---
title: SMTP Settings
description: Configure custom SMTP to send emails using your preferred server for notifications, alerts, and reports sharing.
---
import { Aside, Steps } from '@astrojs/starlight/components';
# SMTP Settings
Infoveave uses its own SMTP server to send reports and other email-based services. Setting up a custom SMTP (Simple Mail Transfer Protocol) connection in Infoveave enables you to send emails from the platform using your preferred email server. This feature is particularly useful for notifications, alerts, and sharing reports.
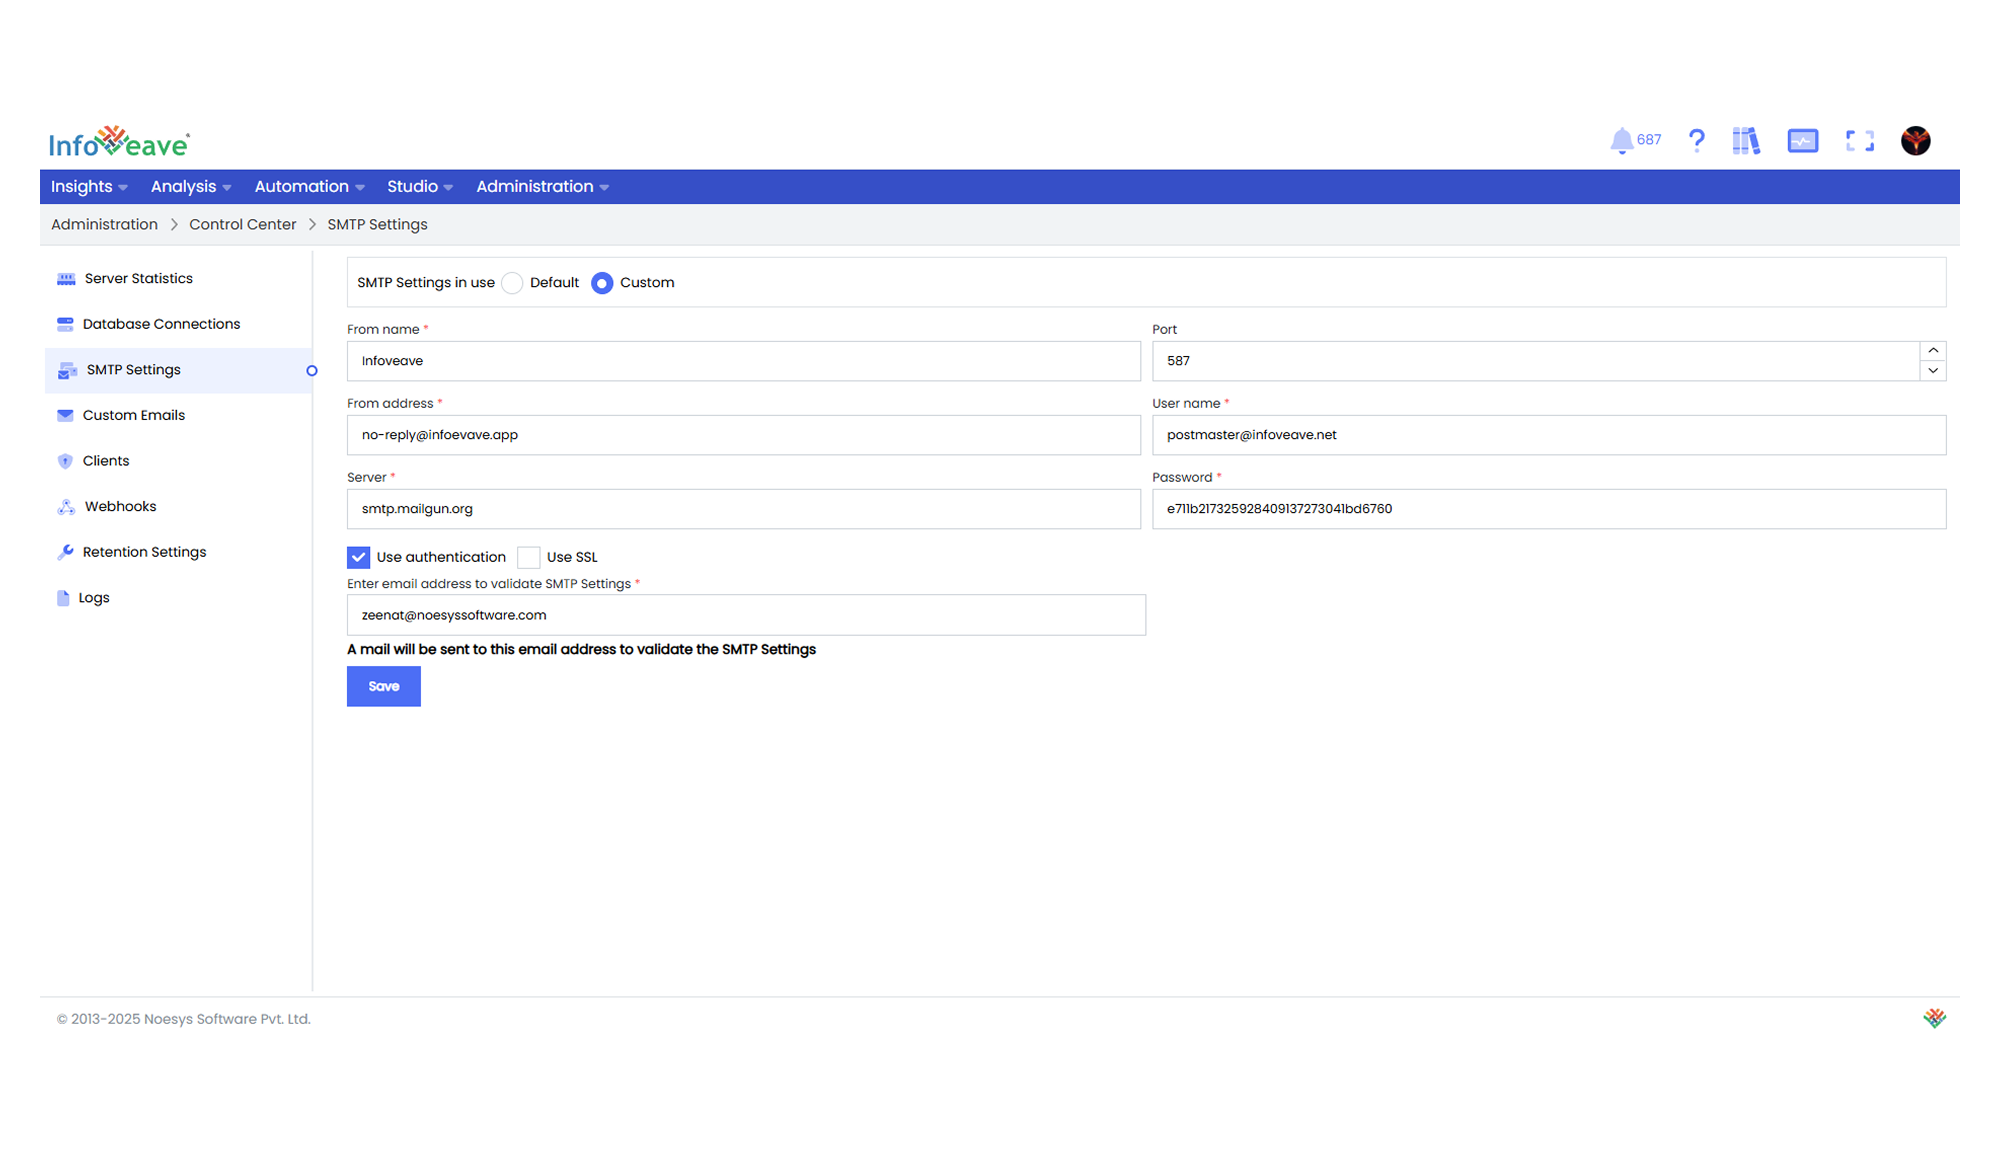
Here is a step-by-step guide on how to configure a custom SMTP connection
1. Navigate to **Administration Control Center**.
2. Click on **SMTP Settings**.
3. Under **SMTP Settings**, you have two options for SMTP. These are Default and Custom.
* **Default** Infoveave uses its own SMTP server to send reports and other email-based services.
* **Custom** Infoveave uses your configured SMTP server to send reports and other email-based services.
4. To configure a custom SMTP, select the **Custom** option and complete all required fields.
* **From name** Enter the name you want to appear as the sender’s name in emails sent from Infoveave. This can be your company name or any preferred identifier.
* **From address** Input the email address you want recipients to see as the sender's email. This must be a valid email address from which Infoveave will send emails.
* **Port** Specify the port number to be used for the SMTP connection.
* **User name** Provide the username associated with the email account used for sending emails. Infoveave uses this credential to authenticate and send emails.
* **Server** Enter the server address or hostname of your SMTP server. Infoveave will send email requests to this address for delivery.
* **Password** Input the password corresponding to the provided username. Infoveave uses this password to authenticate the email connection.
* **Use authentication** Check this option if your SMTP server requires authentication. Most SMTP servers require this to ensure secure email delivery.
* **Use SSL** If your SMTP server supports SSL (Secure Sockets Layer), check this option to enable SSL encryption for the email communication.
* **Enter email address to validate SMTP Settings**. Provide an email address to which Infoveave sends a validation email. This confirms that your SMTP settings are correct and that emails can be sent successfully.
5. Click the **Save** button to save the custom SMTP configuration.