---
title: Managing What-If Formulae
description: Manage and customize What-If Formulae with export formats, editing, sharing, and organization tools for efficient analysis.
---
import { Aside, Steps } from '@astrojs/starlight/components';
import { MediaPlayerComponent } from "../../../../../components/video-player";
import RunScript from "../../../../../components/RunScript.astro";
# Managing What-If Formulae
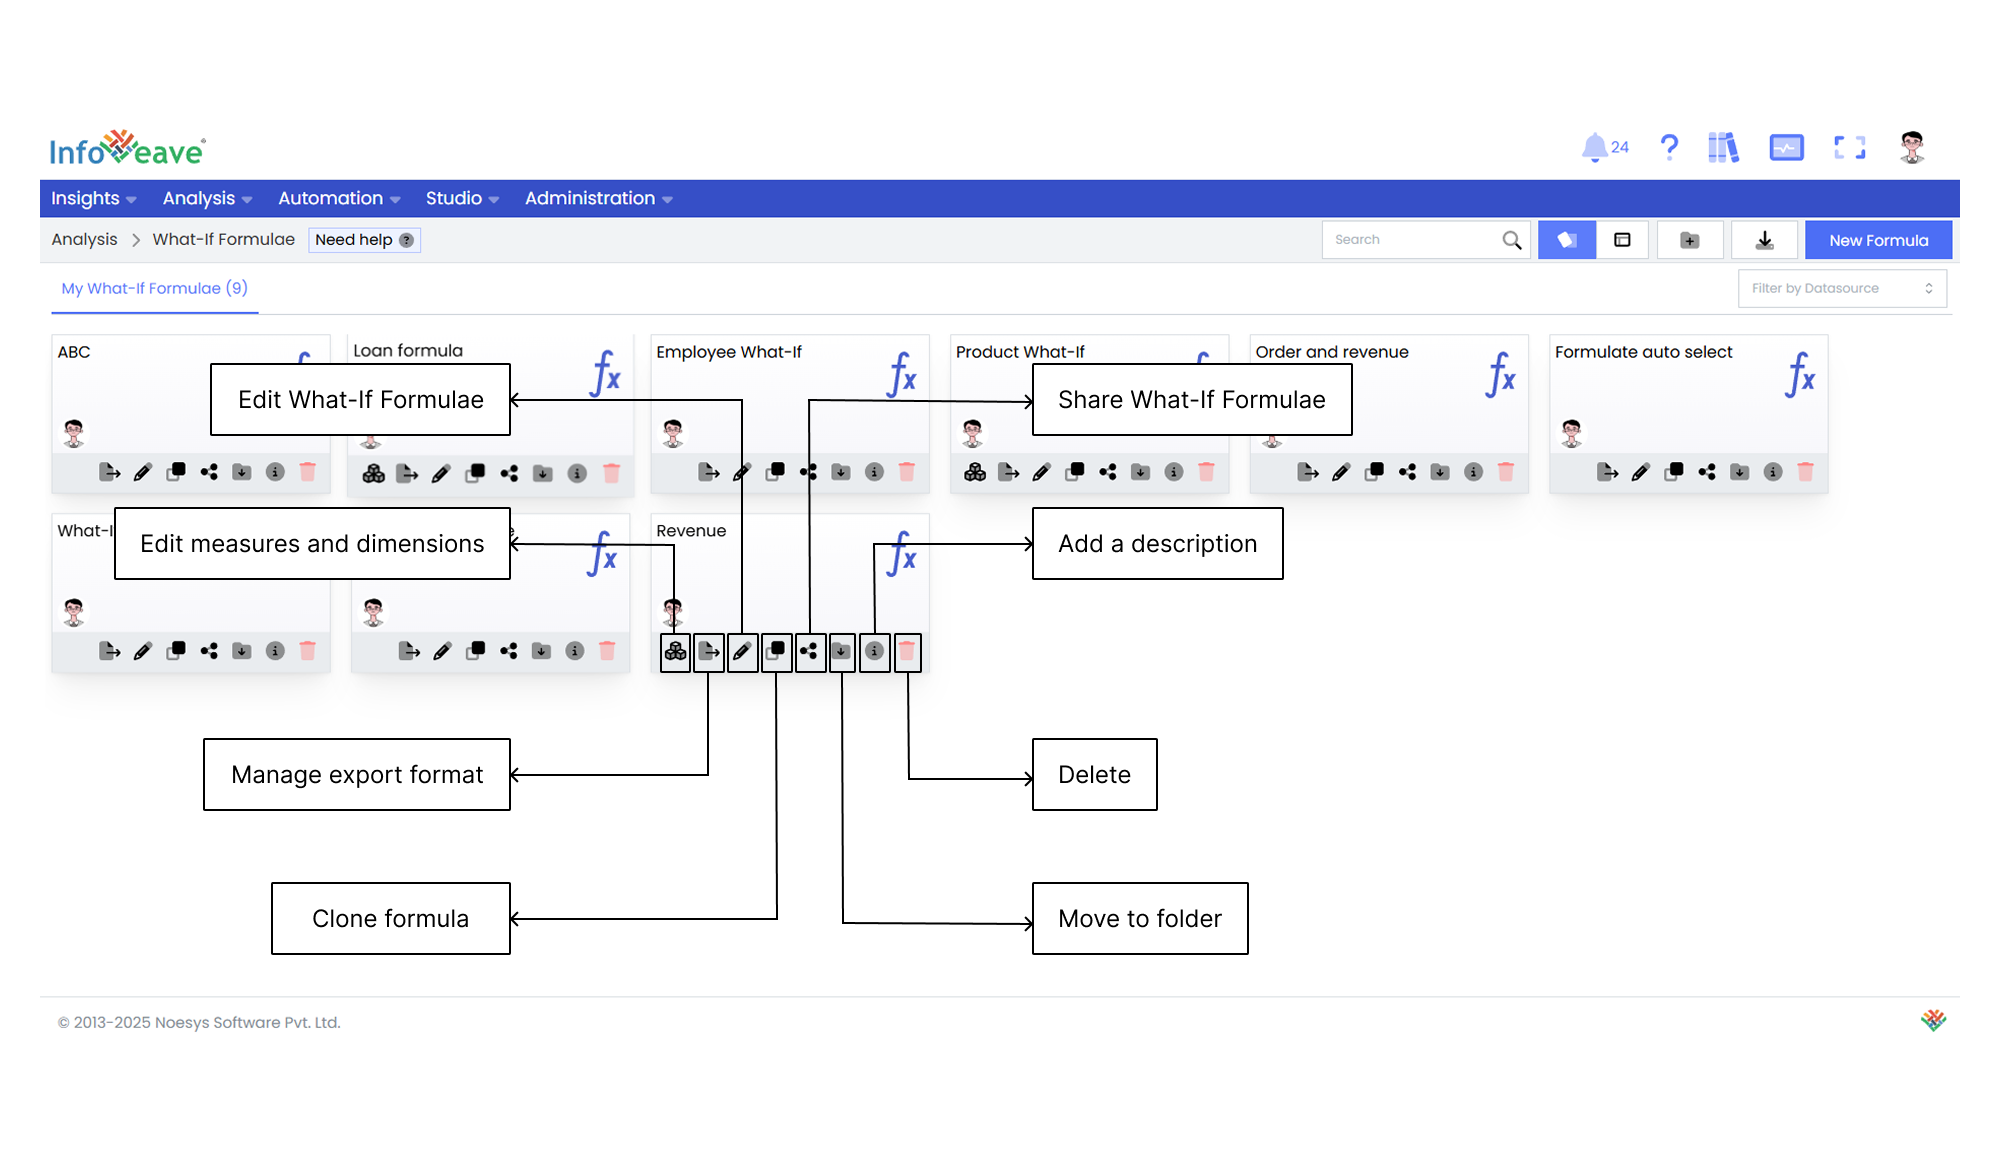
The **Manage What-If Formulae** feature gives you full control over your What-If formulas. It allows you to organize, customize, and share them efficiently. Below is an overview of the various management options available for your What-If formulas.
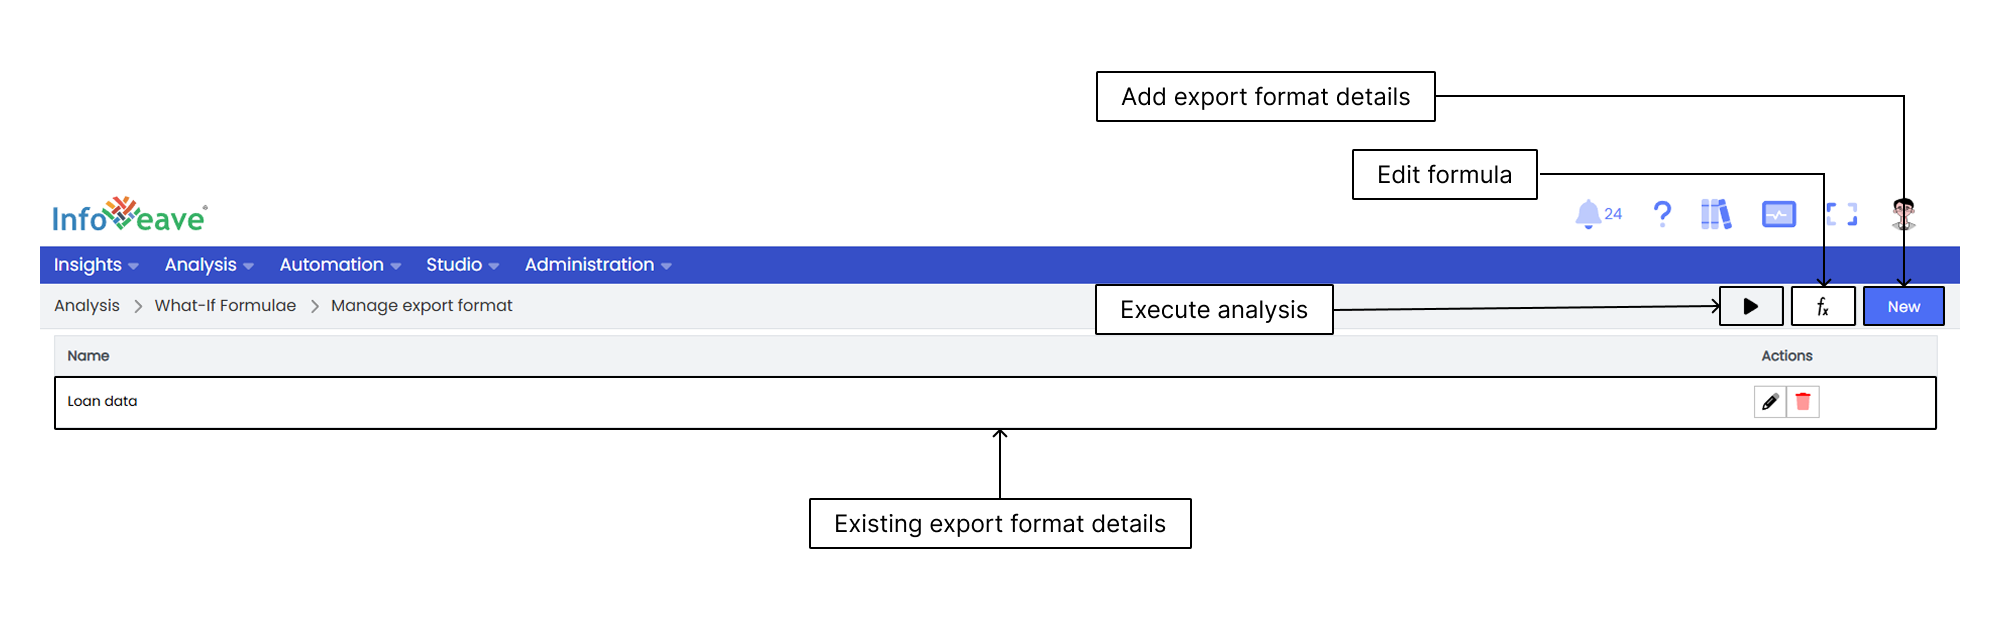
## Managing export format
Managing export formats allows you to define the format and structure of your exported analysis results. It gives you the flexibility to choose the template and layout that best suit your reporting or analysis needs. By managing export formats, you ensure that the exported data is presented in your preferred format, making it easier to analyze or share.
Here is how you manage export formats effectively.
1. To export What-If Formulae, click on **Manage export format** on the preferred What-If Formulae.
2. To define a new template, click on **New** to access the configuration settings.
3. To configure the export settings, start by assigning a name to the export template.
4. Identify the columns that you want to include in the exported results.
5. Check the checkboxes next to the desired columns. Columns that are not selected will be ignored.
6. If you want to provide customized headings for the columns in the export, rename them under the **Export as** option. These names will be used when exporting the What-If Formulae.
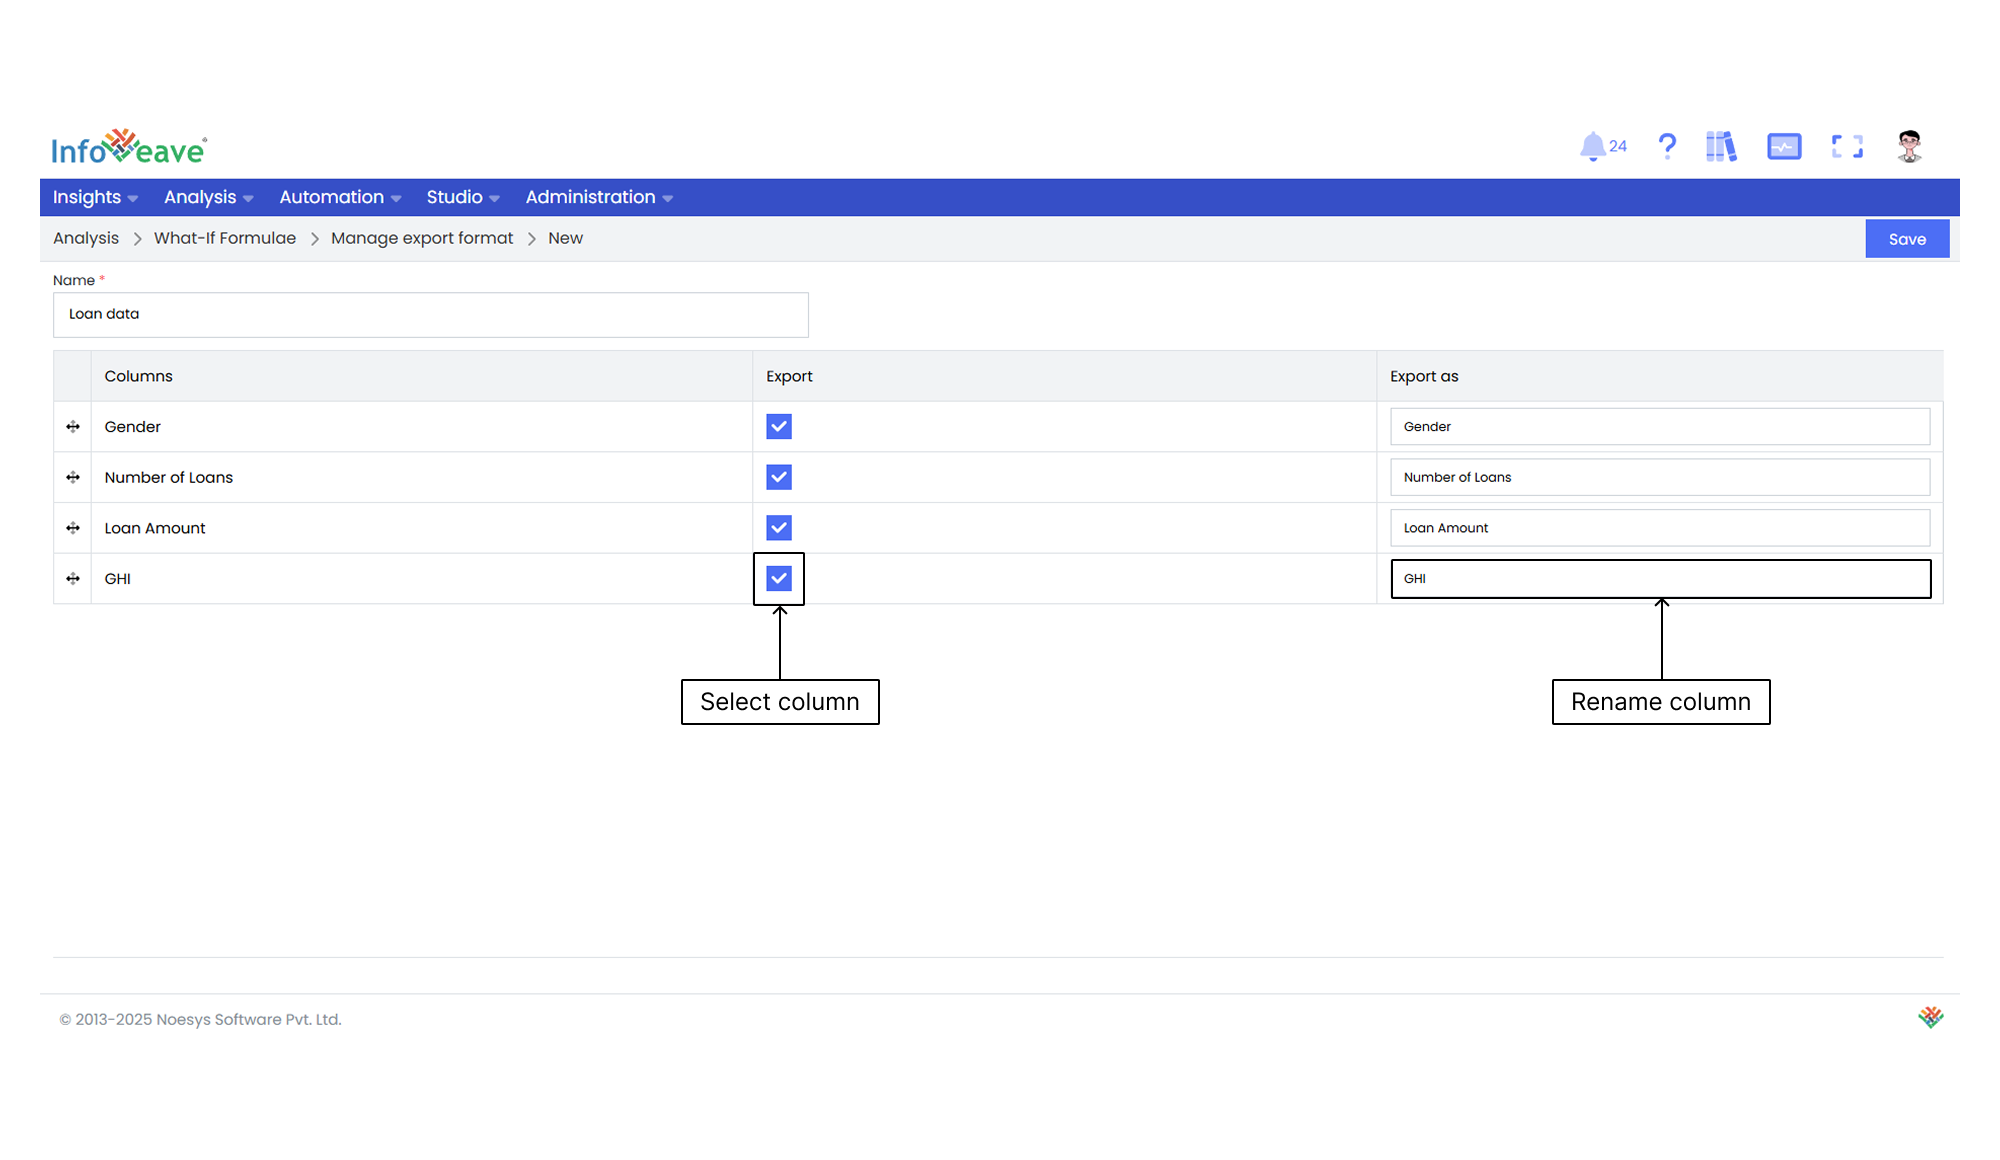
7. Once you have configured the export settings and selected the desired columns and headings, click on **Save**. This will save your changes and finalize the export configuration.
## Editing What-If Formulae
Edit your What-If Formulae in Infoveave to refine the formula logic, expressions, or parameters. This allows you to fine-tune the formula based on changing requirements, updated data, or insights from previous analysis. Editing ensures your formula accurately reflects the necessary calculations, conditions, and relationships for precise and meaningful What-If analysis.
To modify a What-If Formulae in Infoveave, follow these steps.
1. Find the specific What-If Formulae that you want to edit.
2. Click on the **Edit** icon associated with the formula. This opens the formula in edit mode, where you can change components like measures, dimensions, value types, or expressions.
3. After making the necessary modifications, click on the **Save** button to save your edits.
4. To edit a specific formula element, click on the **Edit** icon next to the formula element.
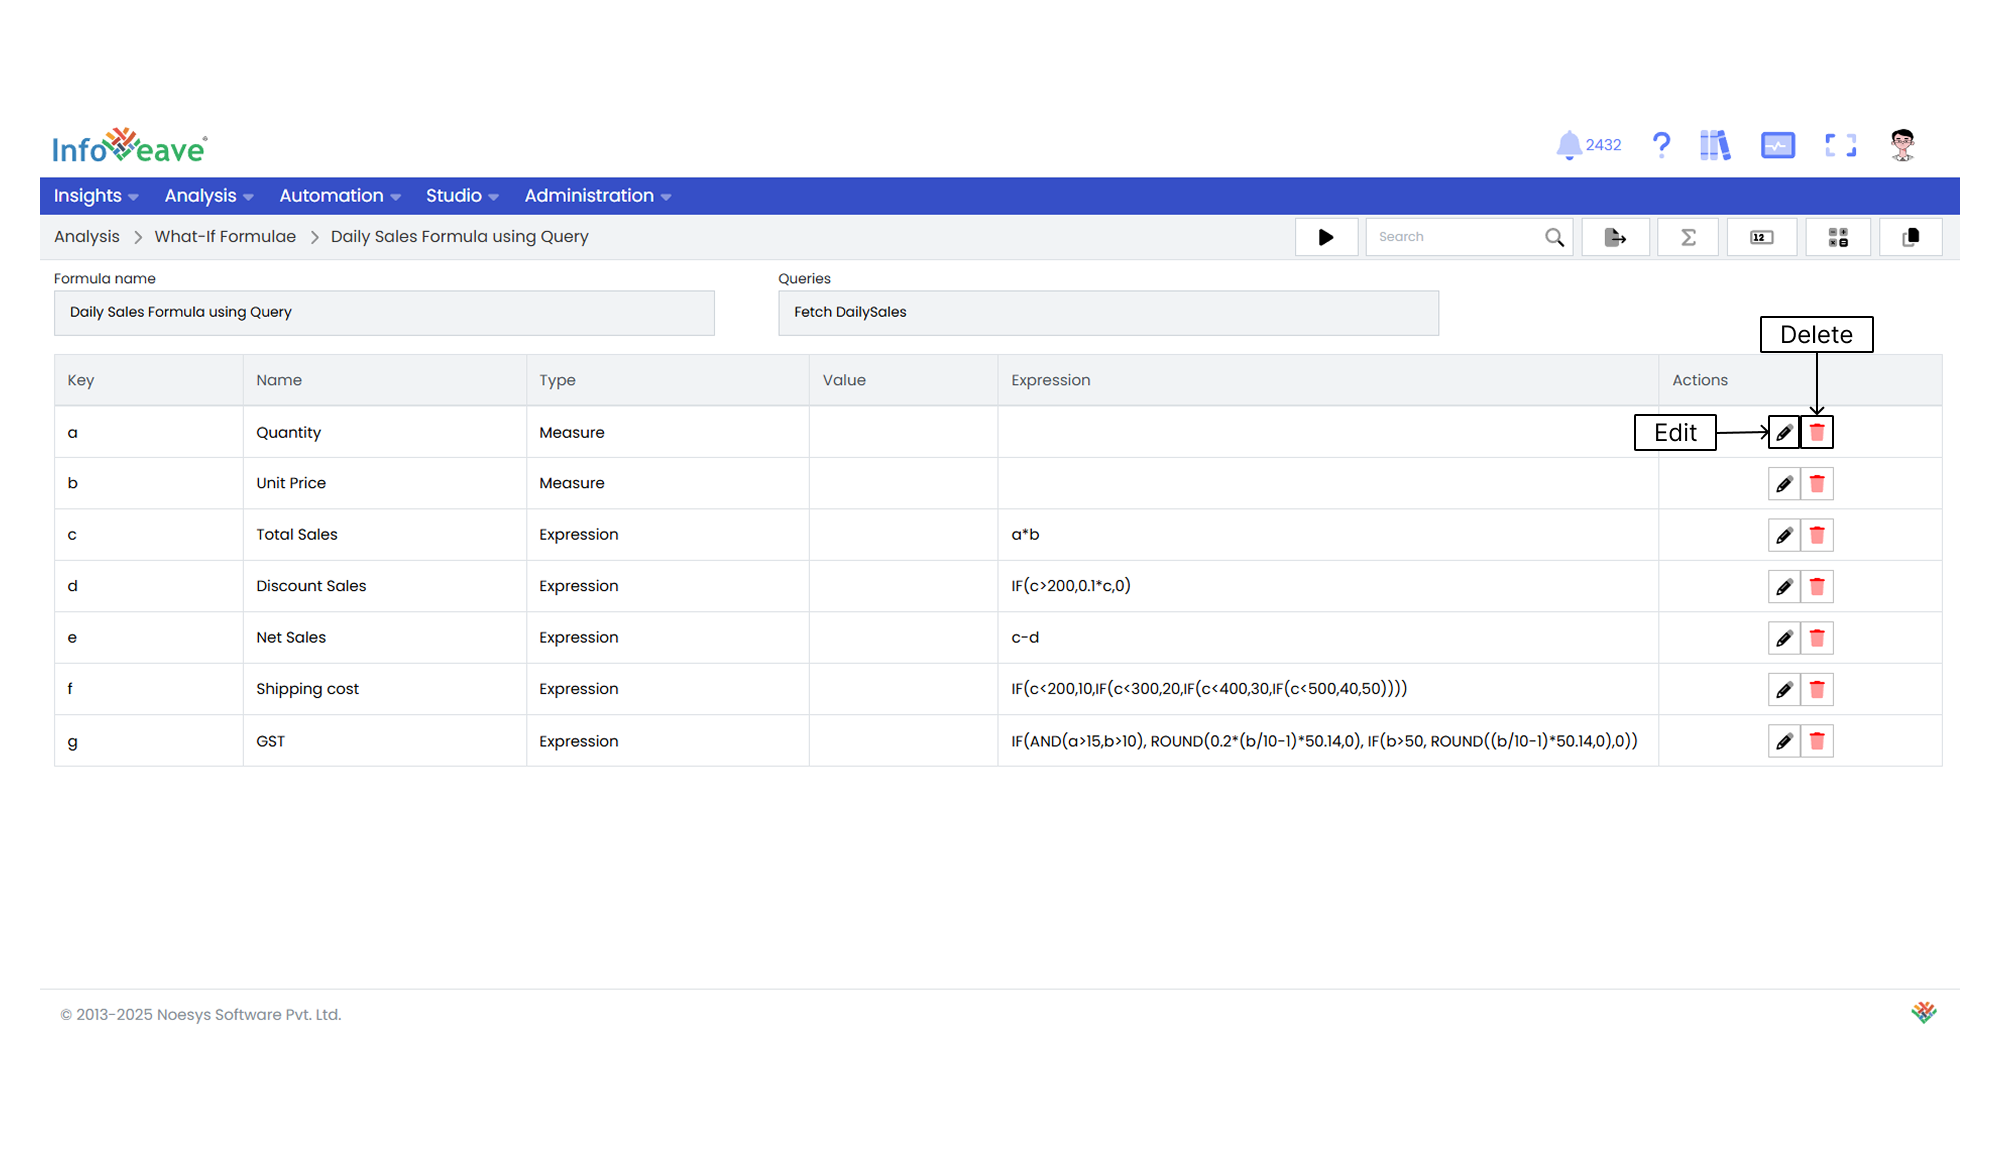
5. To delete a formula element, click on the **Delete** button next to the element.
## Editing What-If Measures and Dimensions
Editing measures and dimensions within a What-If Formulae allows you to modify the specific elements used in the analysis. You can adjust measures to change the quantitative values or calculations. You can also update dimensions to modify the qualitative attributes or categories that define the context of your analysis.
To edit the measures and dimensions in the formula, follow these steps.
1. Open the What-If Formulae you want to edit.
2. Click on the **Edit measures and dimensions** icon to enter edit mode.
3. Make the necessary changes to the measures, such as adding, removing, or modifying existing measures.
4. Adjust the dimensions as needed, including adding, removing, or modifying dimensions.
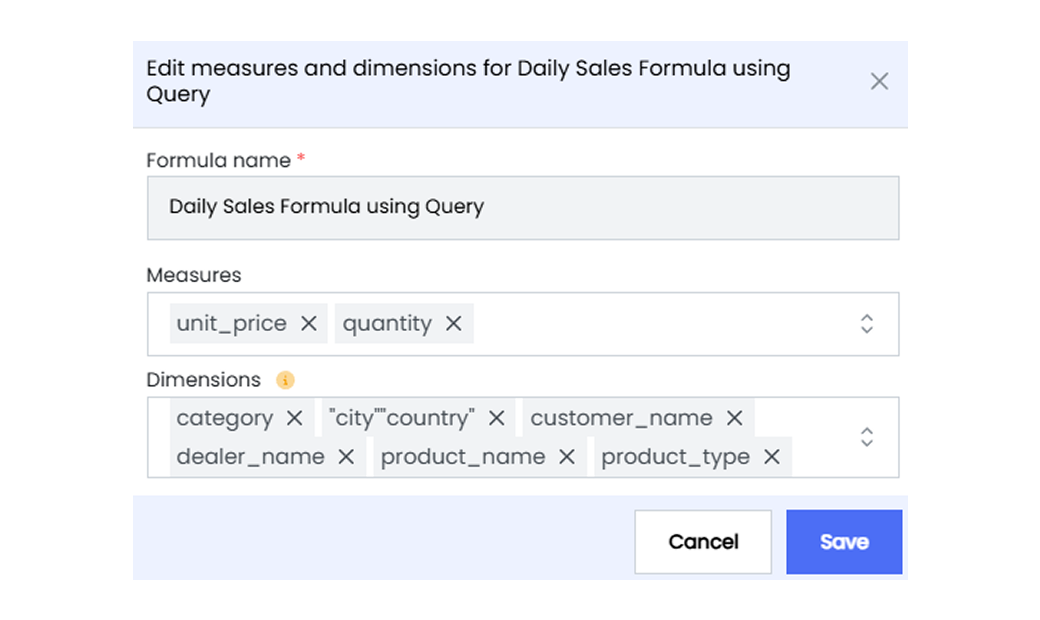
5. After editing the measures and dimensions, click on **Save** to save your changes.
## Sharing What-If Formulae
Sharing options allow you to share What-If Formulae with specific users or roles. This gives you control and flexibility in distributing the formulas to the right audience, ensuring effective use of the What-If capabilities.
Follow these steps to share your What-If Formulae with others.
1. Click on the **Share** icon to share the What-If Formulae with your team or a role.
2. Choose the sharing method. Select from the available options: Share with User or Share with Role.
3. If you choose Share with User, select the user(s) you want to share the What-If Formulae with.
4. If you want to share the formula with all users, select the **Share with Everyone** option.
5. If you choose Share with Role, select the roles you want to share the What-If Formulae with using the share dialogue box.
6. To remove a specific user or role from the shared list, uncheck the corresponding checkbox.
7. Click **Save** to complete sharing your What-If Formulae.
## Cloning What-If Formulae
Cloning a What-If Formulae lets you replicate and modify existing formulas. This enables efficient analysis and customization.
To clone a What-If Formulae in Infoveave, follow these steps.
1. Select the What-If Formulae you want to clone by clicking on the **Clone formula** icon .
2. Provide a name for the cloned formula.
3. Click **Save** to save the name for the cloned formula.
4. If needed, make any edits to the formula to suit your requirements.
## Moving to a Folder
Organize your What-If Formulae by moving them to designated folders.
Follow these steps to move your What-If Formulae to a folder.
1. Select the What-If Formulae you want to move by clicking on the **Move to Folder** icon.
2. Choose the desired folder from the dropdown menu.
3. Click **Save** to complete the move.
## Deleting What-If Formulae
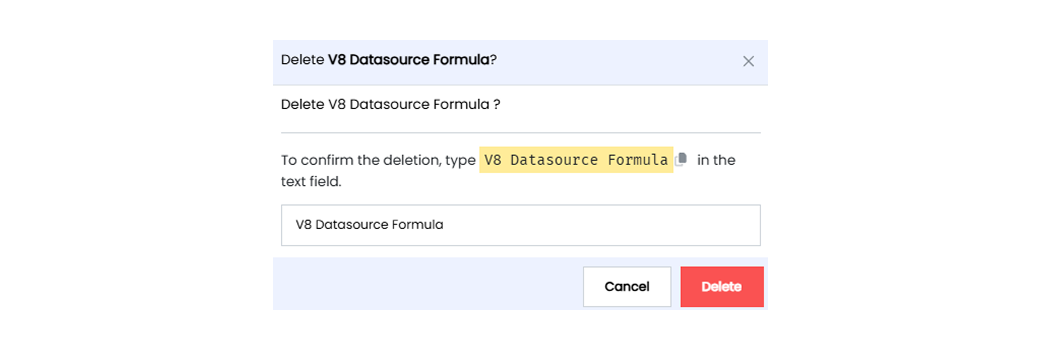
To delete a What-If Formulae in Infoveave, follow these simple steps.
1. Find the formula you want to delete.
2. Click on the **Delete** icon .
3. Type the asset name from the warning message in the provided text field.
4. Alternatively, copy the text from the icon and paste it into the text field.
5. After entering the correct text, click on **Delete**.