---
title: Defining ML Models
description: Create and validate ML Models with powerful tools for data transformation, accuracy metrics, and detailed analysis.
---
import { Aside, Steps } from '@astrojs/starlight/components';
# Defining ML Models
Infoveave ML Model is a powerful tool that helps you create machine learning models. It simplifies the process of building, modifying, and refining these models, enabling you to make effective data-driven decisions.
This section gives you detailed guidance on how to create and set up a machine learning model.
## Creating a Machine Learning (ML) Model
1. To create and execute a machine learning model, click on **Analysis** **ML Modeller**. You can find all your ML models under the tabs **My ML Models** and **Shared ML Models**.
2. To create a new model, click on **New Model**. This takes you to the ML Model builder.
3. Provide a meaningful **Name** in the Setup tab. This helps you identify and understand the purpose of each ML model.
4. Click on **Save** to save the model.
## Selecting and Validating a Query
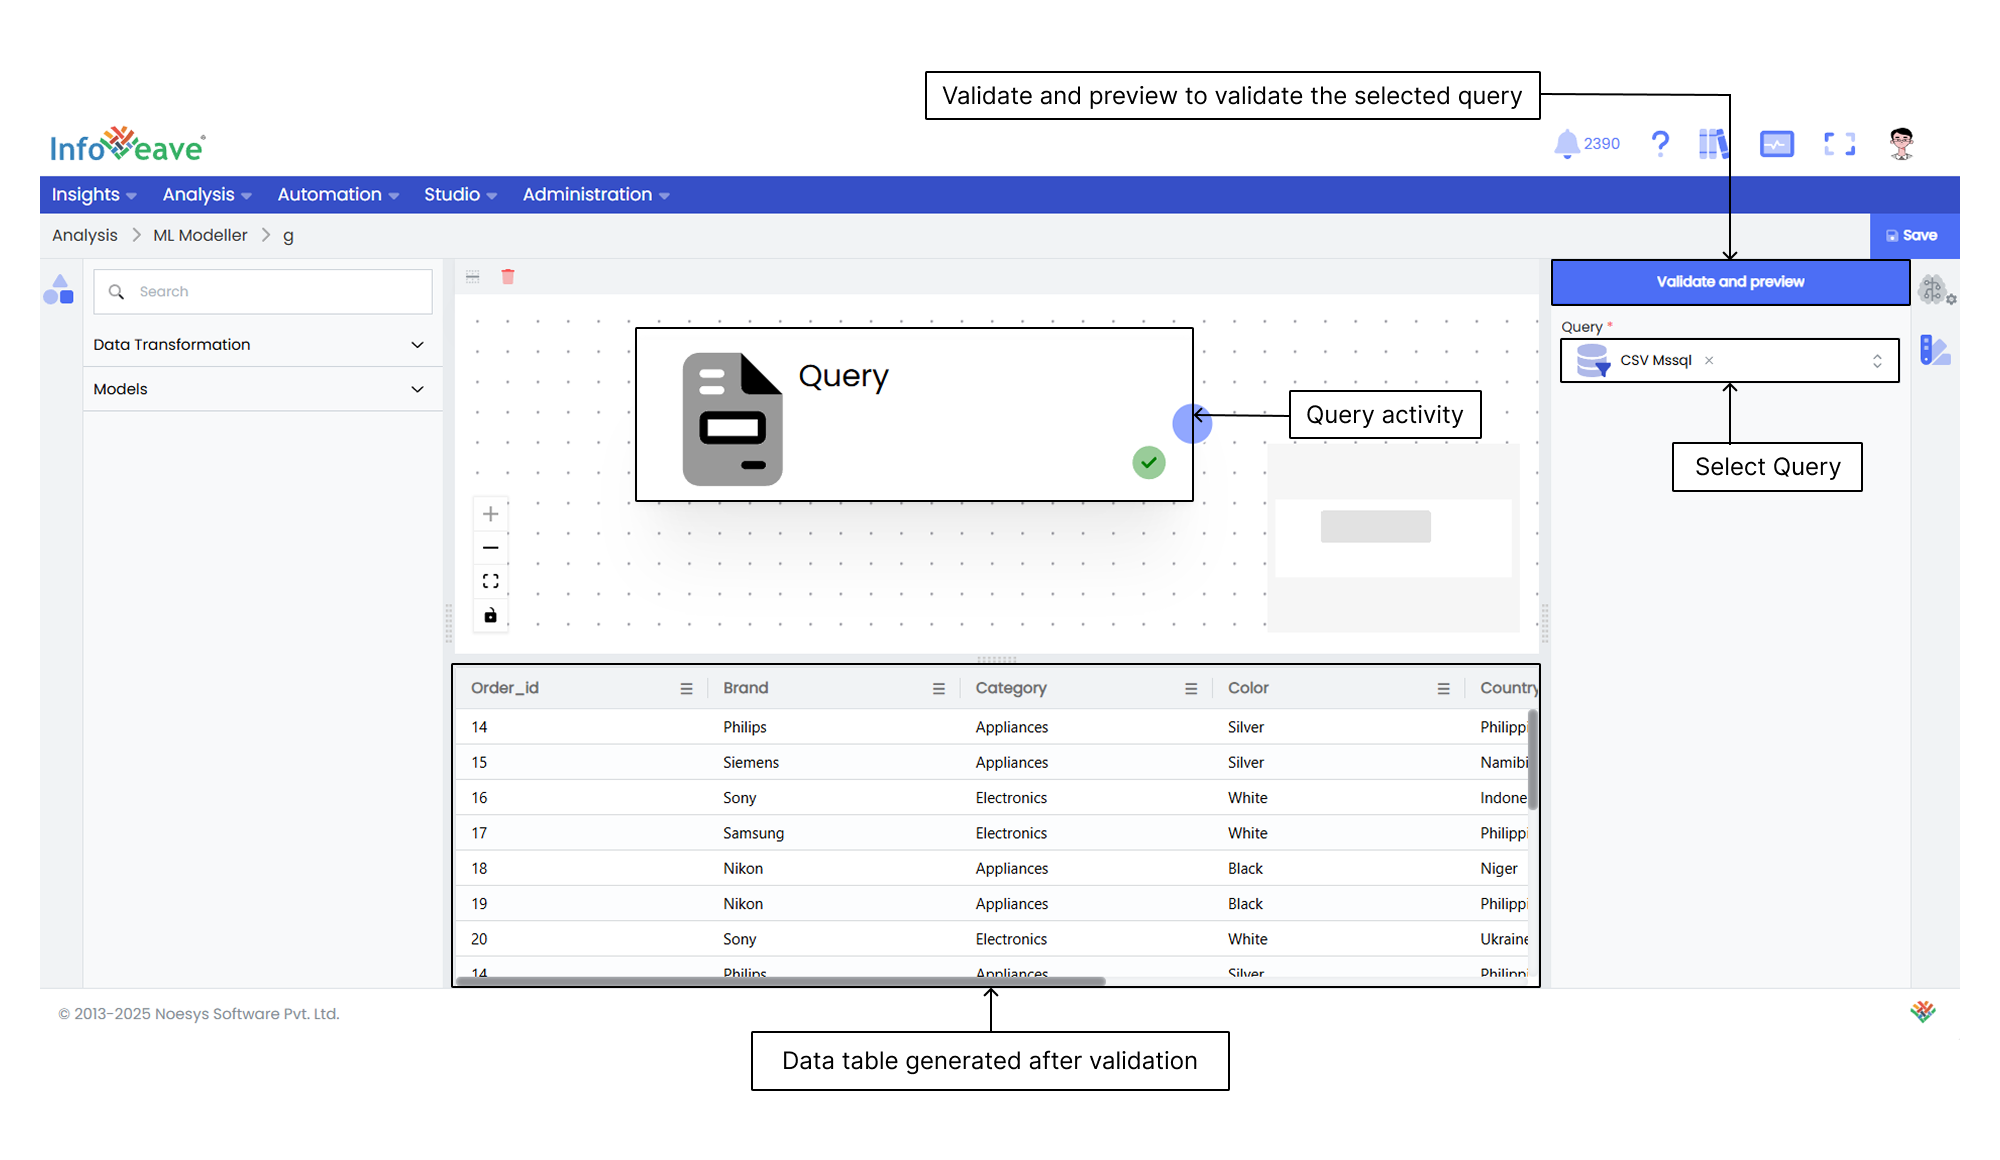
The query activity forms the foundation of your machine learning model. By validating the query, you enable various data transformation activities that are essential for refining and preparing your data for ML modelling.
1. Drag and drop the Query activity from the **Activity panel** to the ML Model builder.
2. Click on the Query activity to select the required query from the dropdown list. For detailed instructions on creating queries, refer to the [Queries](/studio-v8/queries/query-editor/) section.
3. Click on the **Validate and preview** button to validate the selected query. Once validated, it displays the data table. This validation step allows you to configure the necessary data transformation activities and in-built ML models.
## Adding and Validating Data Transformation Activities
Data transformation activities help you format and prepare data for machine learning analysis. These steps ensure that your data is in the correct format for effective modelling.
1. Drag and drop all the required data transformation activities from the **Activity panel** to the ML Model builder.
2. Select each activity and configure them individually in the **Configuration tab**.
3. Link the activities with other configured activities as needed.
4. Click on the **Validate and preview** button to validate each activity.
## Selecting and Building an ML Model
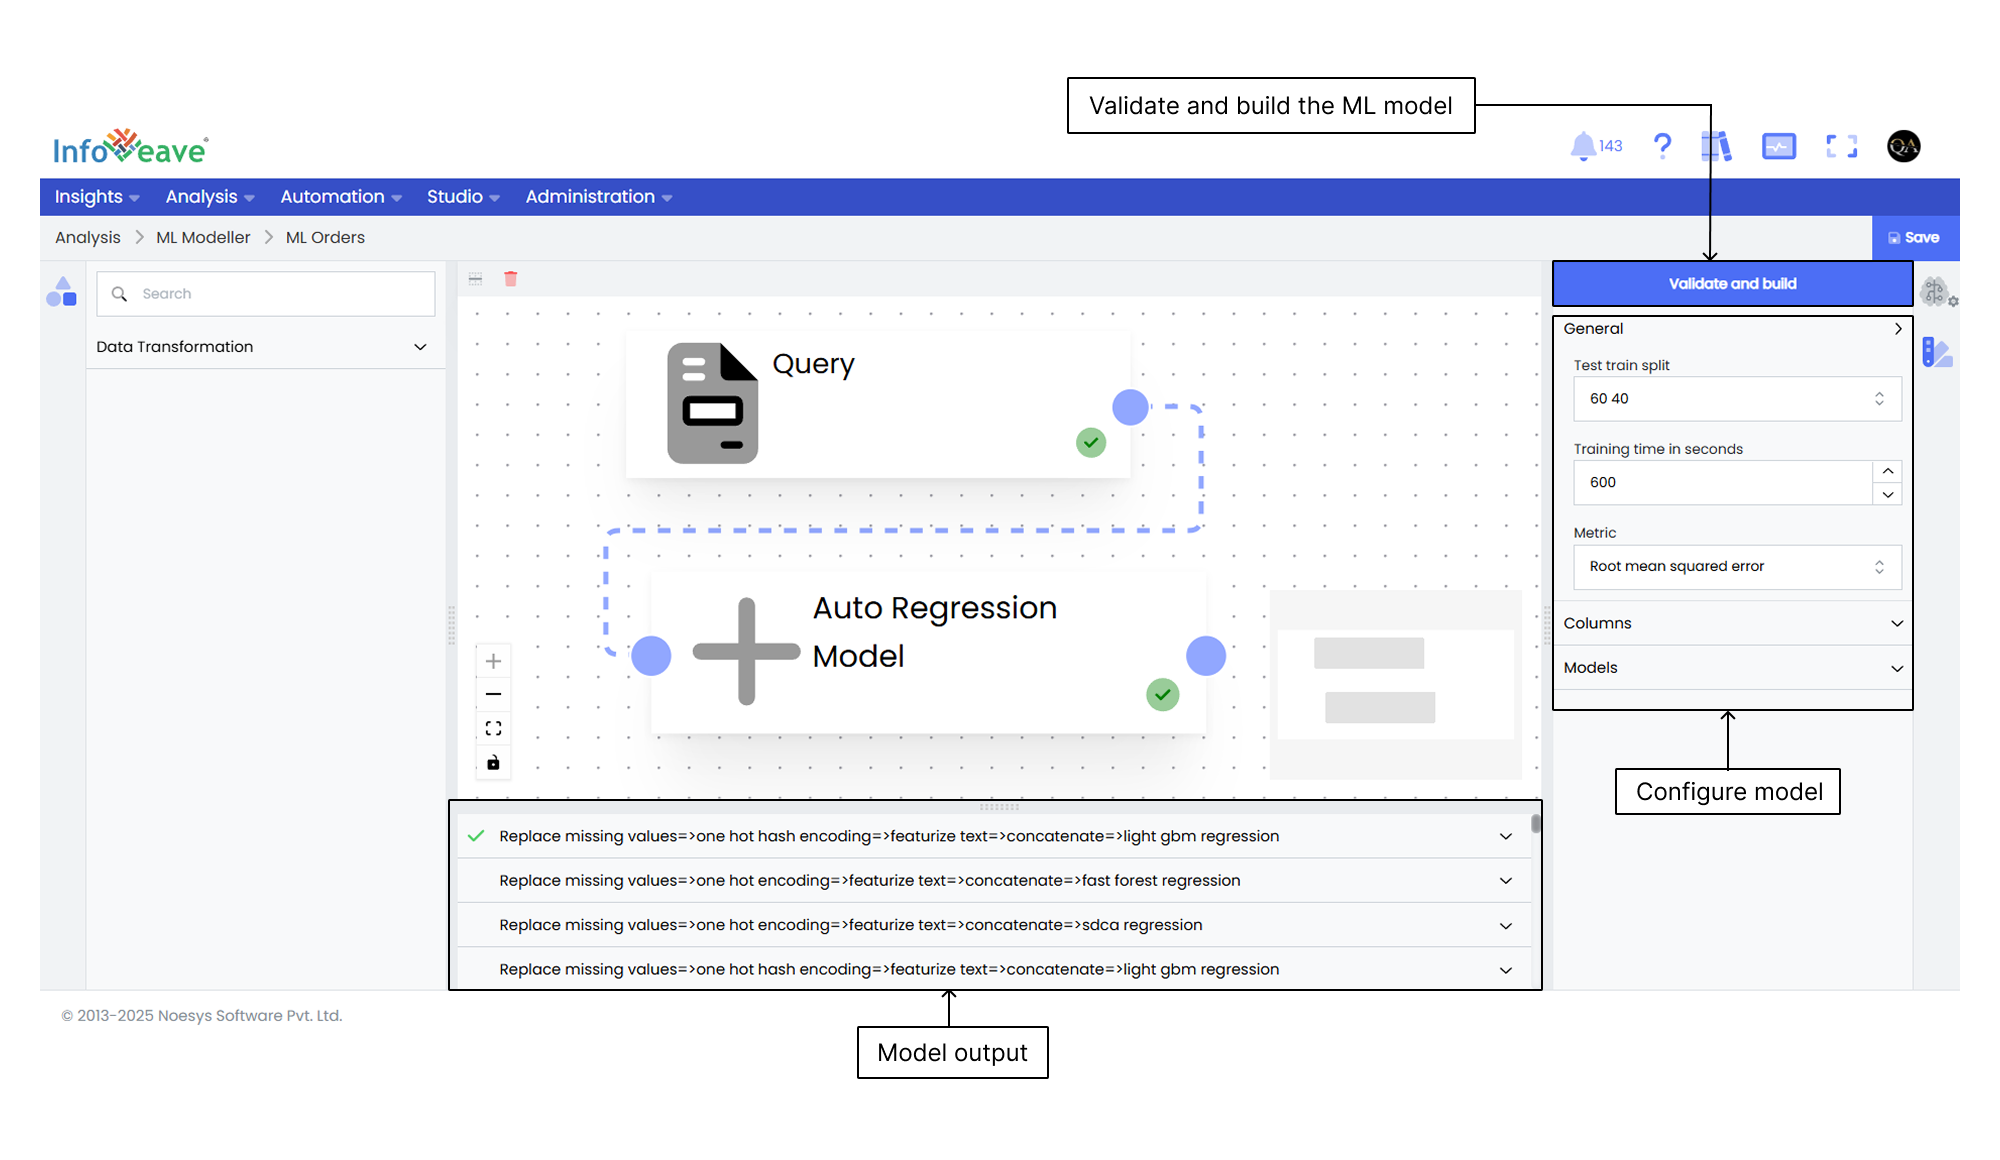
The query activity serves as the foundation of your machine learning model. Validating the query enables various other activities required to build your ML model.
1. Drag and drop the required ML Model from the **Activity panel** to the ML Model builder.
2. Select the ML Model and configure it in the **Configuration panel**.
3. Link or chain all the configured data transformation activities with the ML Model in the ML Model builder.
4. Click on the **Validate and build** button to validate and build the ML Model in Infoveave.
5. The model begins building. After a successful build, it will display the output.
6. Choose the model with the highest accuracy to predict outcomes with more input data.
## Saving the ML Model