Skip to content

Custom Parser

Use the Infoveave Custom Parser to create Datasource from unstructured dataset. 

Steps to Create a File based Datasource

Access Datasources

  1. To access Infoveave Datasource types, navigate to Studio Datasource.
  2. All types of Datasources, created by you or shared with you will be displayed under My Datasources and Shared Datasources. New Datasource
  3. To create a new Datasource, click on New Datasource.

Select the Datasource Type

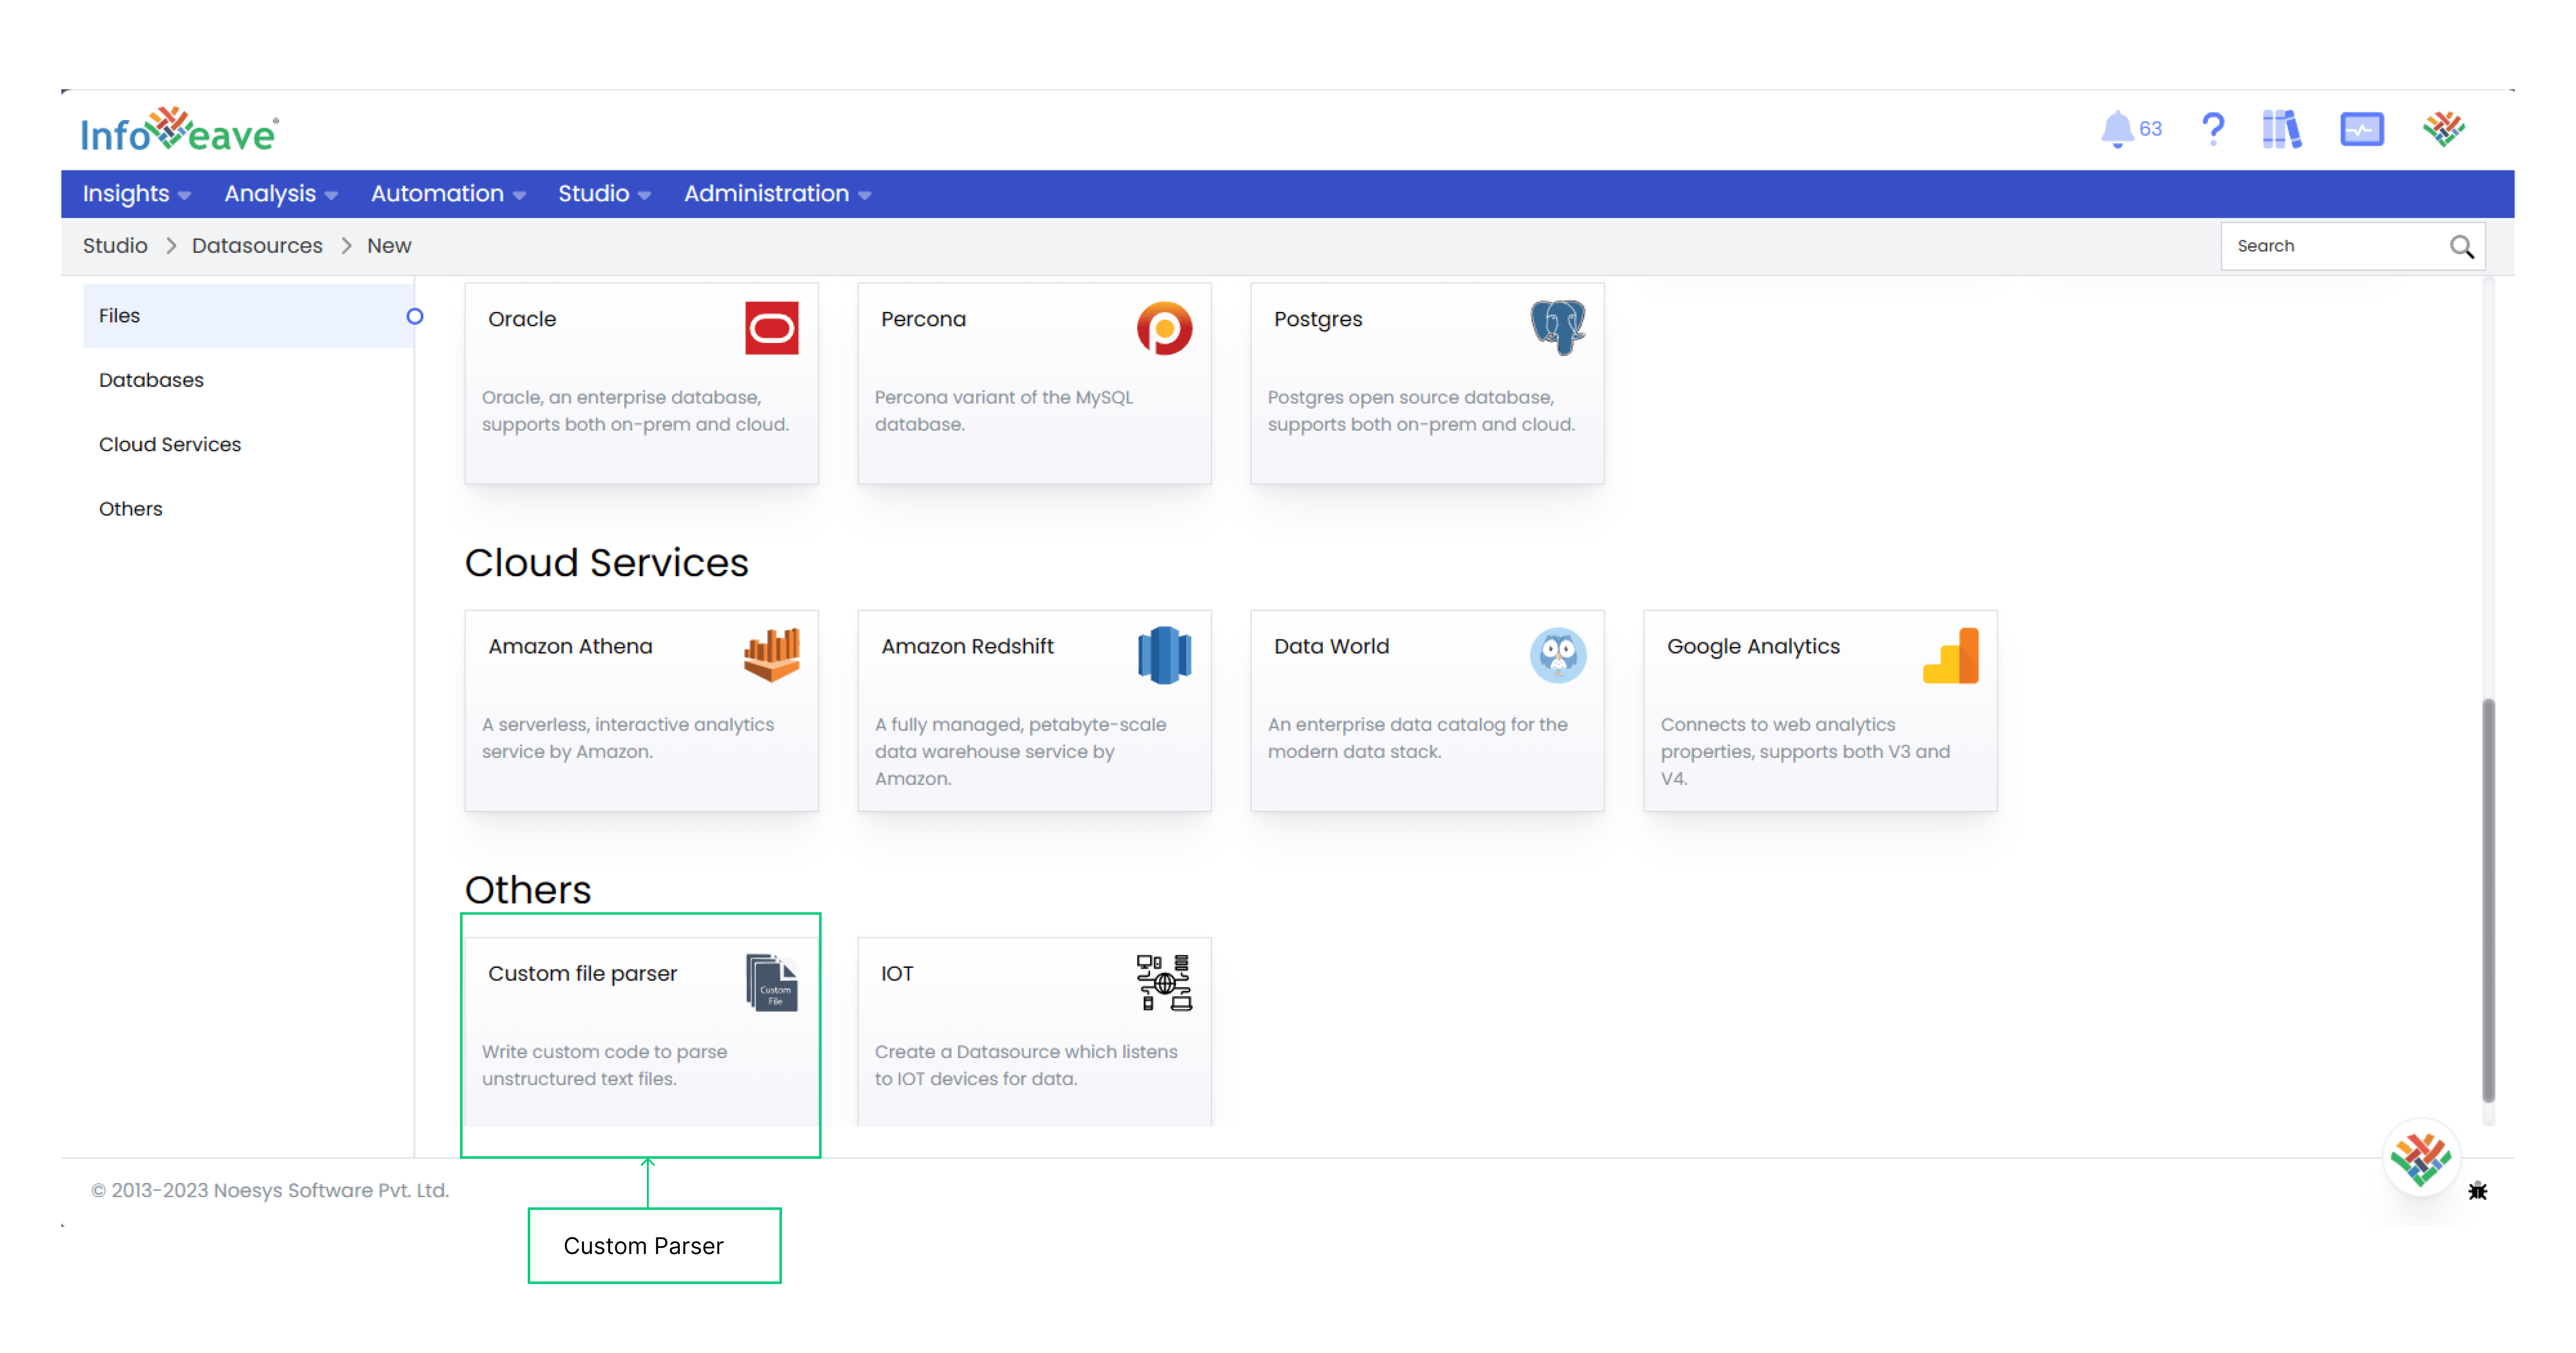
Custom Parser text

  1. Choose Custom Parser as the Datasource type. Custom File Parser
  2. A new window will open for the Datasource creation process.
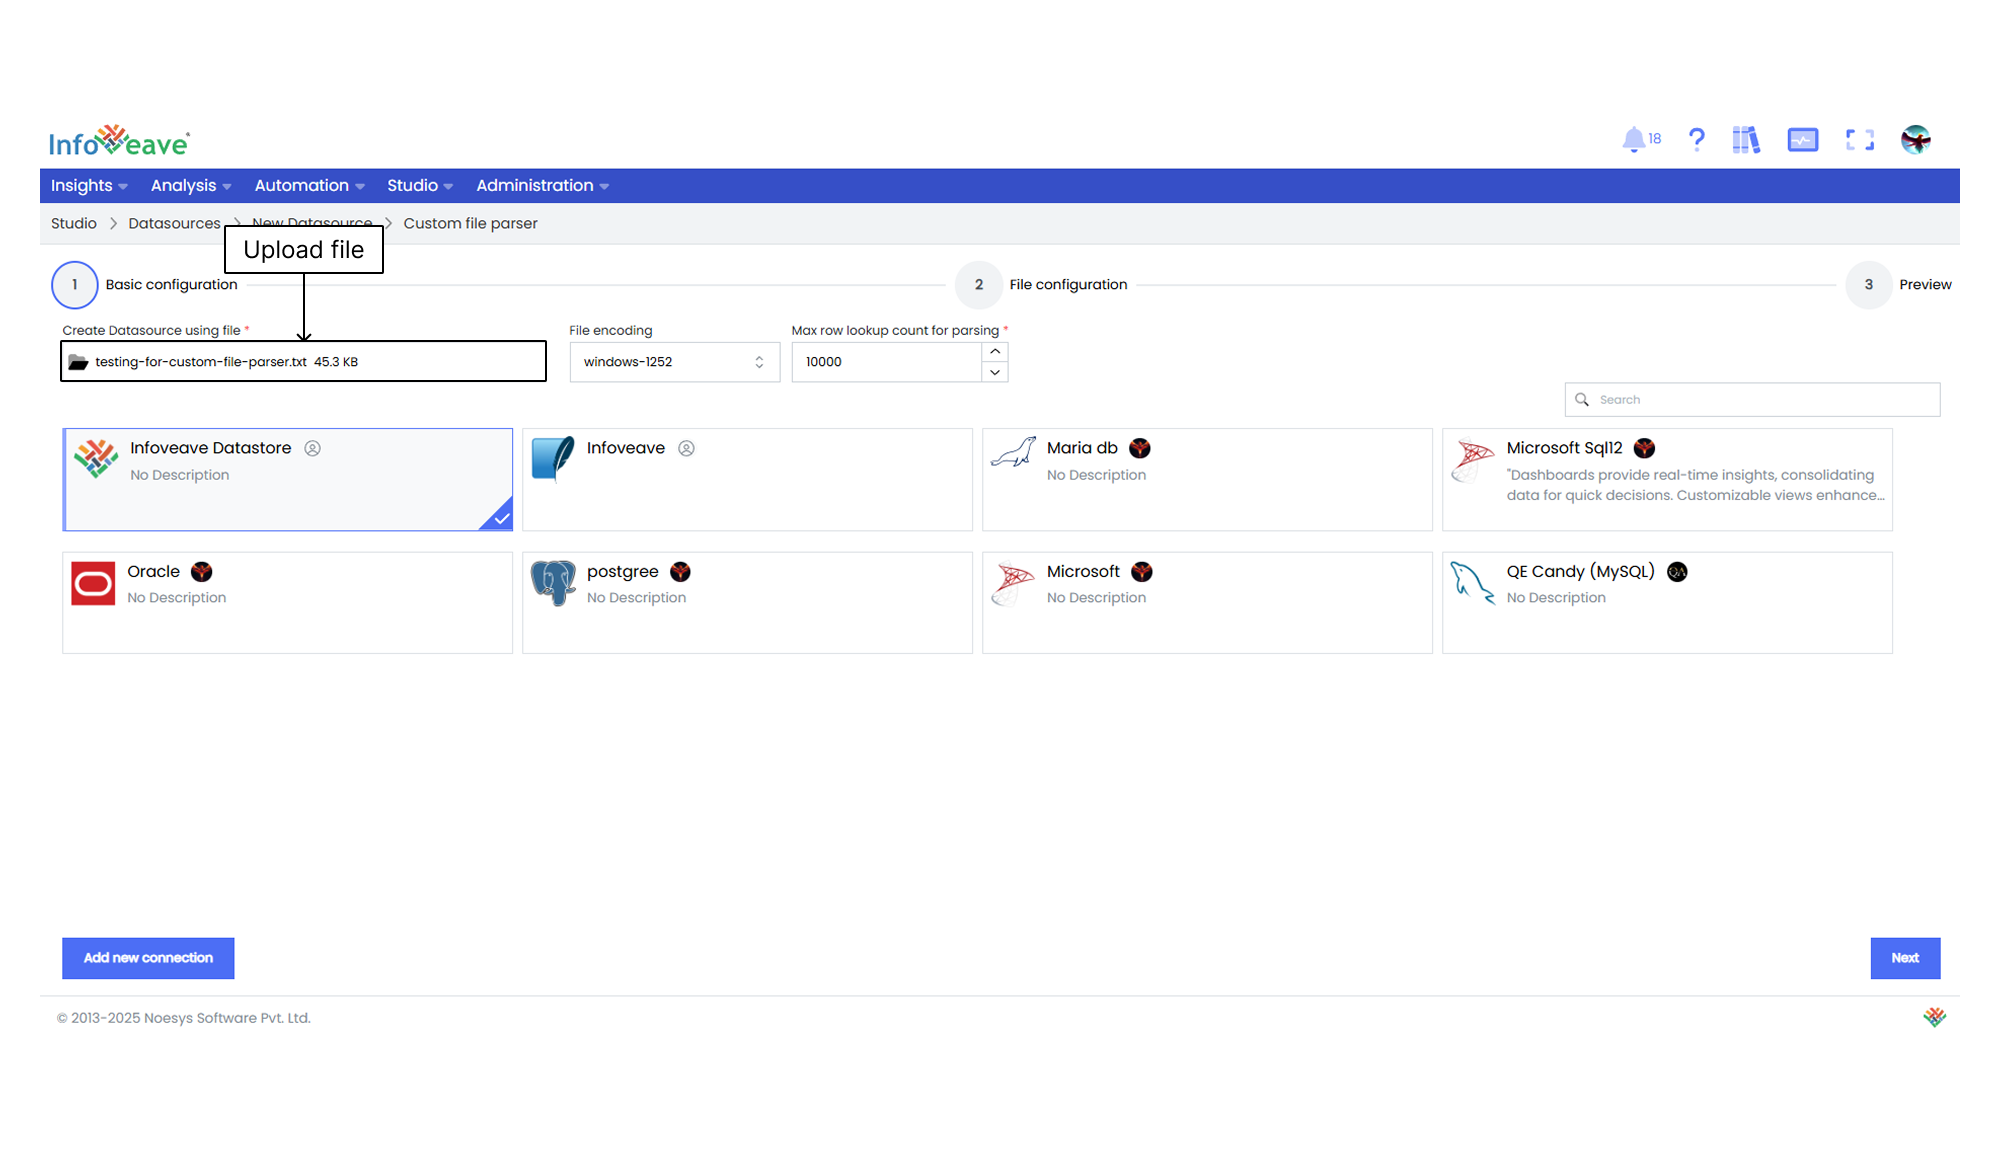
  3. Click on the option to select the file under Create Datasource Using File, to upload the file.
    • You can select a file from your local storage.
    • Supported file extensions are .txt, .prn, .dat, .dtf, .xlsx, .csv, .xls, .xlsm
    • Please note that the maximum file size allowed for upload is## 00 MB.
  4. After providing the necessary details, proceed to Next in the Datasource configuration. Custom Parser
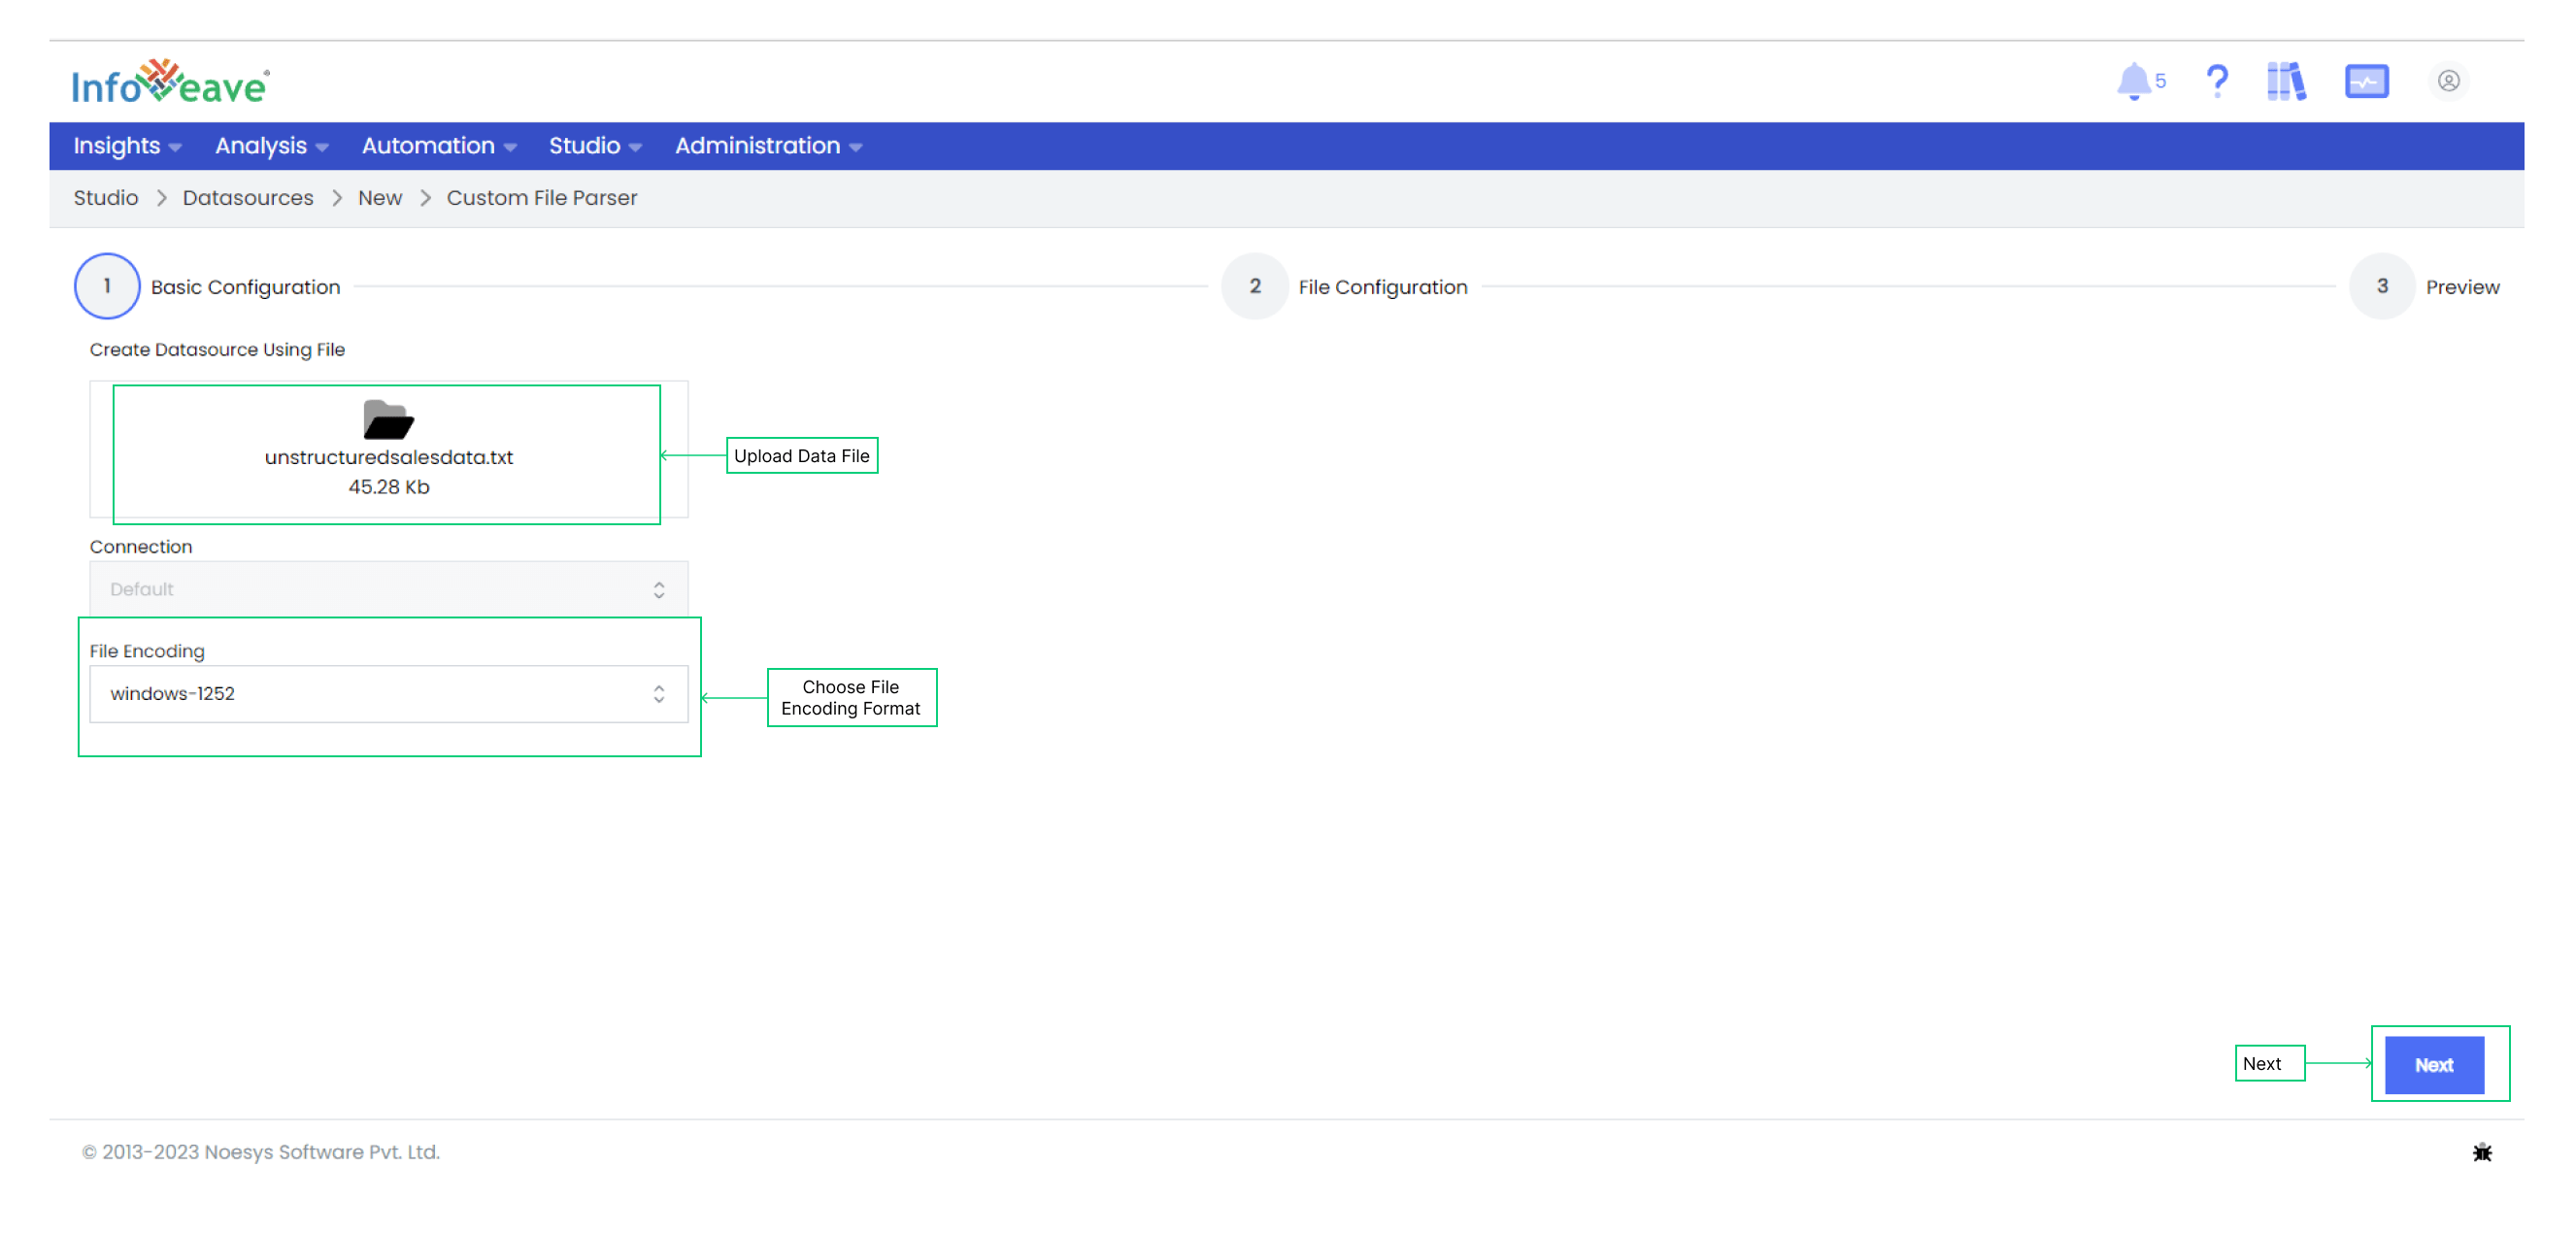
  5. As the file upload is complete, a preview of the unstructured data will be available.
  6. You must create a custom parse code either in .txt or .json format for an Unstructured File.
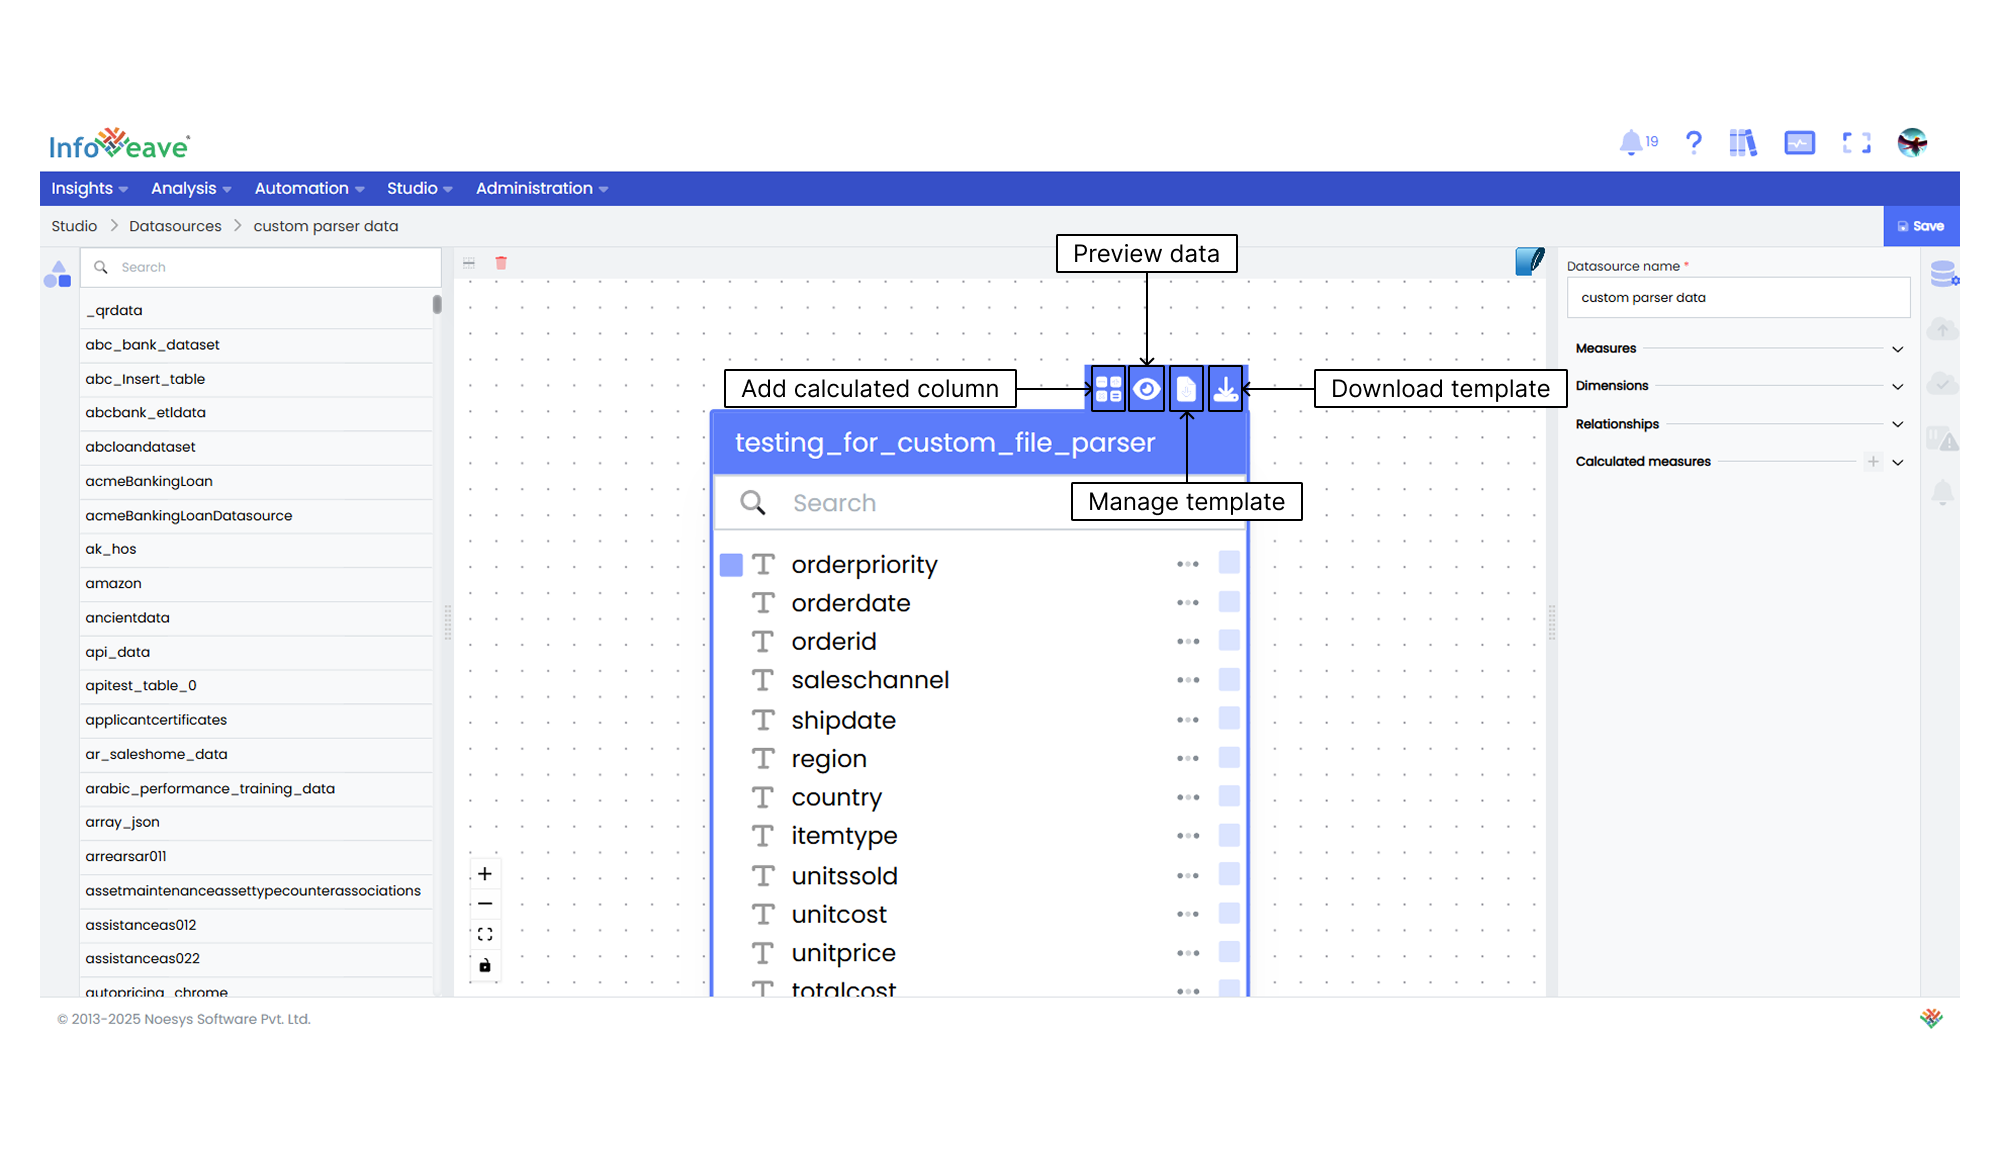
  7. You can click on Import Template, to import the formatting template from your storage location, to convert the Datasource to a structured format.
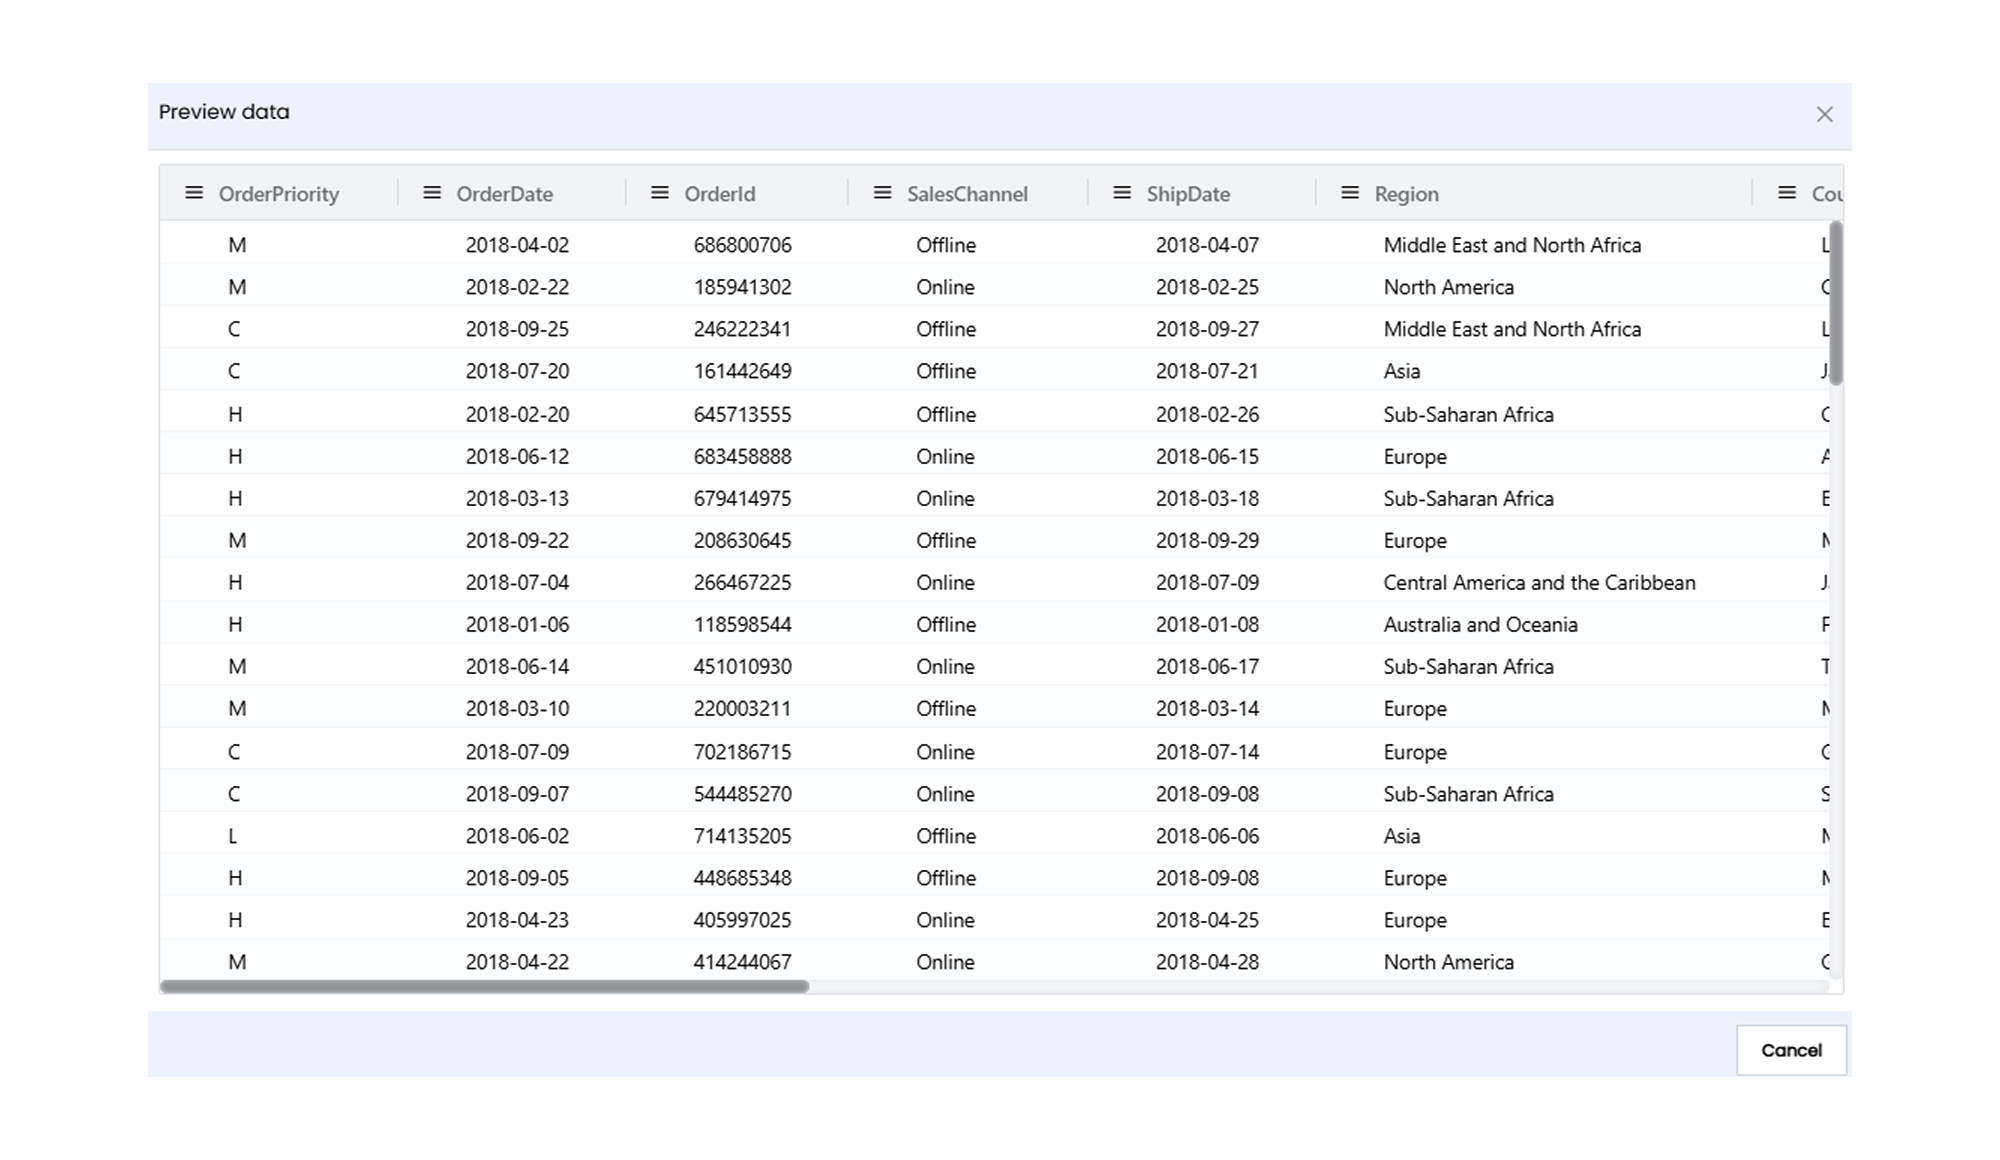
  8. Click on Preview to see the conversion of Datasource from an unstructured format to structured format.
  9. Click on Next to configure the measures ad dimensions in the Datasource.
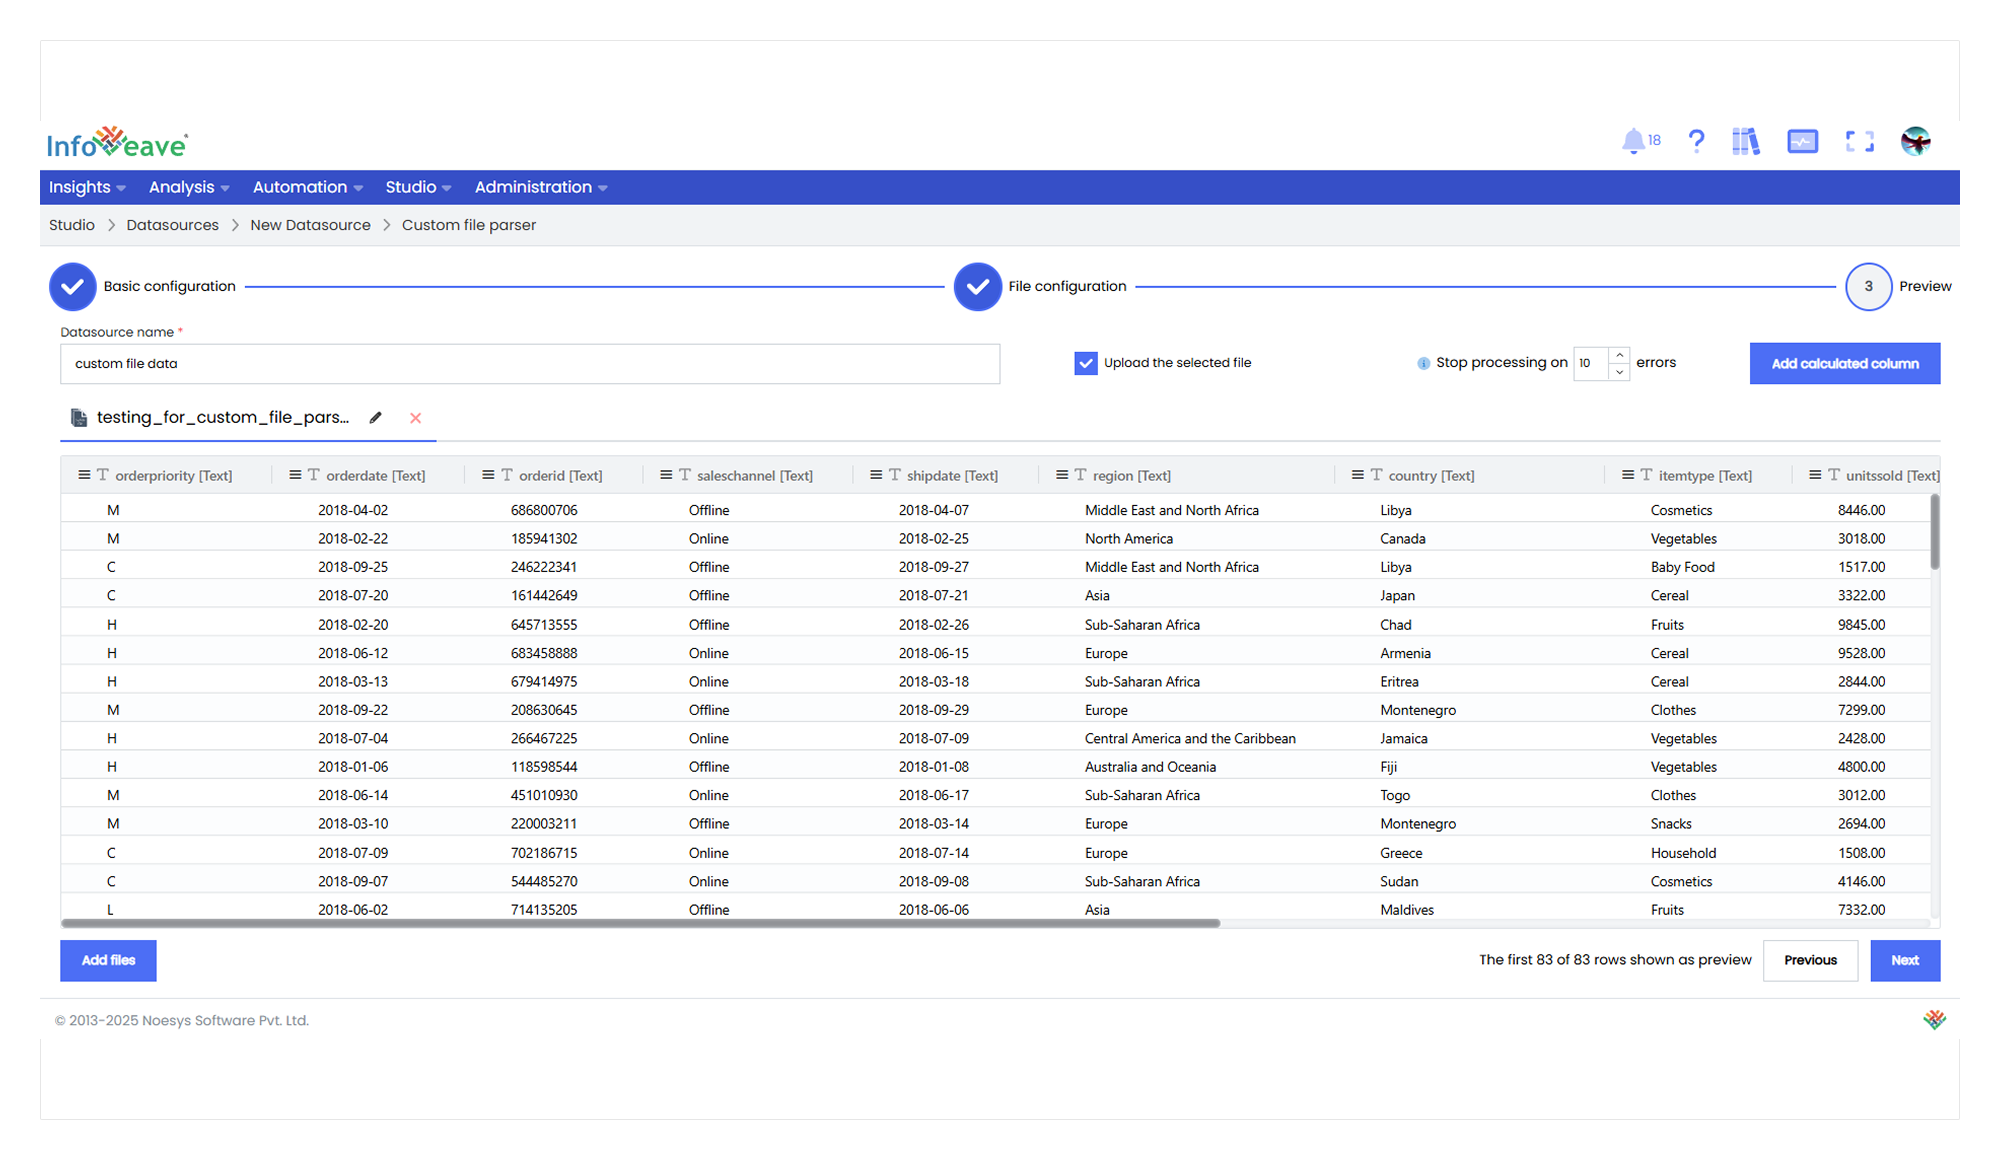
  10. As the file processing is complete, a tabular preview of the data will be available.

Configure Data Table

Configure your data table in Infoveave, to ensure the ease of identification by data table name. Define the data ingestion type to control how new data integrates with the existing dataset and add calculated columns to enhances your dataset.

Follow the below steps on how to configure the data table.

  1. Provide a name for your Datasource.
  2. To add additional files to supplement your DataSource, click on Add Files option. 
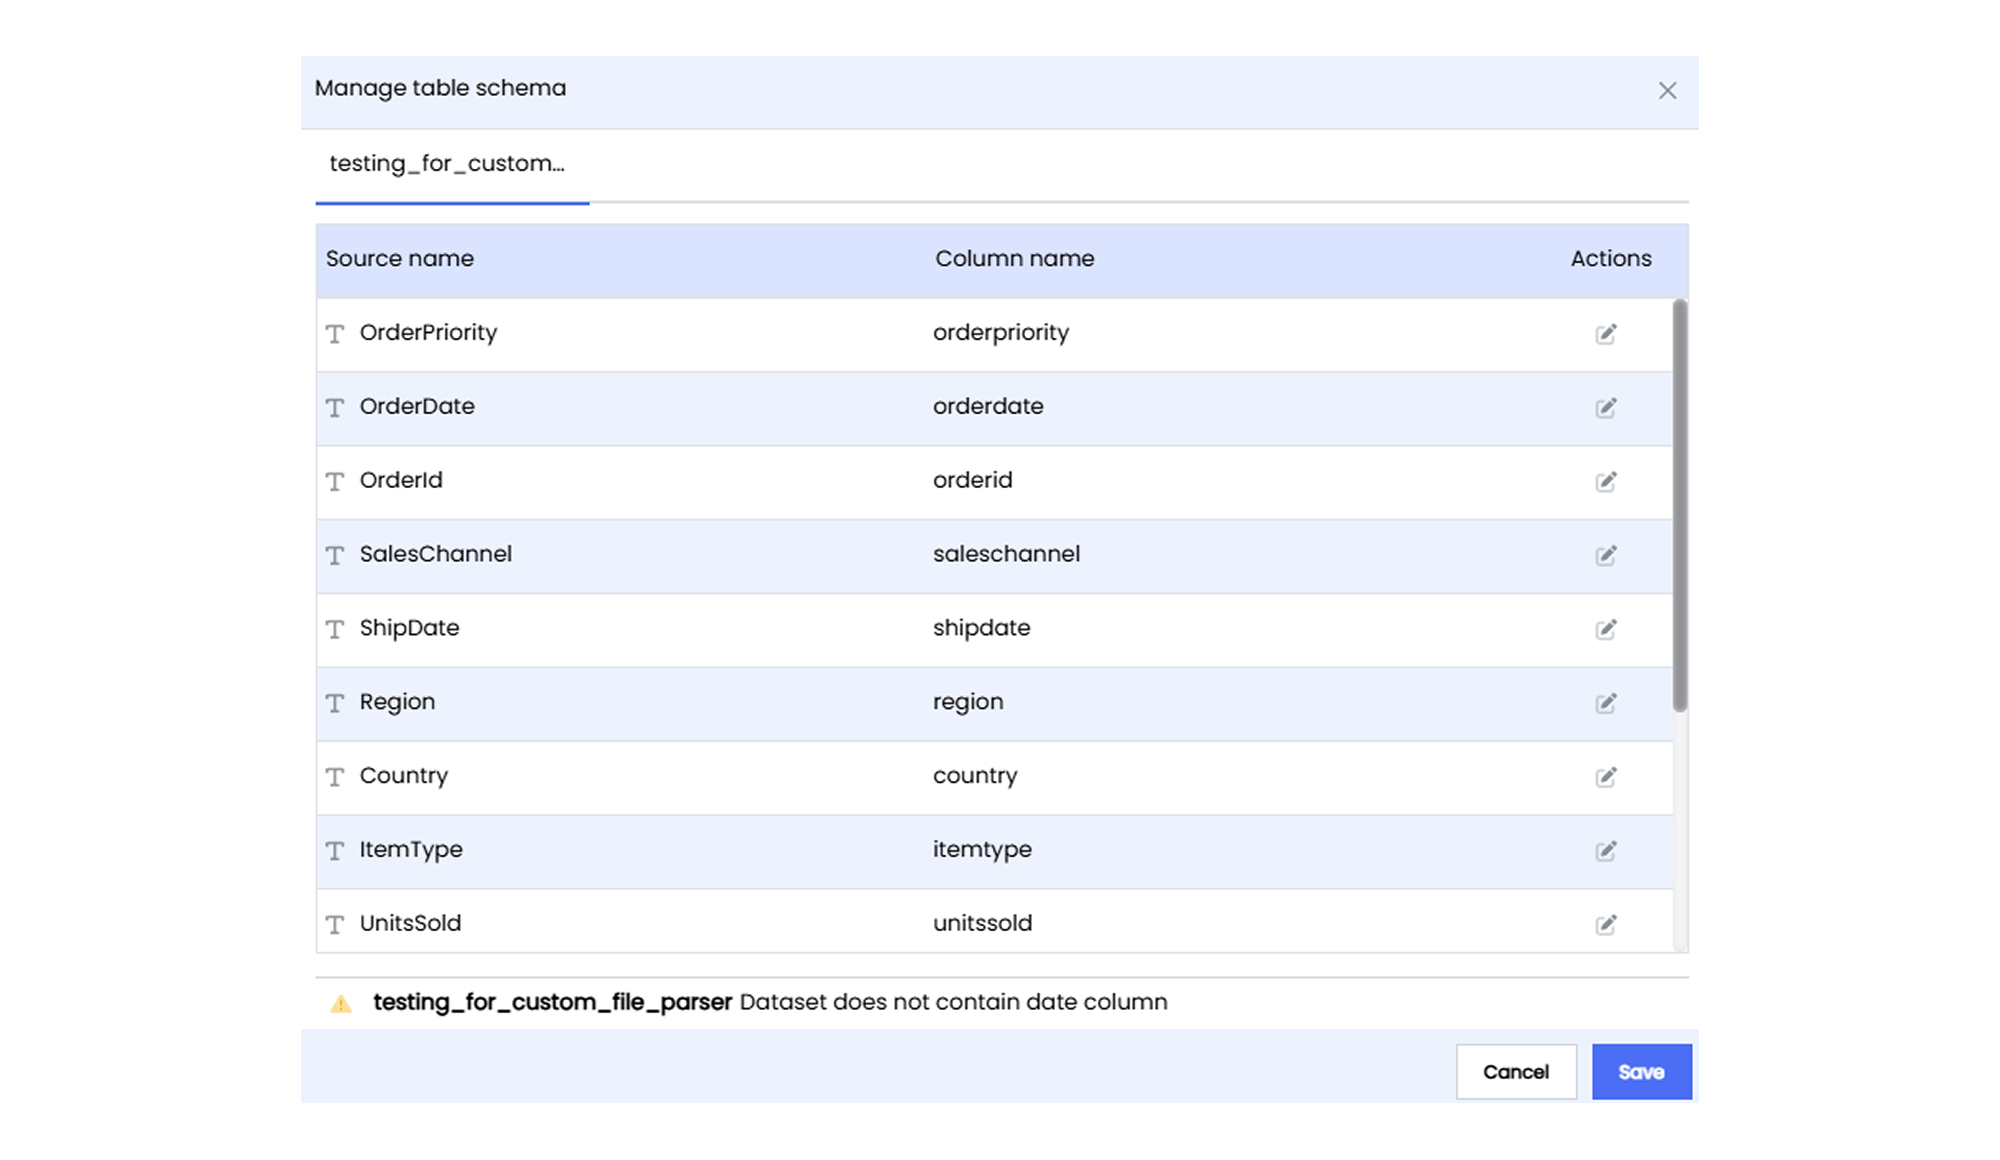
  3. To customize the Table Name and choose the Data Ingestion Type, click on the Edit icon close to the table name. Configure the following fields within this section
    • Table Name Specify the desired table name.
    • Ingestion Type Choose from options such as Incremental, Truncate and Reload, or Update to define how new data is integrated into the existing dataset.
    • Date Column Exists This checkbox identifies the date column in your dataset by default.
    • Add Upload Date If you wish to include an upload date column, select this checkbox. It can be helpful for tracking when new data was added to the dataset.
  4. Click on the column header of the tabular view to set the following
    • Column Type Change the column data type.
    • Auto Size All Columns Perfectly fit the data in the column.
    • Fit to Chart Set the visibility of the data for quick viewing. Data Ingestion Type
  5. To make any changes to any of the data table select the required one and click Previous.
  6. Use the Add Calculated Column feature to create a new column with calculated values not available in the original dataset. This is especially useful for performing custom calculations on your data.
  7. Configure the below fields to define the calculated column.
    • Column NameEnter a meaningful and descriptive name for the new calculated column in the Column Name field.
    • TypeChoose the appropriate data type for your calculated column from the available options Text, Integer, Decimal, Boolean, or Date.
    • Formula
      • In the “Formula” field, construct the formula for your calculated column using the available functions and operators.
      • To reference a column from the source, use the “@” symbol followed by the column name (e.g., @SalesAmount).
      • Click the Validate button to ensure the formula is correctly formatted and valid.
  8. After validating the formula, click the Preview button to see how the calculated column will look based on existing data. This helps you verify that the formula produces the expected results.
  9. Click Add Column button to add calculated column to your data table.
  • Incremental With the “Incremental” ingestion type, new data is added to the existing dataset without affecting the already loaded data. This mode is ideal when you want to continuously append new records to your dataset without modifying or reloading the existing information. It’s efficient for scenarios where your dataset is frequently updated.
  • Truncate And Reload Selecting “Truncate and Reload” means that the existing dataset is completely replaced with the new data. This mode is useful when you want to refresh your dataset with the most recent information and remove any previous data. It’s particularly suitable for scenarios where the entire dataset needs to be updated periodically.
  • Update In this mode, Infoveave identifies matching records between the new data and the existing dataset based on defined keys. Updated records are replaced, while new records are added. This mode is efficient when you want to refresh your dataset with new information and update existing records without starting from scratch.

Datasource Layout

Define Measures and Dimensions

Configure columns as measures and dimensions for effective data analysis and visualization. 

Measures

Configure Measure

Measures are quantitative, numerical data attributes that represent the values to be analyzed. They are typically numeric and can be aggregated or calculated.

To define a measure, follow the below steps

  1. Identify the specific data table and column for which you intend to create a measure.
  2. Locate the designated column within the required table and proceed to click on the Add Measure icon associated with that column.
  3. Once you click on the “Add Measure” icon, an “Add Measure” modal window will appear, allowing you to configure the measure.
    • The Table and Column fields are predefined based on your selection.
    • The Type field is also preselected, aligned with the data type of the chosen column.
  4. Among the key components of the “Add Measure” modal is the Aggregation field. Here, you can choose the desired aggregation function for the measure, which determines how values are summarized
    • Count Total count of values in the column.
    • Sum Summation of numeric values.
    • Average Mean value of numeric data.
    • DistinctCount Count of distinct values.
    • Min Minimum value in the column.
    • Max Maximum value in the column.
  5. Proceed to configure the properties of the measure, enhancing its interpretability and relevance
    • Prefix Prefix to be added to measure values (optional).
    • Suffix Suffix to be appended to measure values (optional).
    • Measure Name Provide a distinctive name for the measure.
    • Format Define the desired display format for measure values.
    • Precision Set the decimal precision for numeric values.
    • Description Elaborate on the purpose and significance of the measure.
  6. Click on the Add Measure button to finalize the configuration.
  7. The created measure will be available under Measures in the Measures and Dimension Panel. 

Dimension

Configure Dimension

Dimensions are categorical data attributes that provide context and categorization for measures.

To define a dimension, follow the below steps

  1. Identify the specific data table and column for which you intend to create a dimension.
  2. Locate the designated column within the required table and proceed to click on the Add Dimension icon associated with that column.
  3. Upon clicking the “Add Dimension” icon, an “Add Dimension” modal window will open, allowing you to configure the properties of the dimension.
    • The “Table,” “Column,” and “Type” fields are automatically populated based on your selection, simplifying the configuration process.
  4. The following fields are essential in configuring your dimension
    • Dimension Name Provide a descriptive name for the dimension to distinguish it from others.
    • Key Column Choose the column that contains unique values acting as key identifiers for this dimension. These identifiers enable proper linking and referencing of data across different tables.
    • Order Column Optionally, specify an order for the values within the dimension.
    • Description Elaborate on the purpose and significance of the dimension.
  5. If you wish to define a hierarchy within the dimension or establish relationships between tables, you can specify the following
    • Hierarchy Name Define a hierarchy name to organize and structure the dimension.
    • Attribute An attribute represents a specific element or characteristic within a dimension that contributes to its hierarchy. Define the attribute that you want to include in your hierarchy. This could be a subcategory, subgroup, or any other relevant classification within the dimension.
    • Attribute Key Column For each attribute included in the hierarchy, you need to specify a key column that serves as a link to the related data. This key column provides a reference point for navigating and organizing data within the hierarchy.
    • Attribute Name Specify the attribute’s display name.
  6. Click on Add Attribute to add the hierarchy. 
  7. Click on the Add Dimension button to finalize the dimension’s configuration.

Define Relationship

Define Relationship

Relationship refers to the connection between tables in a relational database. These relationships are established based on key columns shared between tables. The purpose of defining relationships is to create a logical link between data in different tables, enabling more efficient and meaningful analysis.

To define a relationship, follow the below steps

  1. Identify the table that you want to establish a relationship between from the list of all available tables.
  2. Drag and drop the two tables to the designer canvas.
  3. Identify the column that is common between the two tables (key column). This is the column, based on which you will establish the relationship.
  4. Define the key column on the newly added table as a dimension.
  5. Start defining the hierarchy, along with defining the dimension. 
  6. To define the hierarchy, give a name to the hierarchy under the field Hierarchy Name.
  7. Select the attribute column from the table under the field Attribute. An attribute column is that column in the dataset you want to access through the key column.
  8. Select the key column from the table under the field Attribute Key Column.
  9. Give the attribute column a name under the field Attribute Name.
  10. Click on the button Add Attribute, to add the attribute column.
  11. Checkmark the option Use in Hierarchy to use the define attribute in the hierarchy.You can define multiple hierarchy, under the selected key column. 
  12. Click on Add Dimension to save the dimension. Relationships
  13. Establish a connection between the identified key columns by simply drawing linking the columns.You can define the relationship type (one-to-one, one-to-many) based on your requirement.

Add Calculated Measure

Calculated Measure (1)

A calculated measure is a custom computation or mathematical expression that is applied to the data in a dataset to derive a new column of numeric value without adding it physically to the dataset.

To add a calculated measure, follow the steps

  1. Click on the icon or the Add Calculated Measure option to initiate the process of adding a calculated measure.
  2. Assign a descriptive name to your calculated measure that succinctly represents its purpose.
  3. Choose from options like None, First Date, Last Date, or Skip Date to define the behavior of date-based filtering for this calculated measure.
  4. Configure your calculated measure by defining its format, prefix, suffix, and precision.
  5. Utilize the checkbox option to decide whether to hide this calculated measure from specific widgets or visualizations.
  6. Provide a detailed description that elaborates on the context and significance of this calculated measure.
  7. Construct the formula by combining measures, dimensions, operators, and functions to derive the desired metric. Use the “@” symbol to reference existing columns and ensure you validate the formula to avoid errors.
  8. Click on the Validate button to validate the calculated measure. 
  9. Click the Add Calculated Measure to include the calculated measure in your Datasource.

Add Formula

Add Calculated Formula

A calculated formula is a more general term that includes various types of calculations, not just limited to measures. It can involve calculations on measures, fields, or specific data points.

  1. Click on the icon or the Add Calculated Formula option to initiate the process of adding a calculated formula.
  2. Assign a unique name to the calculated formula, representing the purpose and nature.
  3. Customize the visual representation of your calculated formula using format settings such as prefix, suffix, precision, and formatting rules.
  4. Provide a detailed description that explains the context and significance of the calculated formula.
  5. Construct the formula using available measures, dimensions, operators, and functions. Use the “@” symbol to reference existing columns.
  6. Click on the Validate button to validate the formula. 
  7. Click Add Calculated Formula, to add it to your configuration.

Upload Data

Data upload and ingestion are fundamental processes in Infoveave that empower you to populate your datasets, facilitating meaningful analyses and insights. Let’s delve into the detailed steps and methods for seamless data upload and ingestion

Data Ingestion Methods Infoveave provides three distinct data ingestion methods, each serving a specific purpose

  1. Incremental Ingestion This method adds only the new data that has been generated since the last upload.
  2. Truncate and Reload With this option, existing data is wiped out and replaced with the newly uploaded data.
  3. Update Choose this method to update existing data with new values, where you identify key columns for comparison.

Supported Data Upload Methods Infoveave accommodates multiple techniques to upload data into file based Datasource

  1. Batch Upload Utilize the Upload Data option found in Studio Datasources Upload Data to upload a batch of data.
  2. Email Upload Data can be sent as an attachment to a designated email address, which Infoveave will automatically integrate into the appropriate Datasource.
  3. NGauge Form This method involves using NGuage forms to update file based Datasource.

Uploading Data Using the ‘Upload Data’ Option

Data Ingestion

For uploading data through the ‘Upload Data’ feature, follow these comprehensive steps

  1. Navigate to Studio Datasources Upload Data.
  2. Assign a unique batch name to distinguish different sets of data uploads.
  3. Click on Select Your Data to pinpoint the desired file for upload.
  4. Utilize the file picker dialog box to choose the specific local file.
  5. Click on Previous tab to see all the previous data uploads with options it Download or Delete the previous uploads.
  6. Start the upload by clicking Start Processing.
  7. Receive a confirmation notification for a successful upload or an error notification for any encountered issues.

Uploading Data via Email

Alternatively, you can employ email-based data upload

  1. Attach your data to an email and forward it to the designated email address listed in the Upload Data tab.
  2. Ensure that the attached data adheres to the appropriate data template.
  3. A notification will inform you of the success or failure of the data upload.
  4. Importantly, this method does not necessitate logging into the Infoveave platform.