
NGauge Toolbar
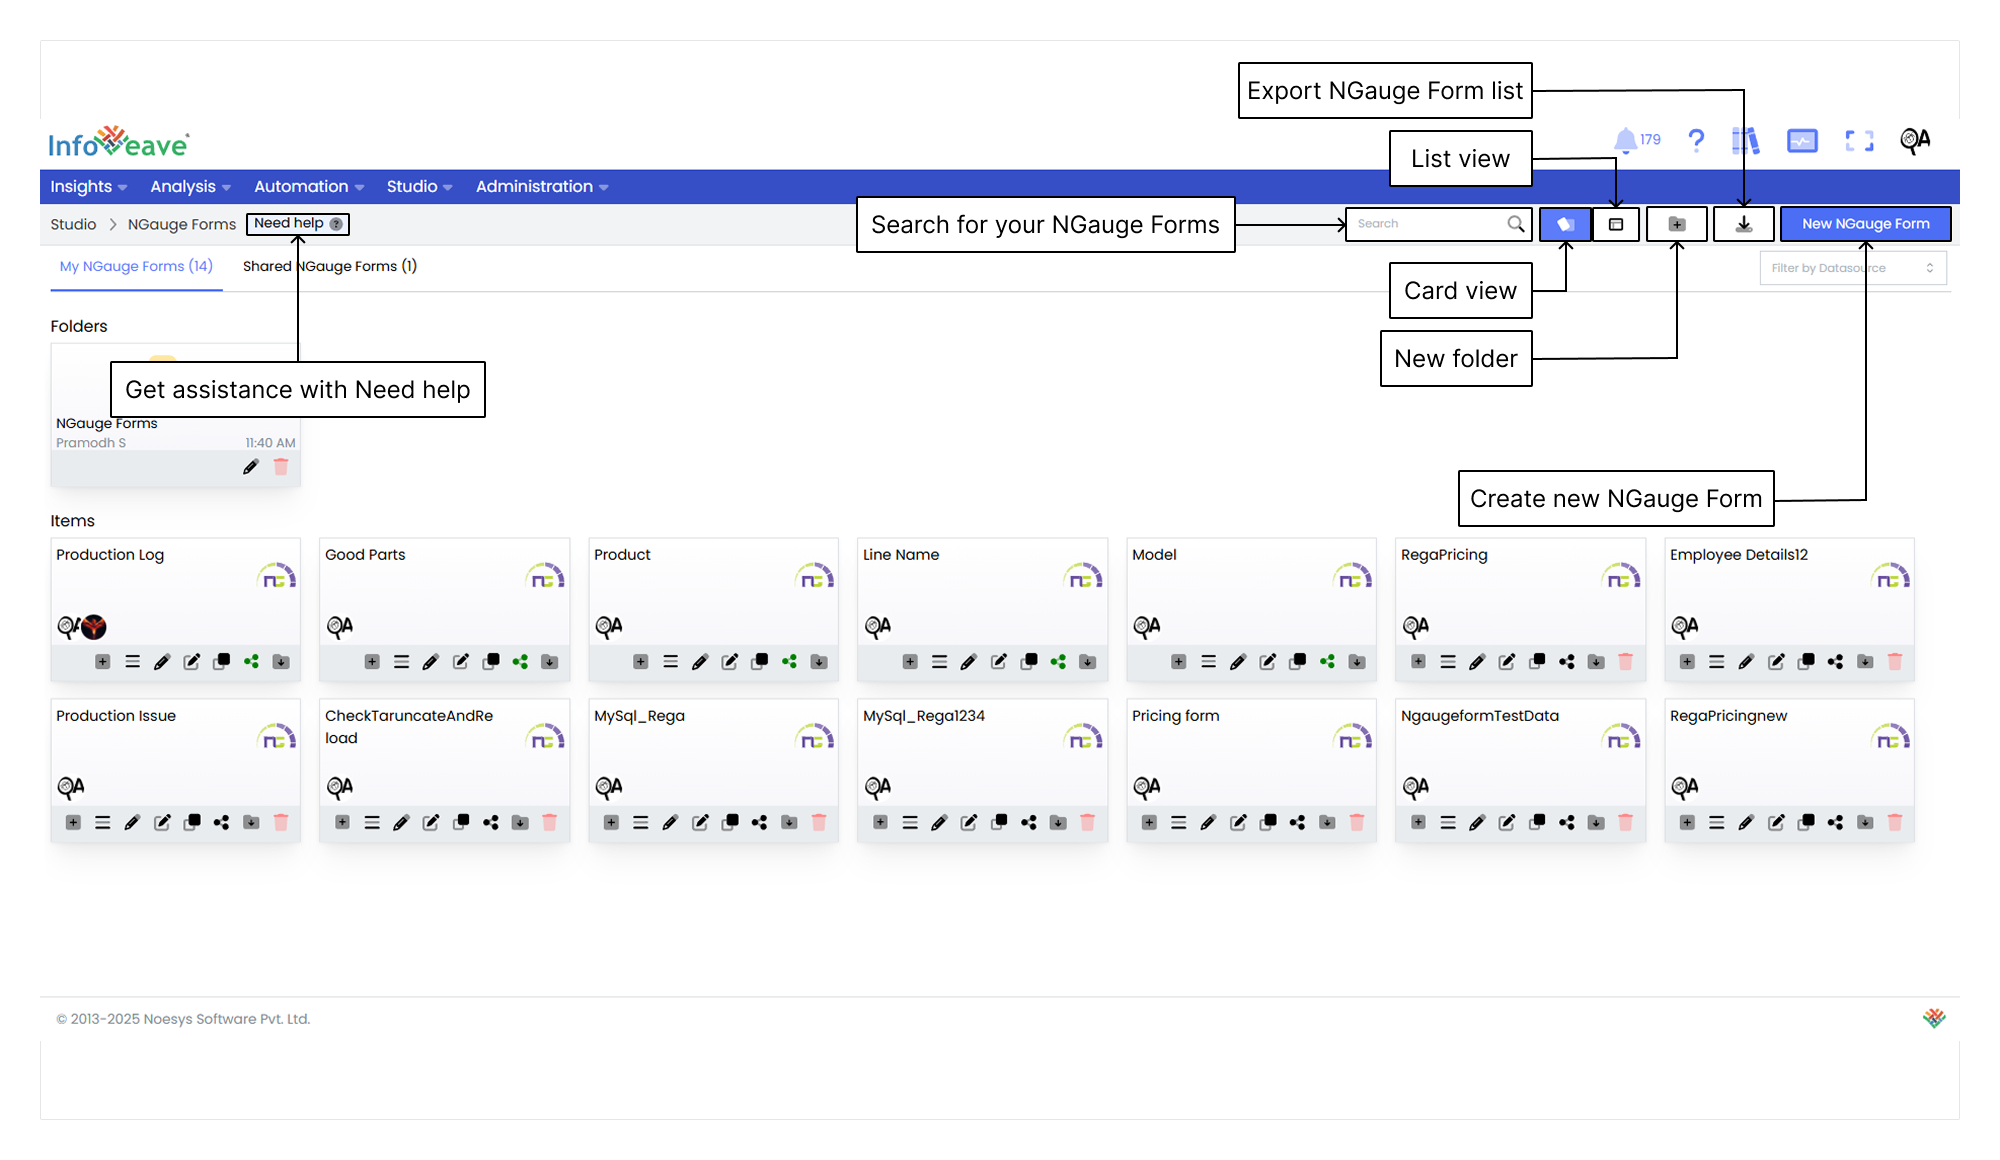
Getting Help
If you’re unsure how to create an NGauge in Infoveave, you can always get assistance by clicking the Need help button. When you click the button, you are directed to a visual walkthrough on how to create an NGauge.

- Selecting Datasource Select the required Datasource to update data entries individually or in bulk. This streamlines the process of direct modification for enhanced master data management.
- Configuring NGauge form Configure the NGauge form in Infoveave for efficient and personalized data interaction. Tailor its functionality to meet specific data management needs.
- Customizing NGauge form layout Customize the NGauge form layout to create a user-centric, efficient, and adaptable last-mile form. This enhances data management, reporting, and overall productivity.
- Entering Data with Add Data option Start entering data using the Add Data option on the NGauge form. This continuously enriches your datasets and ensures real-time updates for accurate analysis, reporting, and informed decision-making.
- Saving NGauge form Save your NGauge form to preserve data, ensure workflow continuity, and support effective data management and analysis within the Infoveave platform.
Using the Search Bar
The Search Bar at the top-right of the screen allows you to quickly locate any NGauge within the platform. Simply enter keywords related to the name of the NGauge or any part of the content you are searching for.
Viewing Items in Card Layout
When you click on the Card option in the layout filter, the items are displayed in a card-based view. This is the default layout for organizing NGauges. The layout provides a more visual representation of the NGauges and folders, making it easier to identify and organize items.
Viewing Items in List Layout
When you click on the List option, the layout changes to a table view. This displays the items and folders in a more detailed and structured format. This layout is ideal if you prefer viewing data in rows and columns. It allows quick access to information such as the item name, type, creation date, last update date, and more.
Creating a New Folder
To organize your NGauge forms more efficiently, you can create a new folder. Here’s how you do it.
- Click the New Folder button to open a popup where you can configure your new folder.
- In the popup that appears, you are prompted to enter a name for your new folder. Choose a name that helps you identify the folder’s purpose.
- After entering the folder name, click the Save button to create the folder. The new folder appears under the Folders section.
Exporting the NGauge Form list
The Export NGauge Form List feature allows you to download a structured file containing all NGauge forms available in the system. This functionality improves data management by enabling easy access, organization, and sharing of form records.
Creating a New NGauge Form
To learn about creating new NGauge Form, visit Creating an NGauge Form
Filtering by Datasource
The Filter by Datasource feature lets you narrow down your search by selecting a specific NGauge from the dropdown menu, making it easier to find and manage forms linked to that NGauge. It improves efficiency and organization.