
Introducing List Views
Infoveave allows you to build and manage a view over the List created through SQL queries on existing Datasource.
Steps to Creating List View
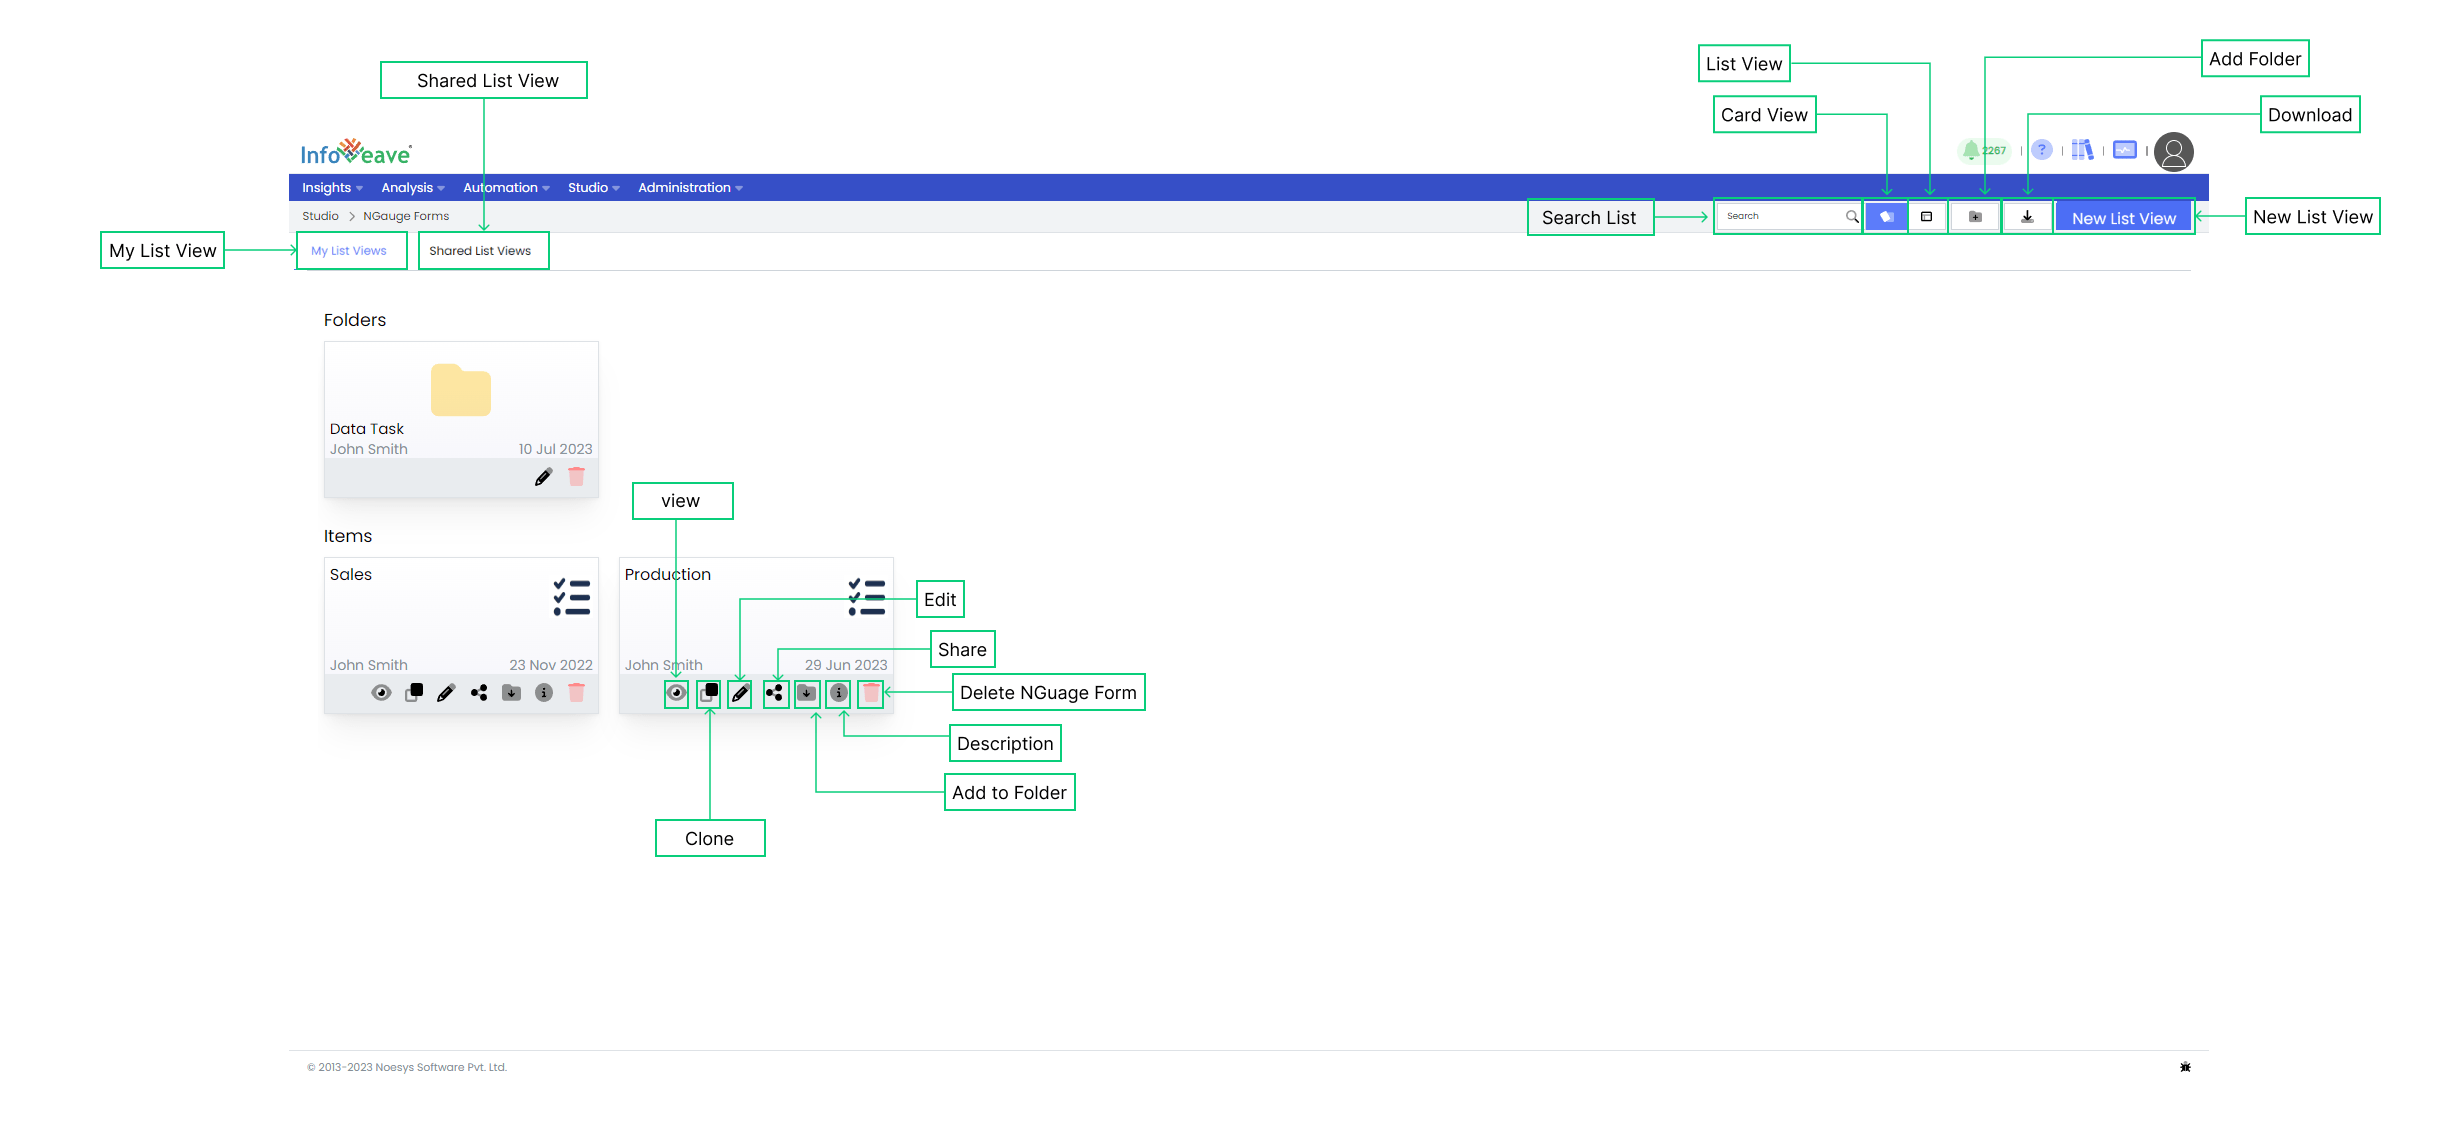
- To create List View in Infoveave over any existing Datasources, click on Studio List View.
- All List Views, created by you or shared with you will be displayed under the tabs My List View and Shared List View respectively.
- To create a new List View, click on New List View.
Selecting and Configuring List View
- Selecting the required preconfigured List from the drop-down menu on the List View dialogue box.
- Choosing the List and clicking Continue.
- Assigning a Name to the new List View.
- Giving the List View Description (if necessary).
- Checking the Load only when filters are applied, when handling large amounts of data, for faster screen load.
- Using the Name option to change/customize the name of the columns to display.
- Using the Display field to select the columns required in the View option.
- To choose every column listed, checking the Display option.
- You can also manually pick the columns required from the list.
- A minimum of one column must be specified in the List View to display.
- Configuring the searchable columns for filtering in the View option.
- To make every column searchable, checking the Allow Search option.
- You can also manually pick the columns required from the list.
- Clicking + Add Filter to add the conditional filters on the listed columns.
- Depending on the column’s data type (date, measure, or dimension), distinct conditional filter choices are available
- Date Columns
- Resetting Clear any existing date filters applied.
- Equals Display entries matching a specific date.
- Not Equals Show entries excluding a designated date.
- Greater Than Present entries occurring after a specified date.
- Greater Than or Equal To Include entries on or after a given date.
- Less Than Display entries preceding a chosen date.
- Less Than or Equal To Include entries on or before a selected date.
- In Range Show entries within a defined date range.
- Measure Columns
- Is One Of Display entries with values matching selected options.
- Is Not One Of Show entries with values not included in chosen options.
- Greater Than Present entries with values surpassing a specified threshold.
- Greater Than or Equal To Include entries with values meeting or exceeding a defined value.
- Less Than Display entries with values lower than a designated limit.
- Less Than or Equal To Include entries with values meeting or falling below a set value.
- In Range Show entries with values falling within a specified range.
- Dimension Columns
- Is One Of Display entries matching selected dimension options.
- Is Not One Of Show entries excluding chosen dimension options.
- Contains Present entries containing specific text or values.
- Does Not Contain Show entries excluding those with designated text or value.
- Date Columns
- Clicking Download to download the customized list view with the chosen columns and filters applied as an Excel file.
- Clicking on Save to store the configured List View.