
Reports Toolbar
Getting Help
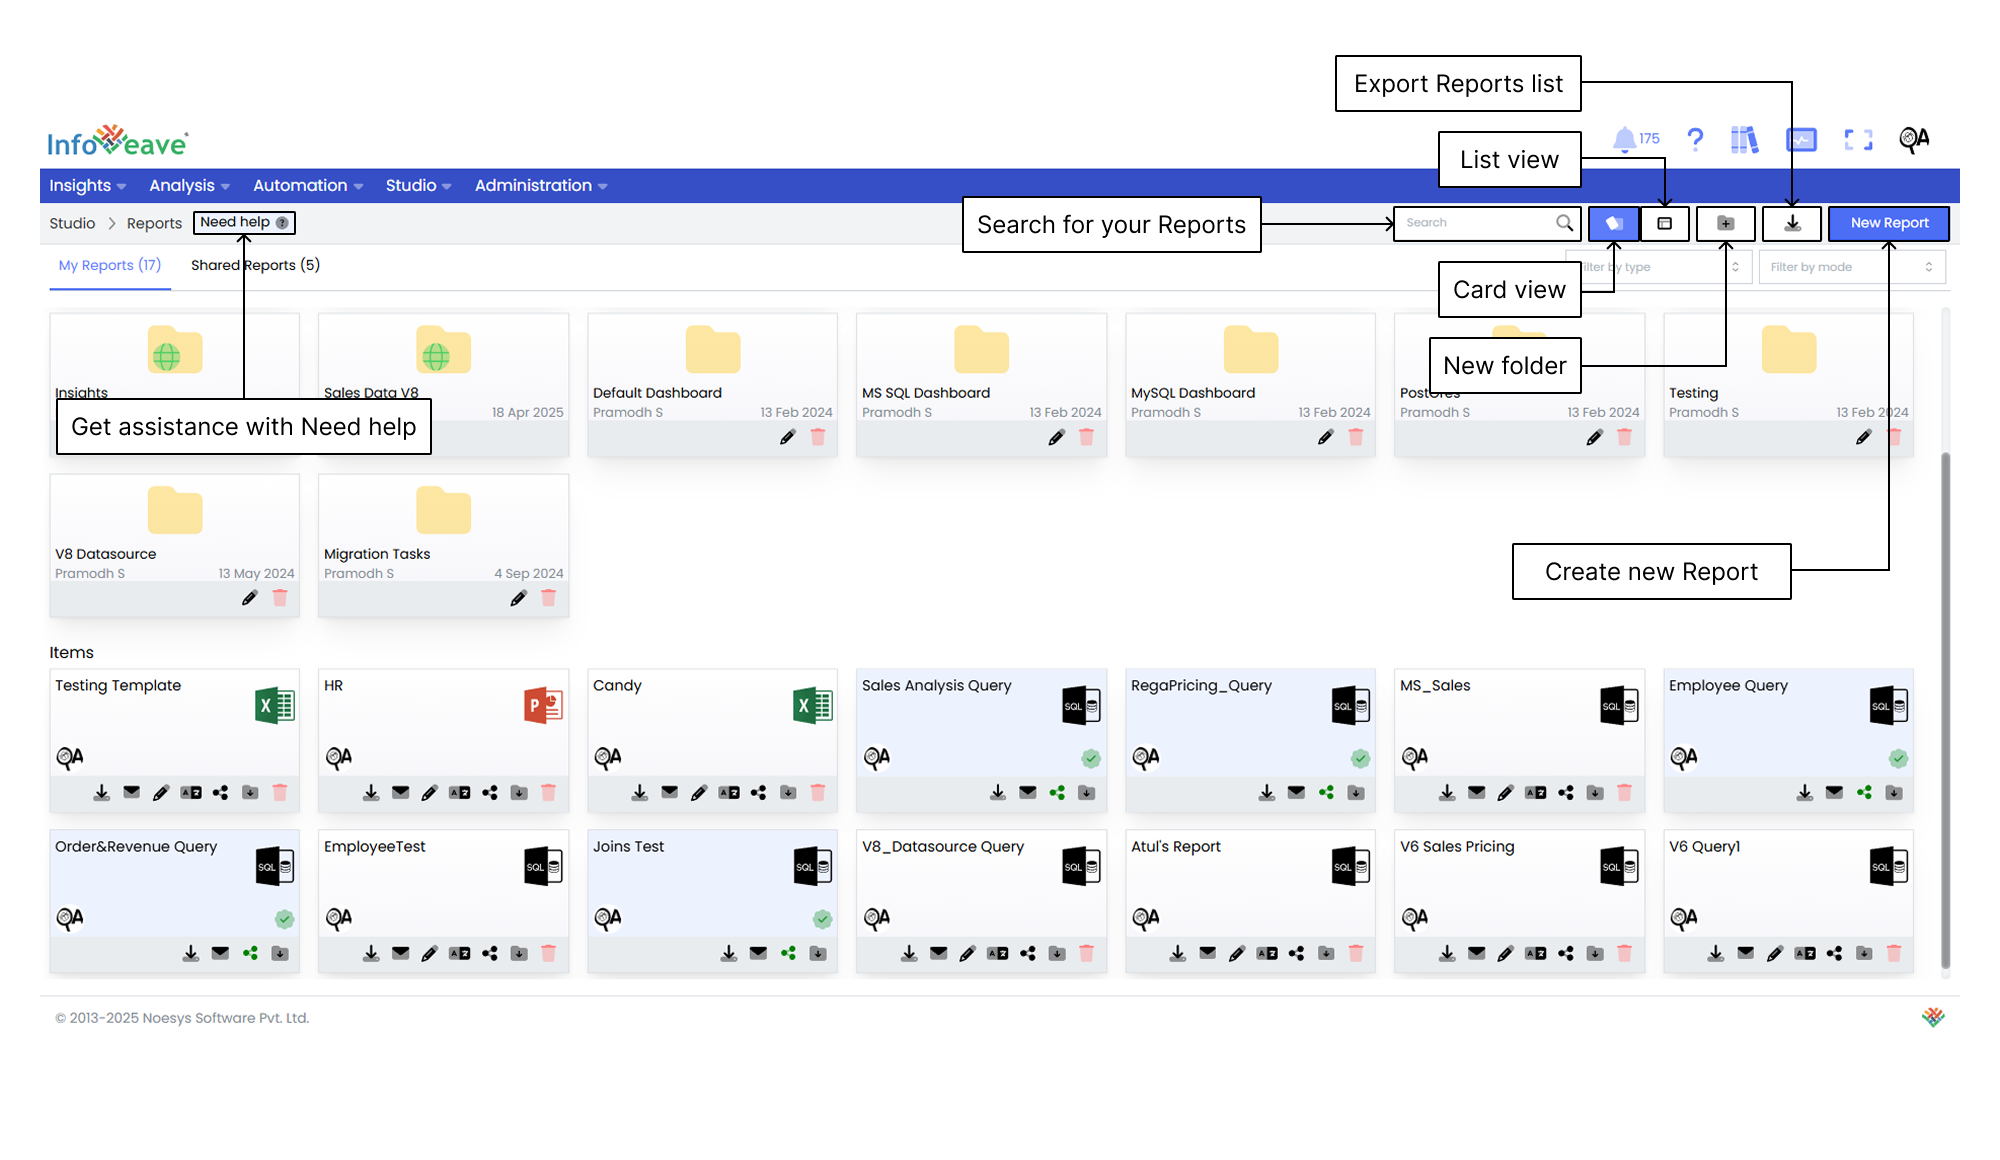
If you are unsure about how to create a report in Infoveave, you can always get assistance by clicking the Need help button. When you click the button, you are directed to a visual walkthrough on how to create a report.

- Install Infoveave plugin Enable the Infoveave Add-in in Microsoft Office tools like Word, PowerPoint, or Excel to seamlessly connect with the Infoveave platform for streamlined reporting.
- Connect with Infoveave Access the Infoveave plugin, securely authenticate, and connect with Infoveave to establish a secure connection between your MS Office tools and your Infoveave account.
- Import Infoboards and charts for reporting Insert an entire Infoboard or selected widgets into your report from a list of available options. Customize dimensions and date ranges for comprehensive insights and enhanced visual appeal of your report.
- Upload report to Infoveave Upload the template report back to Infoveave for easy sharing. This facilitates seamless collaboration and easy access to the analyzed data report within the platform.
Using the Search Bar
The Search Bar at the top-right of the screen allows you to quickly locate any report within the platform. Simply enter keywords related to the name of the report or any part of the content you are searching for.
Viewing Items in Card Layout
When you click on the Card option in the layout filter, the items are displayed in a card-based view. This is the default layout for organizing reports. This layout provides a more visual representation of the reports and folders, making it easier to identify and organize items.
Viewing Items in List Layout
When you click on the List option, the layout changes to a table view. This displays the items and folders in a more detailed and structured format. This layout is ideal if you prefer seeing data in rows and columns. It allows quick access to information such as the item name, type, creation date, last update date, and more.
Creating a New Folder
To organize your reports more efficiently, you can create a new folder. Here is how to do it.
- Click the New Folder button. This opens a popup where you can configure your new folder.
- In the popup that appears, you are prompted to enter a name for your new folder. Choose a name that helps you identify the folder’s purpose.
- After entering the folder name, click the Save button to create the folder. The new folder appears under the Folders section.
Exporting the Report list
The Export Report list feature enables you to download a structured file containing all available reports within the system. This functionality streamlines report management and allows for easy record-keeping, analysis, and sharing.
Creating a New Report
To learn about creating Reports, visit Creating Reports.
Filtering by Type
The Filter by type feature allows you to refine your search by selecting specific types of reports.
Filtering by Mode
The Filter by mode feature enables you to refine your report search based on its status. The dropdown menu provides two options – Draft and Production. Selecting Draft filters reports that are still in progress or undergoing revisions. Choosing Production displays finalized reports that are ready for use or distribution.