---
title: Managing Reports
description: Efficiently manage, customize, share, and download SQL and template reports for streamlined data-driven decision-making.
---
import { Aside, Steps } from '@astrojs/starlight/components';
# Managing Reports
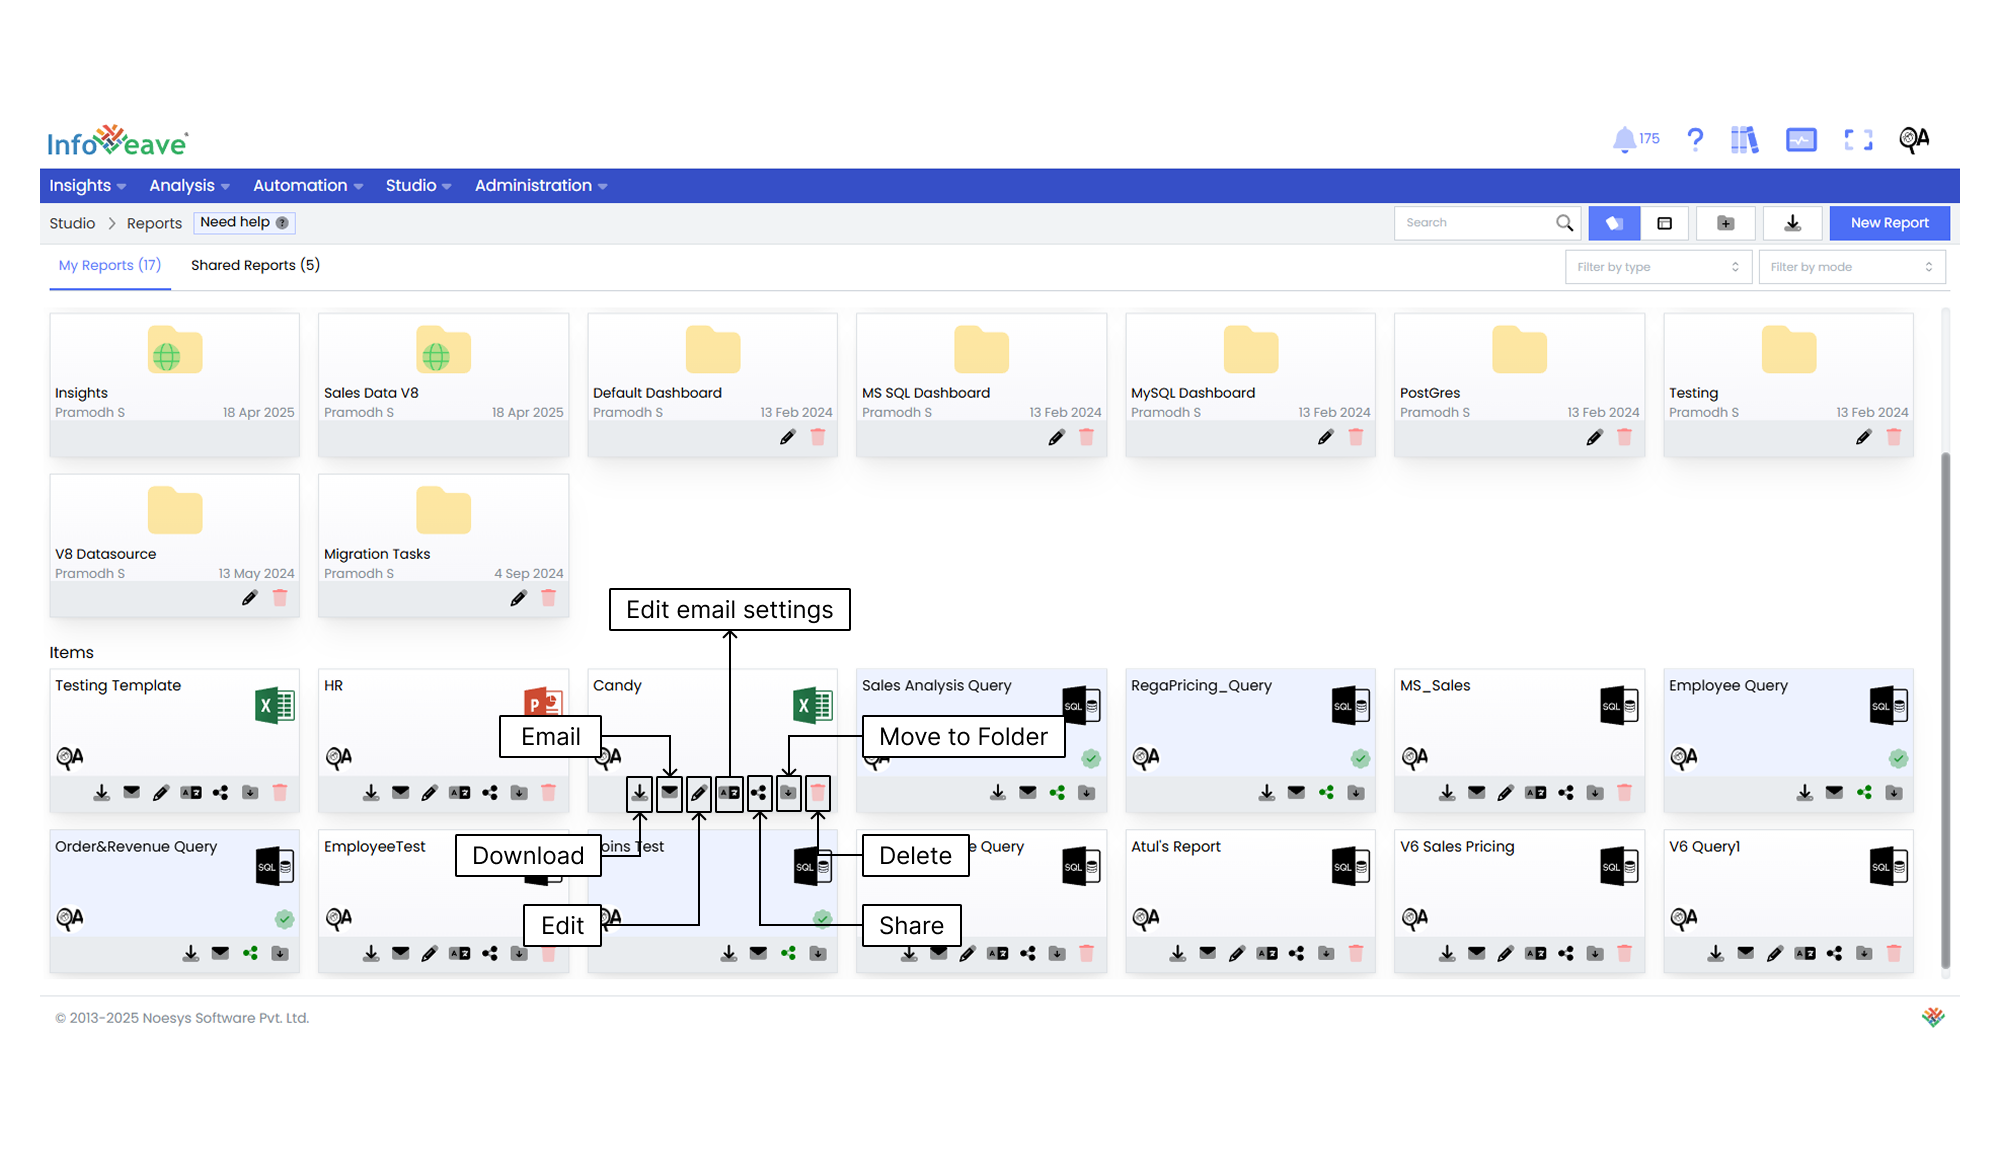
The **Manage Reports** feature provides comprehensive control over your SQL query reports and Template reports. It allows you to organize, customize, and share them efficiently. Here is a brief overview of the various management options available for your Reports.
## Downloading a Report
To download a Report in Infoveave, follow these steps.
1. Navigate to **Studio Reports**.
2. Find the specific Report that you want to download.
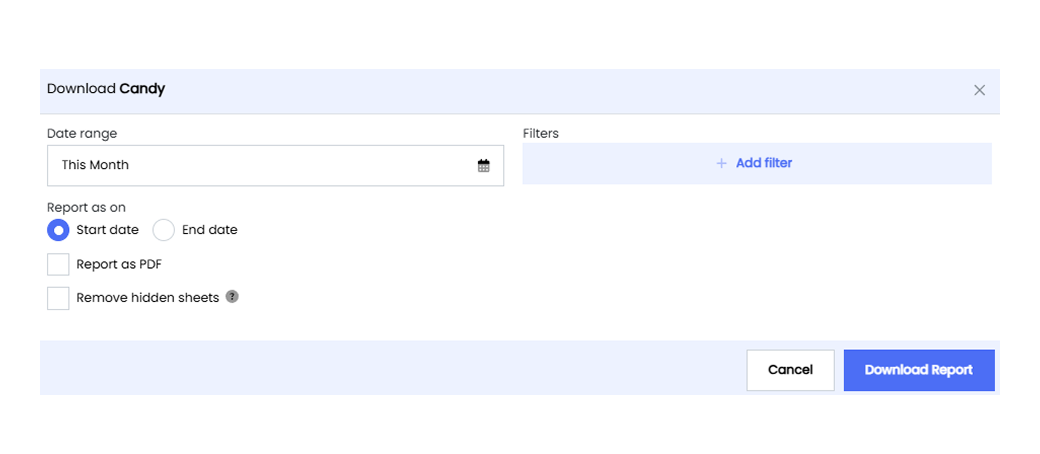
3. Click on the **Download** icon associated with the Report. This opens the download dialog box.
4. Apply the date range filter. Select the report as either the **Start date** or **End date**.
- **Start date** includes data until the start date of the selected date range.
- **End date** includes data until the end date of the selected date range.
5. Click on **+ Add filter** to apply dimension filters to the report if needed. Select the specific dimensions you want to filter by. Choose the Conditional Filter from the available options.
6. Select additional options if required.
- **Report as PDF** generates the report in PDF format.
- **Remove hidden sheets** removes the Infoveave Config Sheet before downloading or sending the report.
7. Click on the **Download Report** button to download the report.
## Emailing a Report
Infoveave allows you to share your Infoboard insights through email reports. Here is a detailed step-by-step guide on how to send email reports from Infoboard.
1. Navigate to **Studio Reports**.
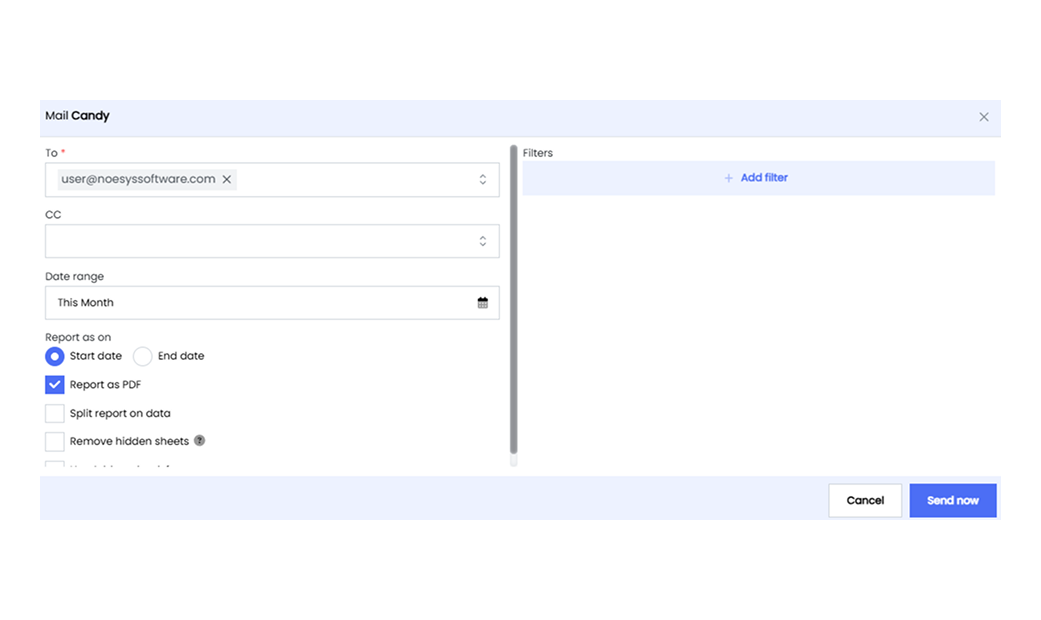
2. Click on the **Email** icon on the required Report. This opens the email dialog.
3. Specify the recipients of the email report. In the “To” field, enter the email addresses. Use the “CC” field to add additional recipients if needed.
4. Configure the Date Range by choosing the appropriate range for the report.
5. Specify the start and end dates for the report using the **Report as on** option.
6. Select the desired format for the report to email.
- **Report as PDF** generates the report in PDF format.
- **Split report on data** splits the report based on a specific dimension. If you choose this, select the dimension.
- **Remove hidden sheets** excludes hidden sheets from the report.
- **Use Address book from** allows you to use an address book for recipient details. Choose between **Datasource** or **Infoboard** and configure related settings.
**Datasource** Specify the Datasource for the address book. Map it with a relevant dimension. Choose the mail dimension and apply Address Book filters if necessary.
**Infoveave** Configure settings for using Infoveave in the email report. If splitting the report, choose the dimension. Select an address book group if applicable.
7. Optionally, apply filters to focus on specific dimensions or values.
8. Click the **Send now** button to generate and send the email report.
## Editing a Report
Edit your Reports to ensure that they reflect the desired modifications and meet your evolving requirements.
To modify a Report in Infoveave, follow these steps.
1. Navigate to **Studio Reports**.
2. Find the specific Report that you want to edit.
4. Click on the **Edit** icon associated with the Report.
* If it is a SQL query report, it redirects to edit the query.
* For a template report, you can upload a new template.
4. After making the necessary changes, click on the **Save** button to save your edits.
## Editing the Email settings
Infoboard in Infoveave allows you to customize email templates to send reports with personalized subjects and bodies. Here is a comprehensive guide on how to edit email templates for Infoboard.
1. Navigate to **Studio Reports**.
2. Click on the **Edit email settings** icon located in the selected Report.
4. Tailor the subject to reflect the report content or provide relevant context.
5. Customize the email body to provide additional information, instructions, or insights.
6. Use dynamic tags to insert dynamic content into the email body.
7. Click the **Save** button to apply your changes.
## Sharing a Report
Sharing options in Infoveave Reports, such as user and role-based sharing, ensure efficient distribution and use of your analysis.
To share your Infoveave Reports with other users or roles, follow these steps.
1. Navigate to **Studio Reports**.
2. Click on the **Share** icon.
3. Select between the available options: Share with User or Share with Role.
4. If you choose Share with User, select the user or users you want to share the Reports with.
5. To share the Reports with all users, select the **Share with Everyone** option.
6. If you choose Share with Role, select the roles from the dialog box.
7. To remove a specific user or role from the shared list, uncheck the corresponding checkbox.
8. Click **Save** to share your Reports.
## Moving Reports to a Folder
Organize your Reports by moving them to designated folders.
To organize your Reports under folders, follow these steps.
1. Navigate to **Studio Reports**.
2. Select the Reports you want to move. Click on the **Move to Folder** icon.
3. Choose the desired folder from the dropdown menu.
4. Click the **Save** button to finalize the move.
## Deleting a Report
To delete a Report in Infoveave, follow these steps.
1. Navigate to **Studio Reports**.
2. Find the Report you want to delete.
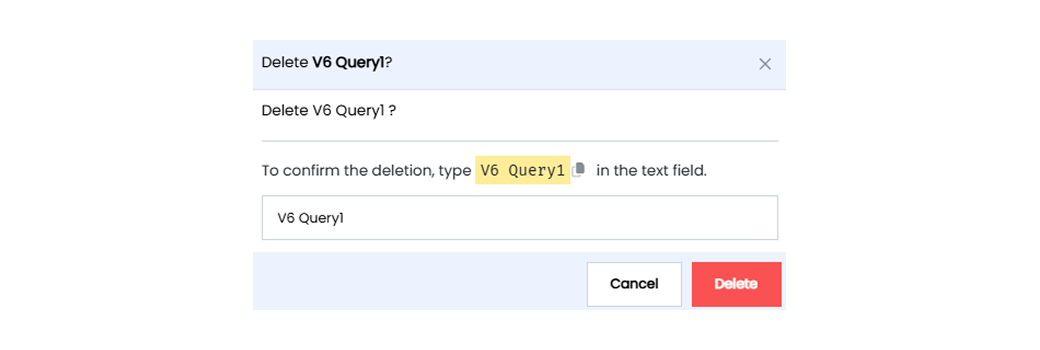
3. Click on the **Delete** icon .
4. Type the specified text from the warning message in the provided text field.
5. Alternatively, copy the text from the icon and paste it into the text field.
6. Once you have entered the correct text, click on **Delete**.