---
title: Datasource Toolbar
description: DataSource Toolbar
---
import { Steps } from '@astrojs/starlight/components';
# Datasource Toolbar
## Getting Help
If you are unsure about how to create a Datasource in Infoveave, you can always get assistance by clicking the **Need help** button. When you click the button, you are directed to a visual walkthrough on how to create a Datasource.
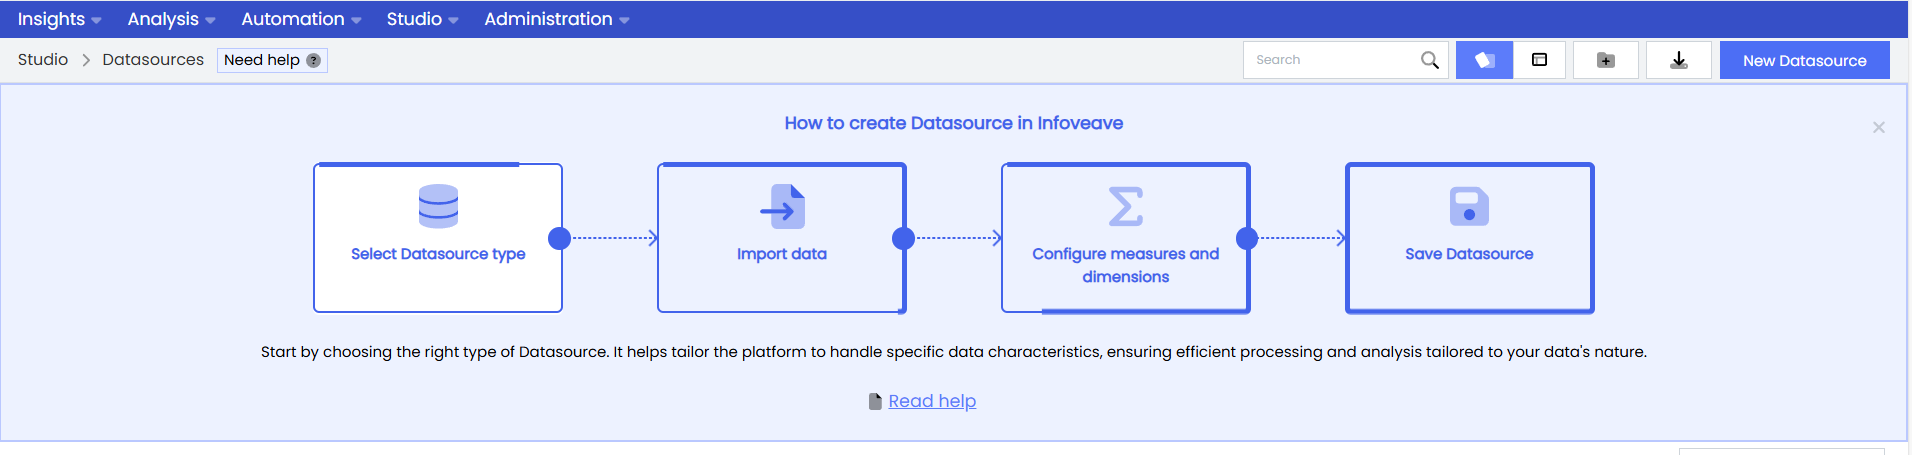
* **Select Datasource type** Start by choosing the right type of Datasource. It helps tailor the platform to handle specific data characteristics. This ensures efficient processing and analysis based on the nature of your data.
* **Import data** Connect to the necessary databases or cloud services for a smooth data import into Infoveave. Alternatively, configure the data table for file types. This creates an organized and structured setup for effective data analysis and accurate insights.
* **Configure measures and dimensions** Set up essential measures and dimensions to introduce flexibility in analysis. This supports charts and widgets, helping you make informed decisions by tailoring insights to your specific goals.
* **Save Datasource** Save your Datasource to perform various types of analysis. These include business analysis, statistical analysis, query execution, Infoboard creation, machine learning modelling, and workflow automation setup.
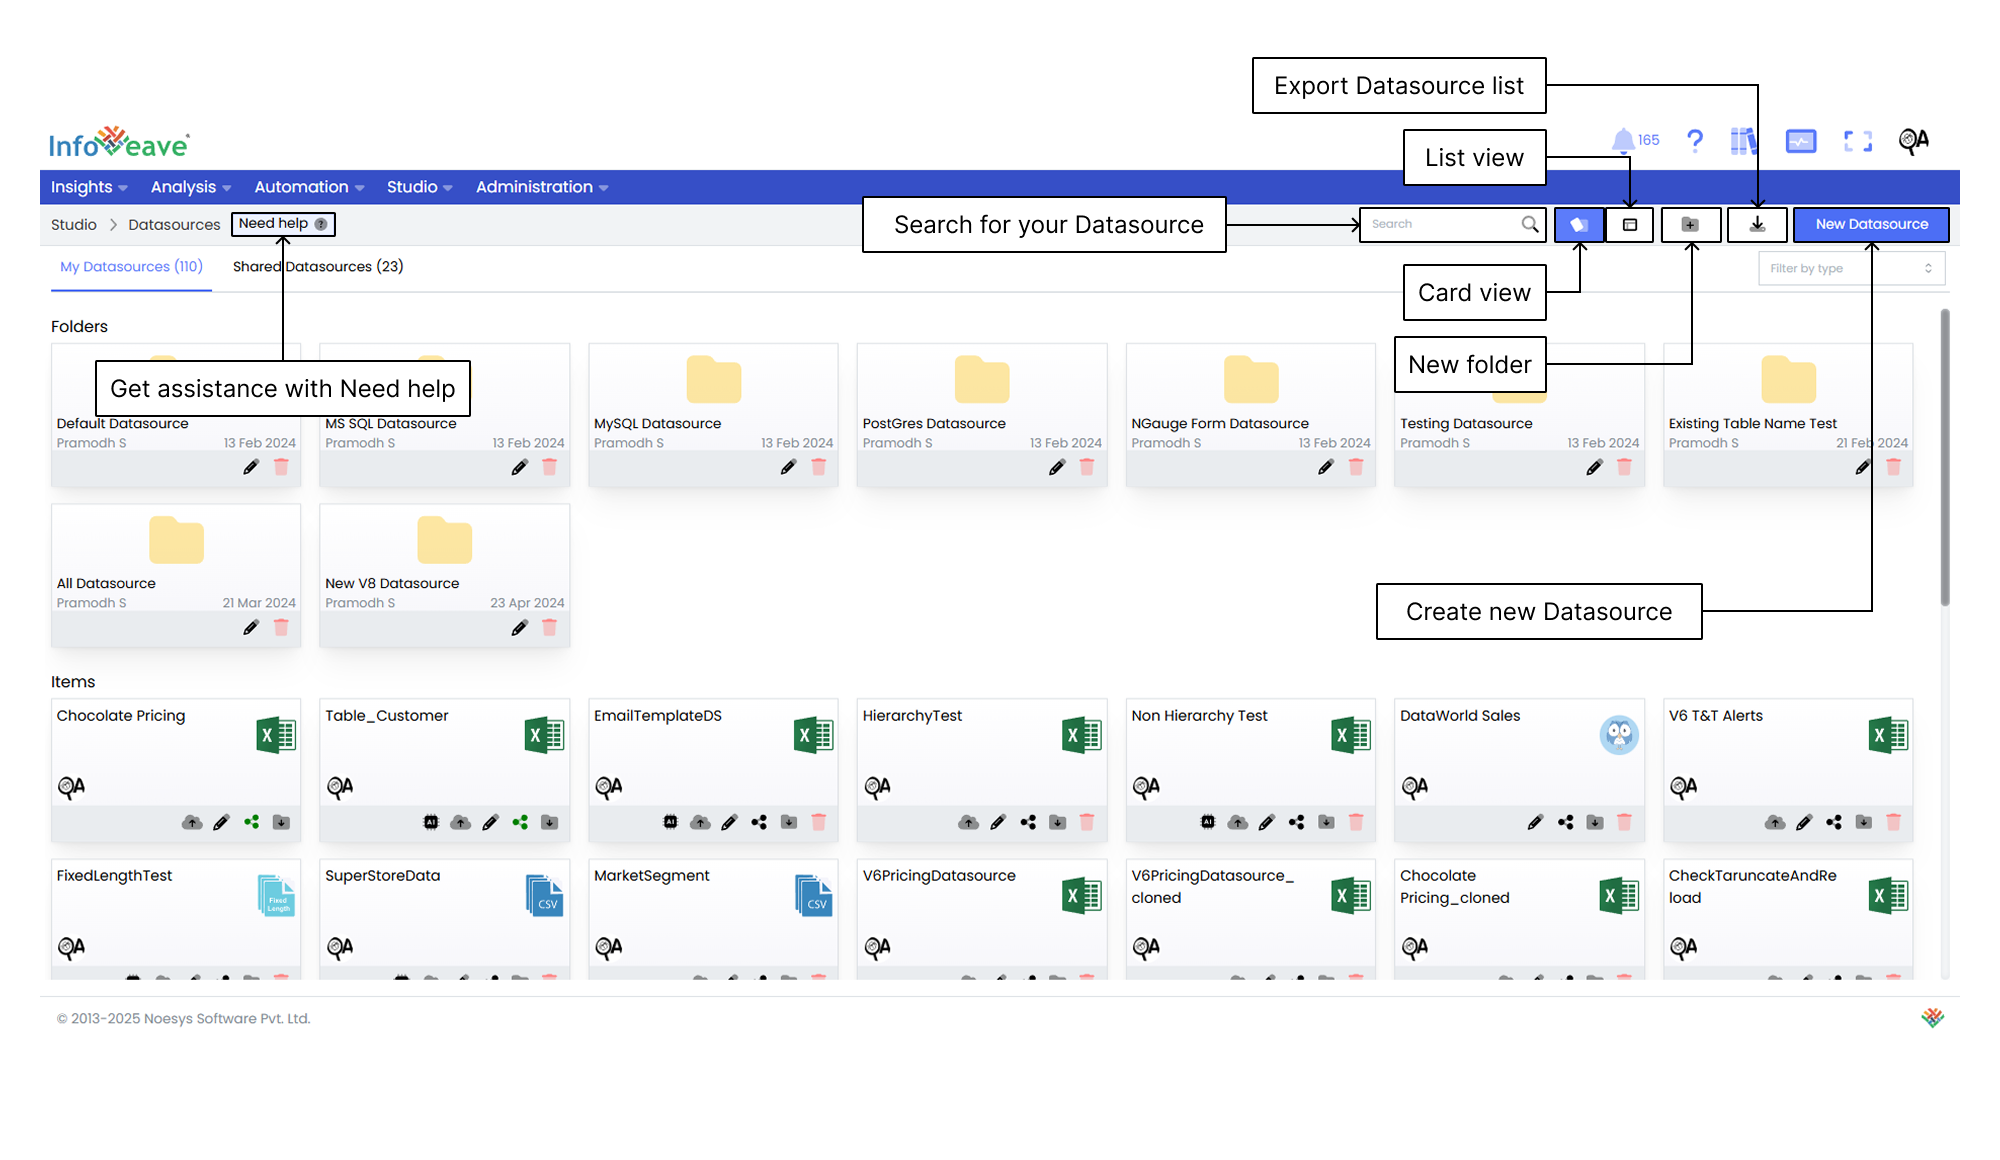
## Using the Search Bar
The Search Bar at the top right of the screen allows you to quickly find any Datasource within the platform. Simply enter keywords related to the name of the Datasource or any part of the content you are searching for.
## Viewing Items in Card Layout
When you click the Card option in the layout filter, the items appear in a card-based view. This is the default layout for organizing Datasources. It provides a visual representation of the Datasources and folders, making it easier to identify and organize items.
## Viewing Items in List Layout
When you click the List option, the layout changes to a table view. This displays the items and folders in a more detailed and structured format. It is ideal if you prefer to view data in rows and columns. This allows quick access to details such as the item name, type, creation date, last update date, and more.
## Creating a New Folder
To organize your Datasources more efficiently, you can create a new folder. Here’s how to do it.
1. Click the **New Folder** button. This opens a popup where you can configure your new folder.
2. In the popup, enter a name for your new folder. Choose a name that helps you identify the folder’s purpose.
3. After entering the folder name, click the **Save** button to create the folder. The new folder appears under the Folders section.
## Exporting the Datasource list
The **Export Datasource list** feature allows you to download a structured file that contains all available Datasources in the system. This functionality simplifies data management by providing a comprehensive overview for analysis, reporting, and sharing.
## Creating a New Datasource
Follow these steps to create a Datasource in Infoveave.
1. Click the **New Datasource** button.
2. You are navigated to a page that includes **Files**, **Databases**, **Cloud Services**, and **Others**.
3. Select the type of Datasource you want to create. To learn in detail, visit [Excel Files](/studio-v8/datasources/excel-file), [Oracle](/studio-v8/datasources/create-datasource-from-database-servers), [Google Analytics](/studio-v8/datasources/create-datasource-from-cloud-services), and [Custom Parser](/studio-v8/datasources/custom-parser).
4. Fill in the configuration details.
5. After providing the necessary details, click on **Next** to configure the data table.
6. Provide a name for your Datasource.
7. To make any changes to the data table, select the required one and click on **Previous**.
8. To define the measures and dimensions on the dataset, click on **Next**.
9. Click on **Save**.
## Filtering by Type
The **Filter by type** feature allows you to refine your search and quickly find specific Datasources based on predefined categories. The **Filter by type** dropdown offers options such as Delimited and Excel. This lets you filter Datasources based on their format.