Creating Workflow
Infoveave workflows let you automate and streamline your data processes. These processes range from ingestion to visualization. A workflow is a sequence of connected activities that automates business-critical tasks such as data acquisition, analysis, and reporting.
Creating an Infoveave Workflow
-
Access Infoveave Workflows by going to Automation Workflows.
You can see all workflows created by you under My Workflow and those shared with you under Shared Workflow.
-
To create a new workflow, click New Workflow. This takes you to the Workflow Designer.

-
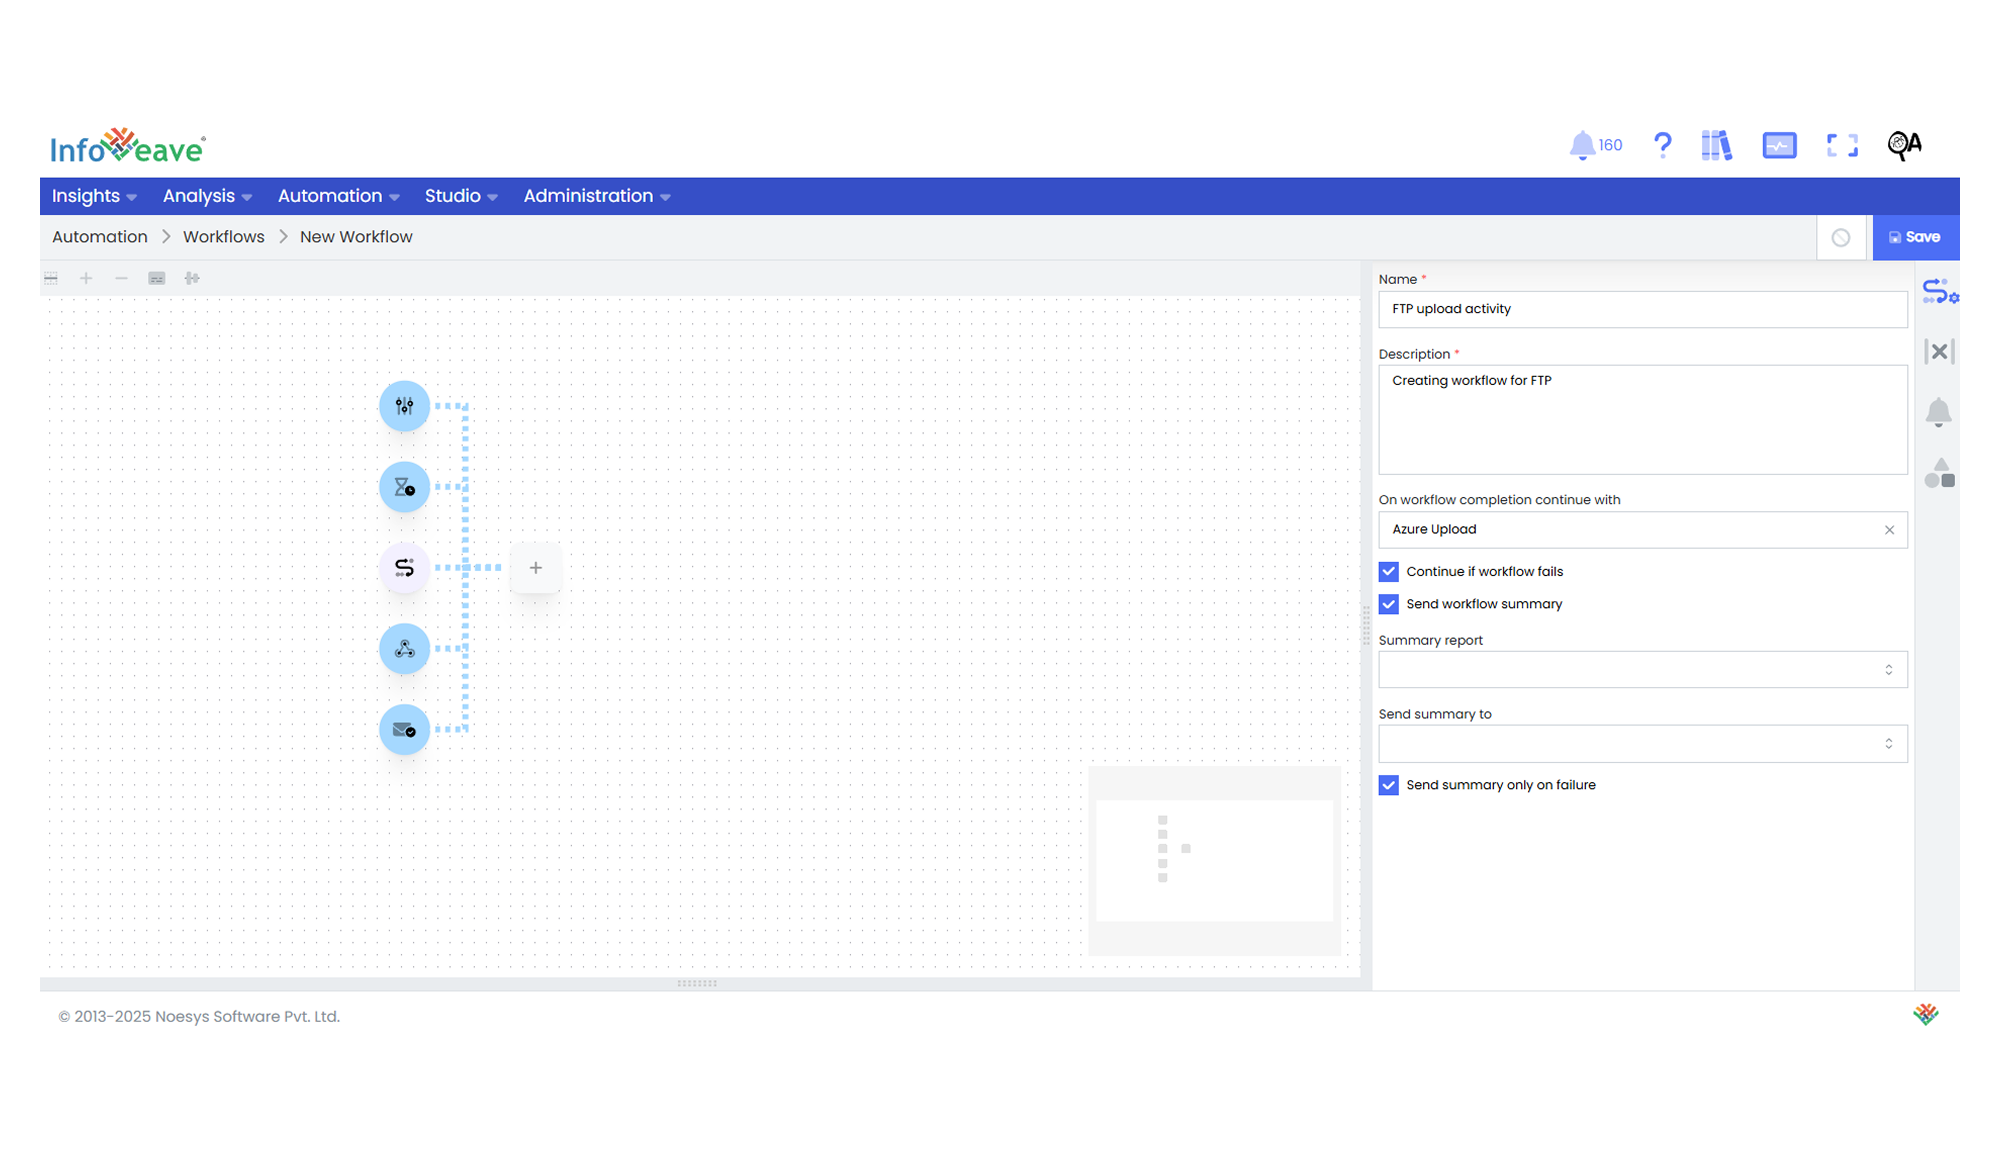
In the Workflow Setup tab, enter a meaningful Name and Description. These help you identify the workflow and understand its purpose.
-
Choose what should happen after the workflow finishes by selecting an option from the On workflow completion continue with dropdown.
-
You can enable the Continue if workflow fails checkbox if you want the workflow to continue running even if one or more activities fail.
-
To get a summary report after the workflow runs, check the Send workflow summary box. This report gives you an overview of the workflow’s execution.
-
Select a summary report (query report) from the dropdown list.
-
Specify who should receive the summary report for review and analysis.
-
Optionally, check the Send summary only on failure box to receive the summary report only when the workflow encounters failures. This helps you with monitoring and troubleshooting.
-
Click Save to save your workflow.
Starting a Workflow
To learn more about starting a workflow, visit Workflow Start.
Adding, Configuring and Linking Activities
Identify the key activities in your workflow and add them to the Workflow Designer. These activities define how your workflow functions.
- Drag and drop the required activity from the activity panel onto the Workflow Designer canvas. Each activity performs a specific task in your workflow.
- To configure an activity, select it to view its settings in the Configuration tab. The selected activity is highlighted on the canvas.
- To add variables to your workflow that can be used anytime, go to the Variables tab in the Workflow Setup panel.
- Click Add to create a new variable.
- Enter a unique and descriptive name.
- Select the variable type from String, Number, Boolean, Date, or JSON.
- Set the initial value depending on the variable type.
- For Boolean, choose either True or False.
- For Date, select a date using the calendar.
- For JSON, enter a JSON array.
- Click Save to save the variable.
- After configuring an activity, click Validate.
- Link all the necessary activities to complete your workflow.
- Use the mini map to navigate through the Workflow Designer canvas.
- To add alerts that send email notifications during the workflow, go to the Alerts tab in the Workflow Setup panel.
- Toggle Enable to turn the alert on or off.
- Select recipient email addresses from the user list. You can choose multiple recipients.
- Write a custom alert message that is sent when the condition is met.
- When setting an execution time alert, toggle Use Absolute Time to choose between absolute and relative time.
- Absolute Time measures total execution time in minutes.
- Relative Time measures time based on a specific event or condition.
- When setting data alerts, define the conditions for input and output data.
- Input Rows lets you choose whether to send alerts for input rows. Options are Send or Don’t send.
- Input Files lets you choose whether to send alerts for input files. Options are Send or Don’t send.
- Output Rows lets you choose whether to send alerts for output rows. Options are Send or Don’t send.
- Output Files lets you choose whether to send alerts for output files. Options are Send or Don’t send.
- Click Save to save the configured workflow.