
Workflow Toolbar
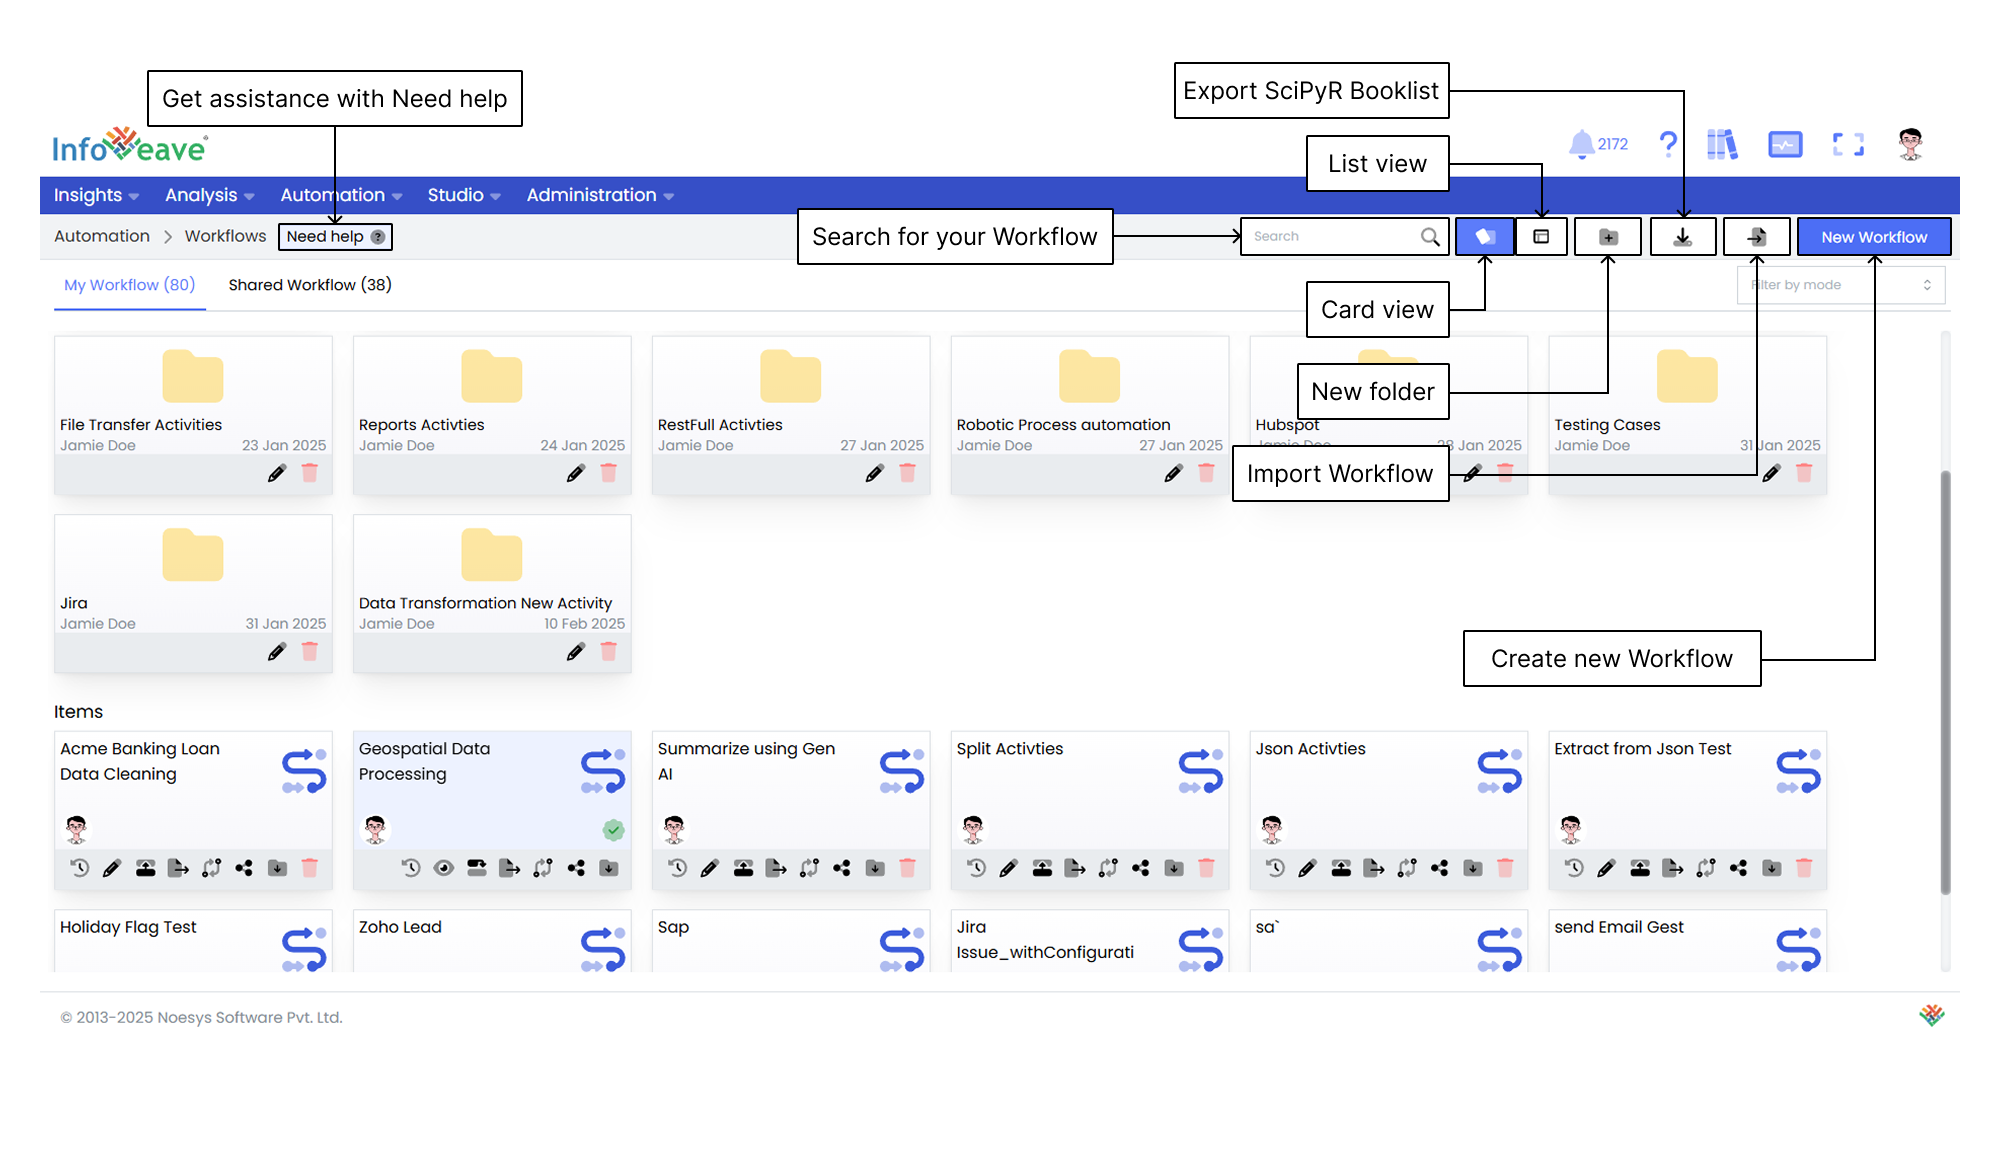
Getting Help
If you are unsure about how to create a Workflow in Infoveave, you can always get assistance by clicking the Need help button. When you click the button, you are directed to a visual walkthrough that guides you on how to create a Workflow.
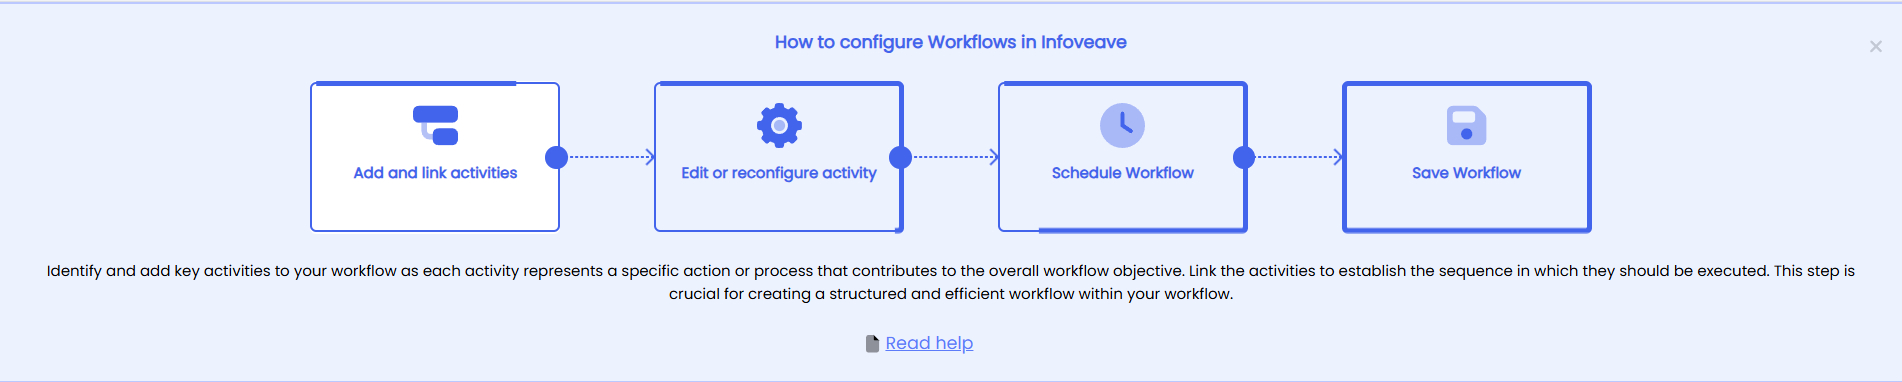
- Add and link activities Identify and add the key activities to your Workflow. Each activity represents a specific action or process that contributes to the overall objective. Link the activities to establish the sequence in which they should be executed. This step is crucial for creating a structured and efficient Workflow.
- Edit or reconfigure activity Edit or reconfigure the activities to fine-tune each activity. Update the configurations based on changing requirements and address any adjustments needed for optimal performance. The Edit activity feature helps maintain the relevance and effectiveness of your automation.
- Schedule Workflow Schedule the Workflow to define when it will be executed and automate its activation at specific intervals. This step is essential for managing routine Workflows, ensuring timely data processing, and keeping information up to date. The scheduling feature gives you control over when the Workflow runs, offering convenience and efficiency.
- Save Workflow Save the configured Workflow to store the setup for future use and reference. This step ensures reusability, flexibility, adaptability to changing requirements, and efficient updates.
Using the Search Bar
The Search Bar at the top-right of the screen allows you to quickly locate any Workflow within the platform. You simply enter keywords related to the name of the Workflow or any part of the content you are searching for.
Viewing Items in Card Layout
When you click the Card option in the layout filter, the items are displayed in a card-based view. This is the default layout for organizing Workflows. It provides a more visual representation of the Workflows and folders, making it easier to identify and organize items.
Viewing Items in List Layout
When you click the List option, the layout changes to a table view. This view displays the items and folders in a more detailed and structured format. It is ideal if you prefer seeing data in rows and columns. This layout allows you to quickly access information such as the item name, type, creation date, last update date, and more.
Creating a New Folder
To organize your Workflows more efficiently, you can create a new folder. Here’s how you can do it.
- Click the New Folder button. This opens a popup where you can configure your new folder.
- In the popup that appears, you are prompted to enter a name for your new folder. Choose a name that helps you identify the folder’s purpose.
- After entering the folder name, click the Save button to create the folder. The new folder appears under the Folders section.
Exporting a Workflow
The Export Workflow feature allows you to download a structured file that contains all available Workflows within the system. This functionality streamlines data management by providing a comprehensive overview for analysis, reporting, and sharing.
Importing a Workflow
To learn about importing a workflow, visit Importing a Workflow
Creating a New Workflow
To learn about creating a new workflow, visit Creating Workflow
Filtering by Mode
The Filter by mode option allows you to filter your workflow based on the mode of the data. In this example, you can choose between two modes. These modes are Draft and Production.