Workflow Configuration Layout

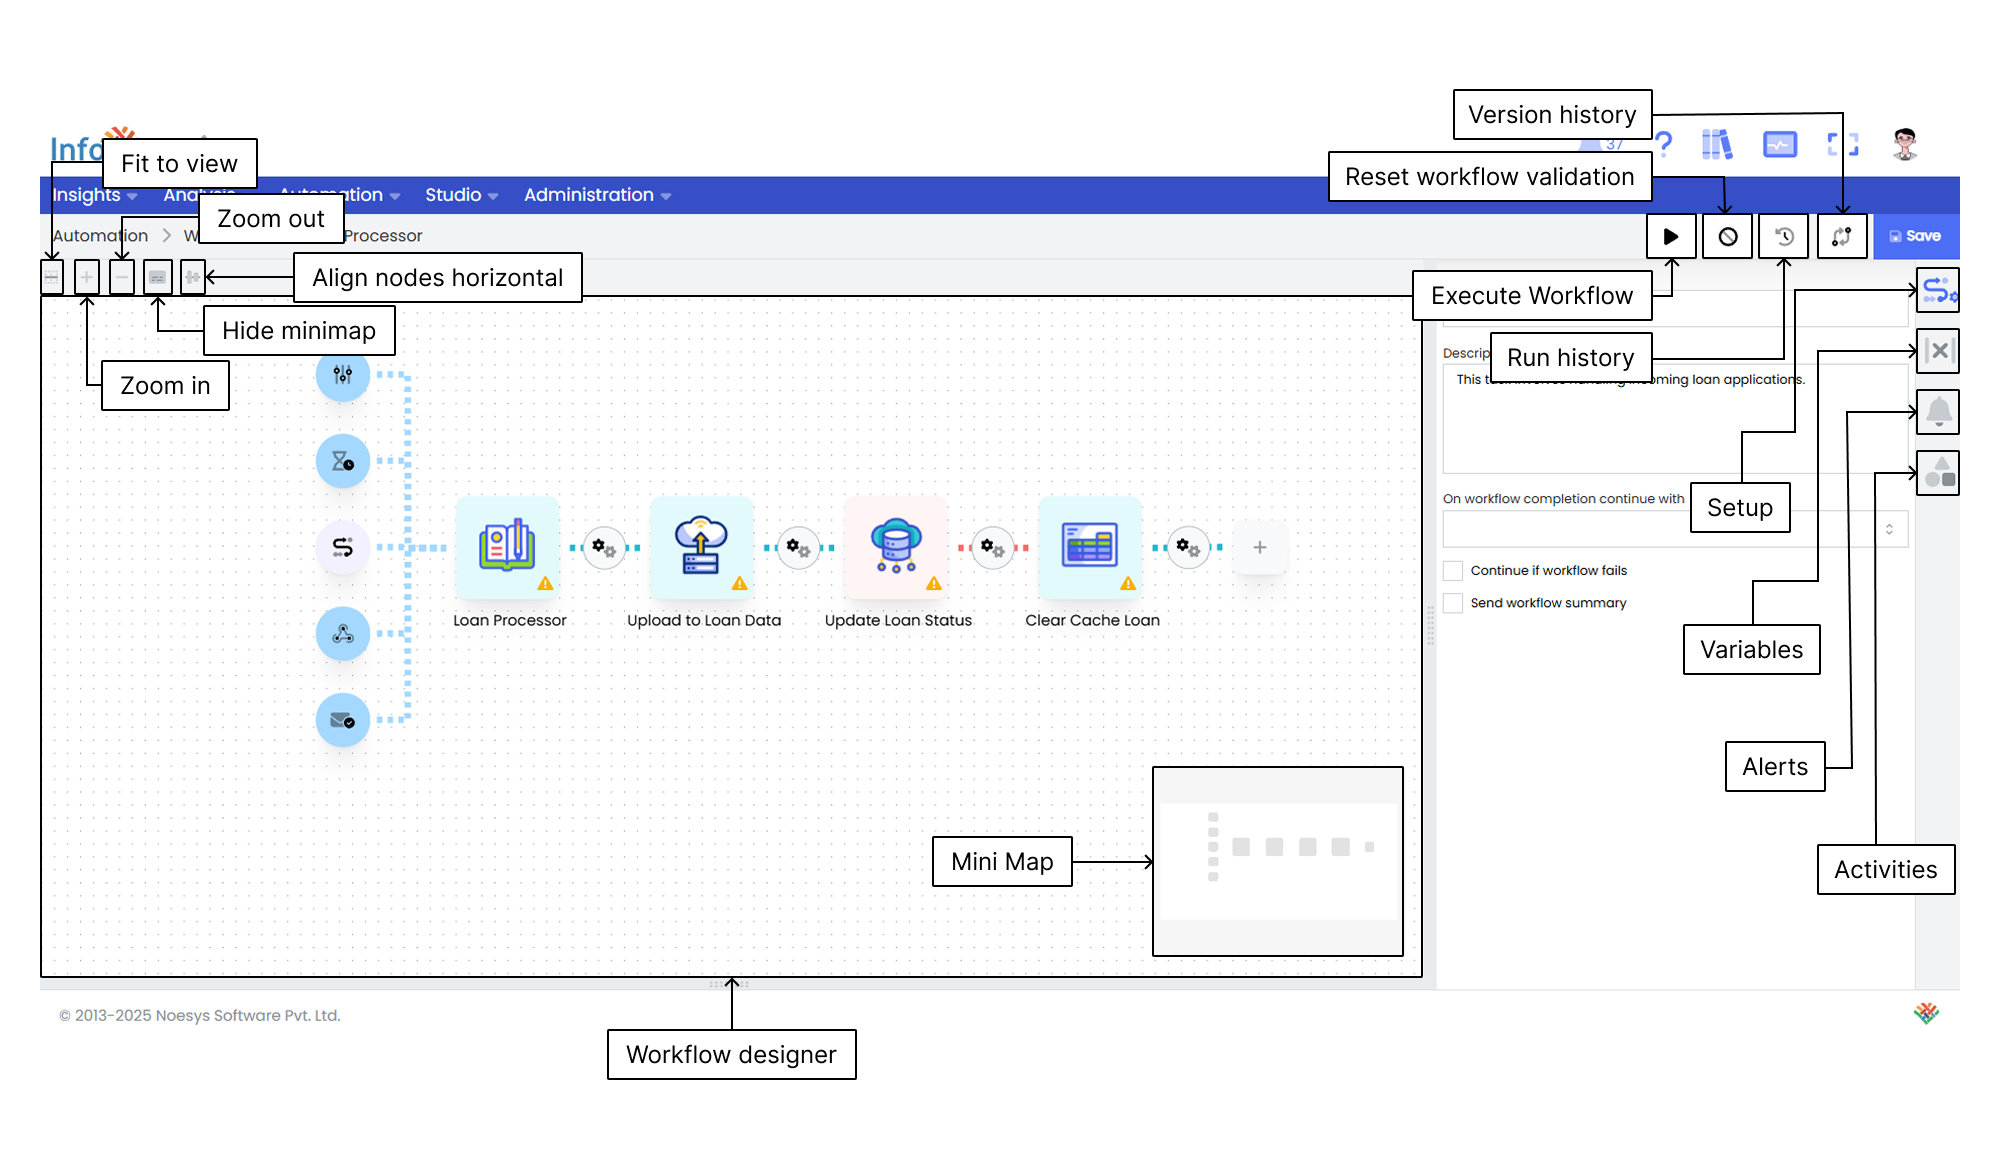
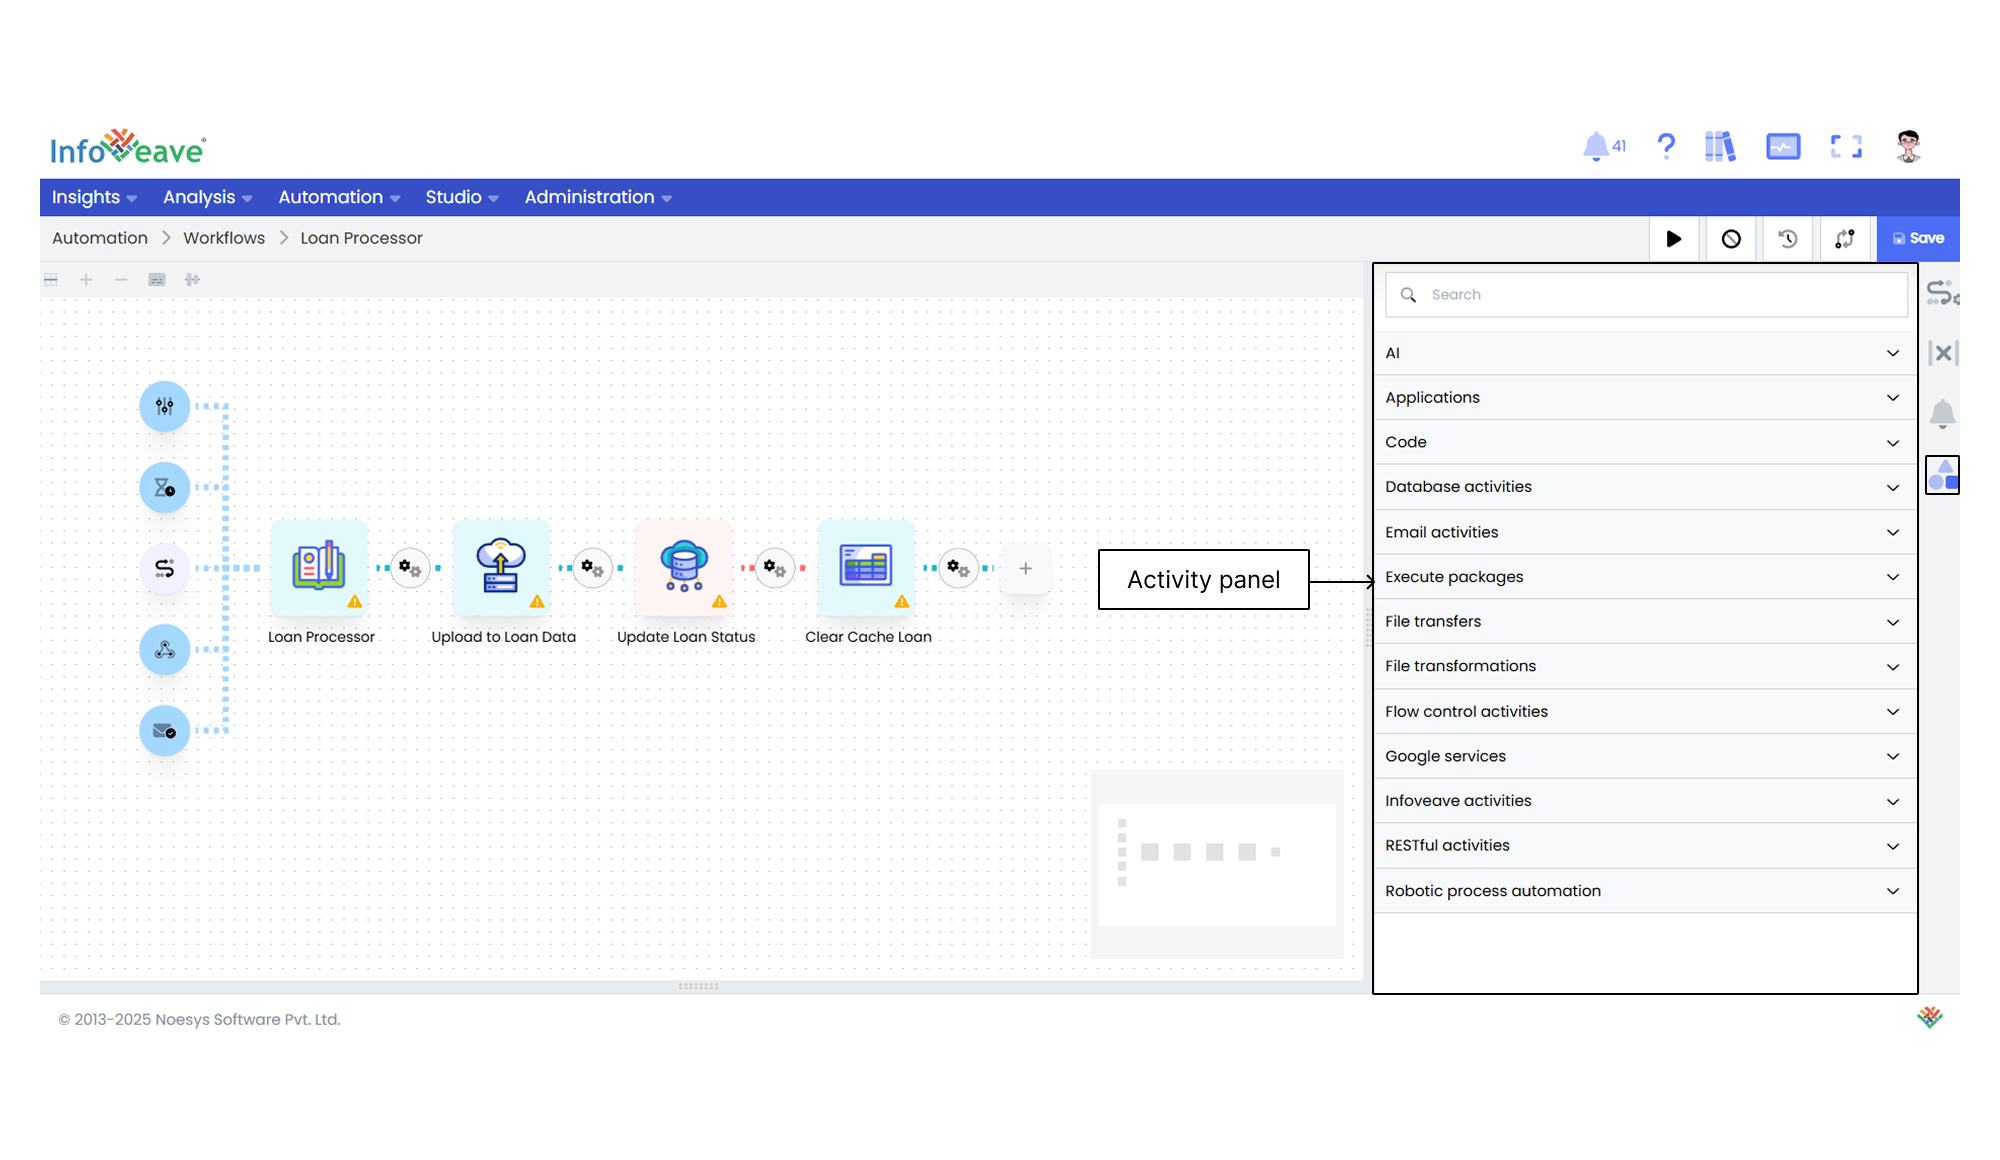
The Infoveave Workflow layout is divided into three sections. These are the Activity Panel, the Workflow Designer, and the Workflow Setup Panel. By understanding these components, you will be able to efficiently navigate and utilize the Workflow-related features.
Activity Panel

Search Option The Activity Panel includes a search option that allows you to quickly find specific Workflow activities by entering keywords or activity names in the search bar. This helps streamline the activity selection process, especially when you are working with a large number of activities.
Drag-and-Drop Feature The Activity Panel offers a convenient drag-and-drop functionality. You can simply click and drag the desired activity from the Activity Panel onto the Workflow Designer canvas. This feature simplifies the process of adding activities to your Workflow Designer and enhances productivity.
Workflow Designer
Workflow Start The Workflow Start enables you to set up triggers for initiating Workflows. Infoveave provides four types of Workflow start triggers. Each trigger serves a different purpose.
Mini Map The Workflow Designer includes a mini map feature that provides an overview of the entire canvas. It helps you navigate and locate specific areas within your Workflow design easily. By referring to the mini map, you can quickly identify and move to different sections of your Workflow. This facilitates efficient navigation.
Link Activities In the Workflow Designer, you can connect activities by linking the output of one activity to the input of another. Each activity has input and output nodes. This allows you to define the logical flow and sequence of activities within your Workflow. By visually connecting activities, you can create a cohesive Workflow that accurately reflects your desired data processing steps.
Zoom-In and Zoom-Out The Workflow Designer provides zoom-in and zoom-out options. Zooming in enables you to focus on specific areas of your Workflow design. Zooming out provides an overview of the entire canvas. This flexibility helps you work with precision and maintain an optimal view of your Workflow design.
Delete Activity To remove an activity from your Workflow design, simply select the activity and click on the delete icon or press the backspace key. This allows you to easily remove unwanted or unnecessary activities from your Workflow and refine it to meet your specific requirements.
Workflow Setup Panel
Workflow Setup Tab Within the Workflow Setup Tab, you can configure essential Workflow settings such as the Workflow name and description. Providing meaningful information in these fields helps you easily identify and differentiate your Workflows, especially when you are managing multiple Workflows.
Variables Tab The Variables Tab allows you to define variables as text, numeric, boolean, date, or JSON. You can call these variables when configuring the activity.
Alerts Tab The Alerts Tab allows you to configure email alerts based on execution time or data for individual configured activities.
Activity Tab The Activity Tab provides a list of activities. Once you select any activity and click on it, the activity configuration tab opens. This helps you configure the activities and gives you the ability to edit the configuration settings as needed.
Toolbar
Execute Manually execute the Workflow at any time for real-time validation.
Reset Workflow Validation Clear the validation status of the Workflow. This allows for revalidation and ensures all steps meet the necessary criteria.
Run History View detailed logs of all Workflow executions. This includes times, statuses, and error messages for monitoring and troubleshooting.
Version History Track changes to the Workflow. This helps you maintain control and consistency over its development.