
Lists
Lists in Infoveave allow you to organize, analyze, and maintain datasets more efficiently. They enable you to generate custom views of your data using SQL queries on any Datasource within Infoveave. You can update, enrich, or selectively modify your data using different ingestion methods. This provides flexibility in managing data without compromising the structure of your queries. Lists make it easier to handle live data, conduct deeper analysis, and share insights in downloadable formats.
Using Infoveave, you can create dynamic lists that reflect live data. You can apply selected dimension filters while creating a list to assist in your analysis. These lists can be downloaded for further examination. It is easy to search for and preview any list you need. You can then download it in formats like CSV or Excel.
Creating Lists
Infoveave Lists allows you to create and manage a list of selected columns generated through SQL Queries on any Datasource within Infoveave.
- To create a List in Infoveave using any existing Datasource, click on Studio Lists.
All lists created by you or shared with you are displayed under the tabs My Lists and Shared Lists respectively. - To create a new list, click on New List.
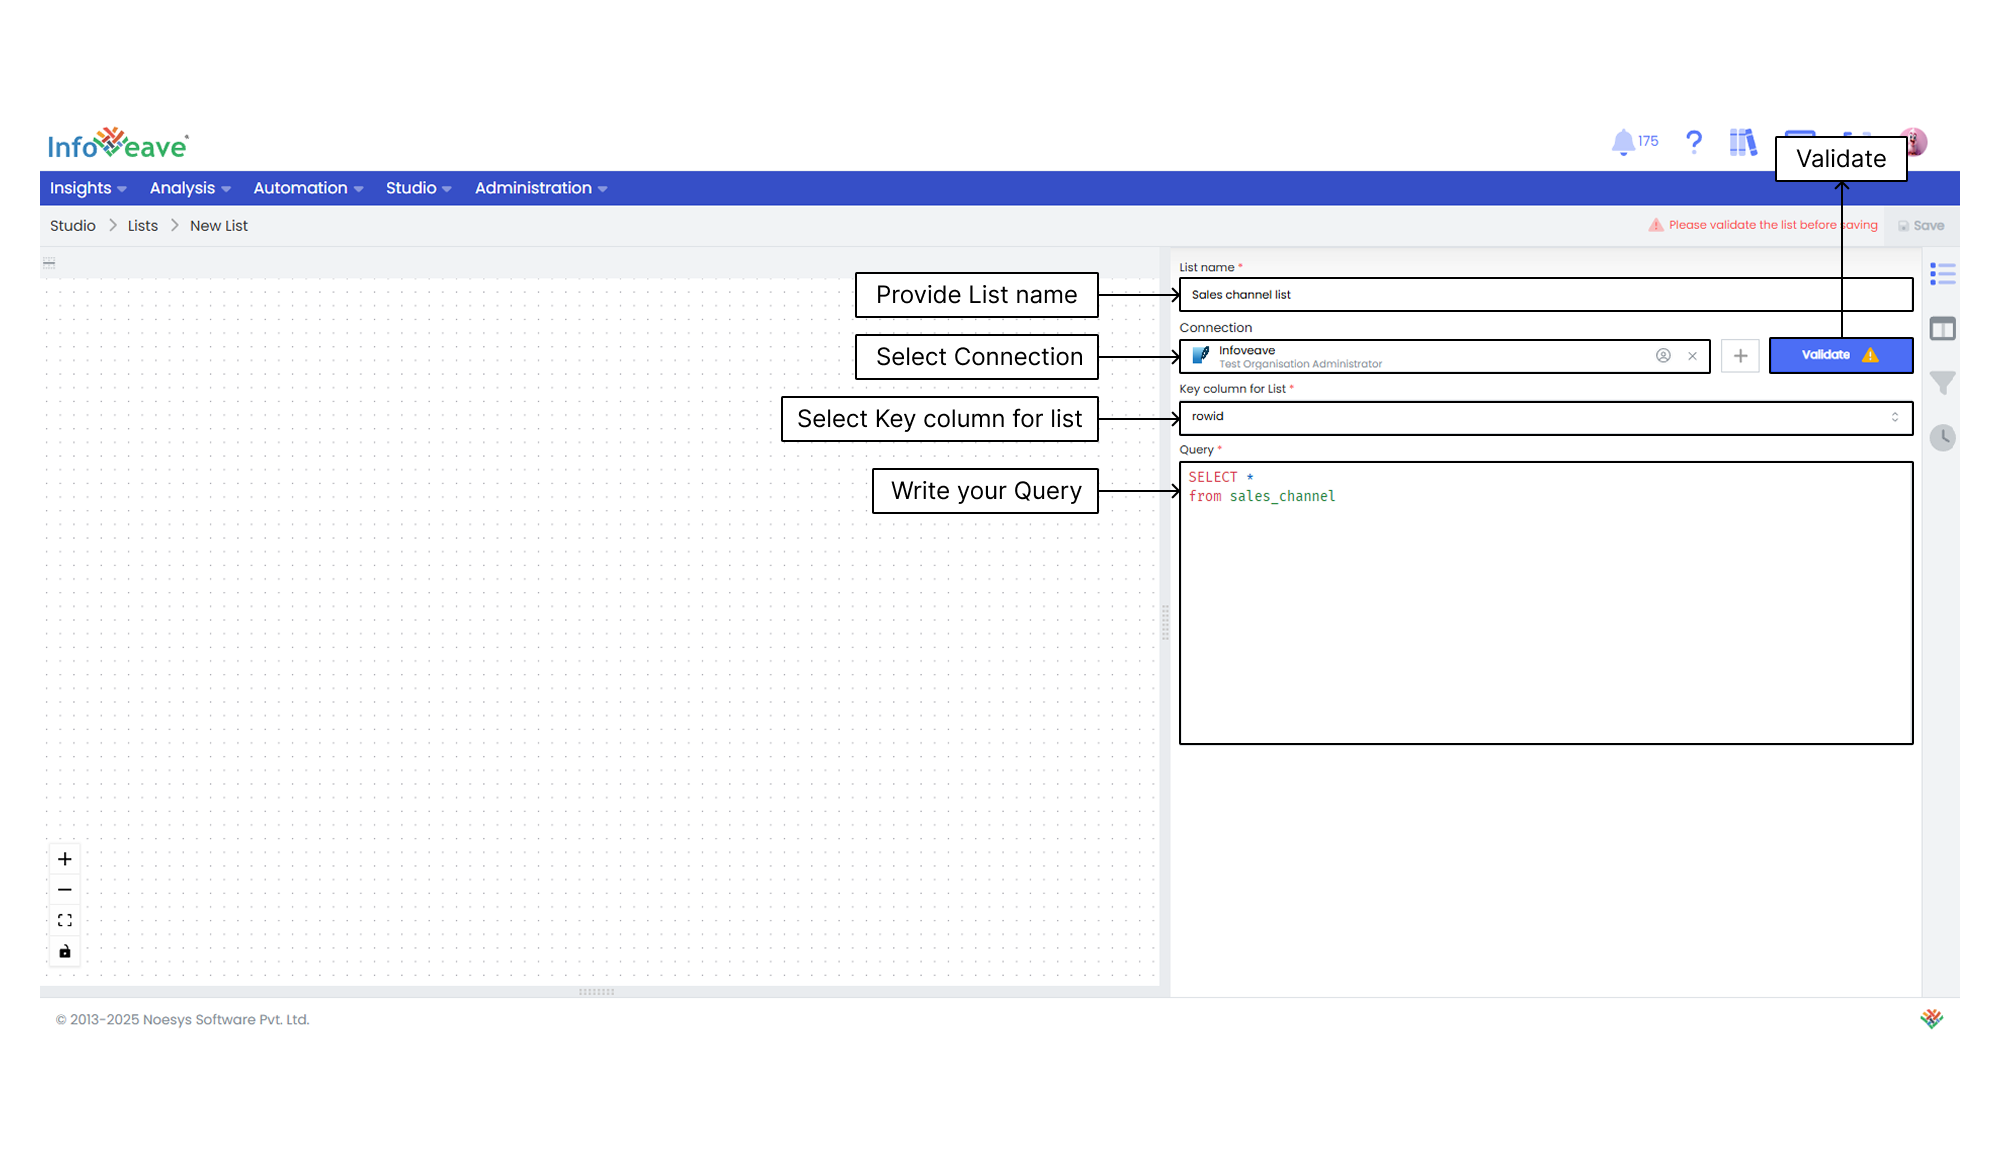
- Assign a name to the new list.
- Select the connection.
- Select the Key column for the list.
- Write the query.
- Validate the list by clicking the Validate button.
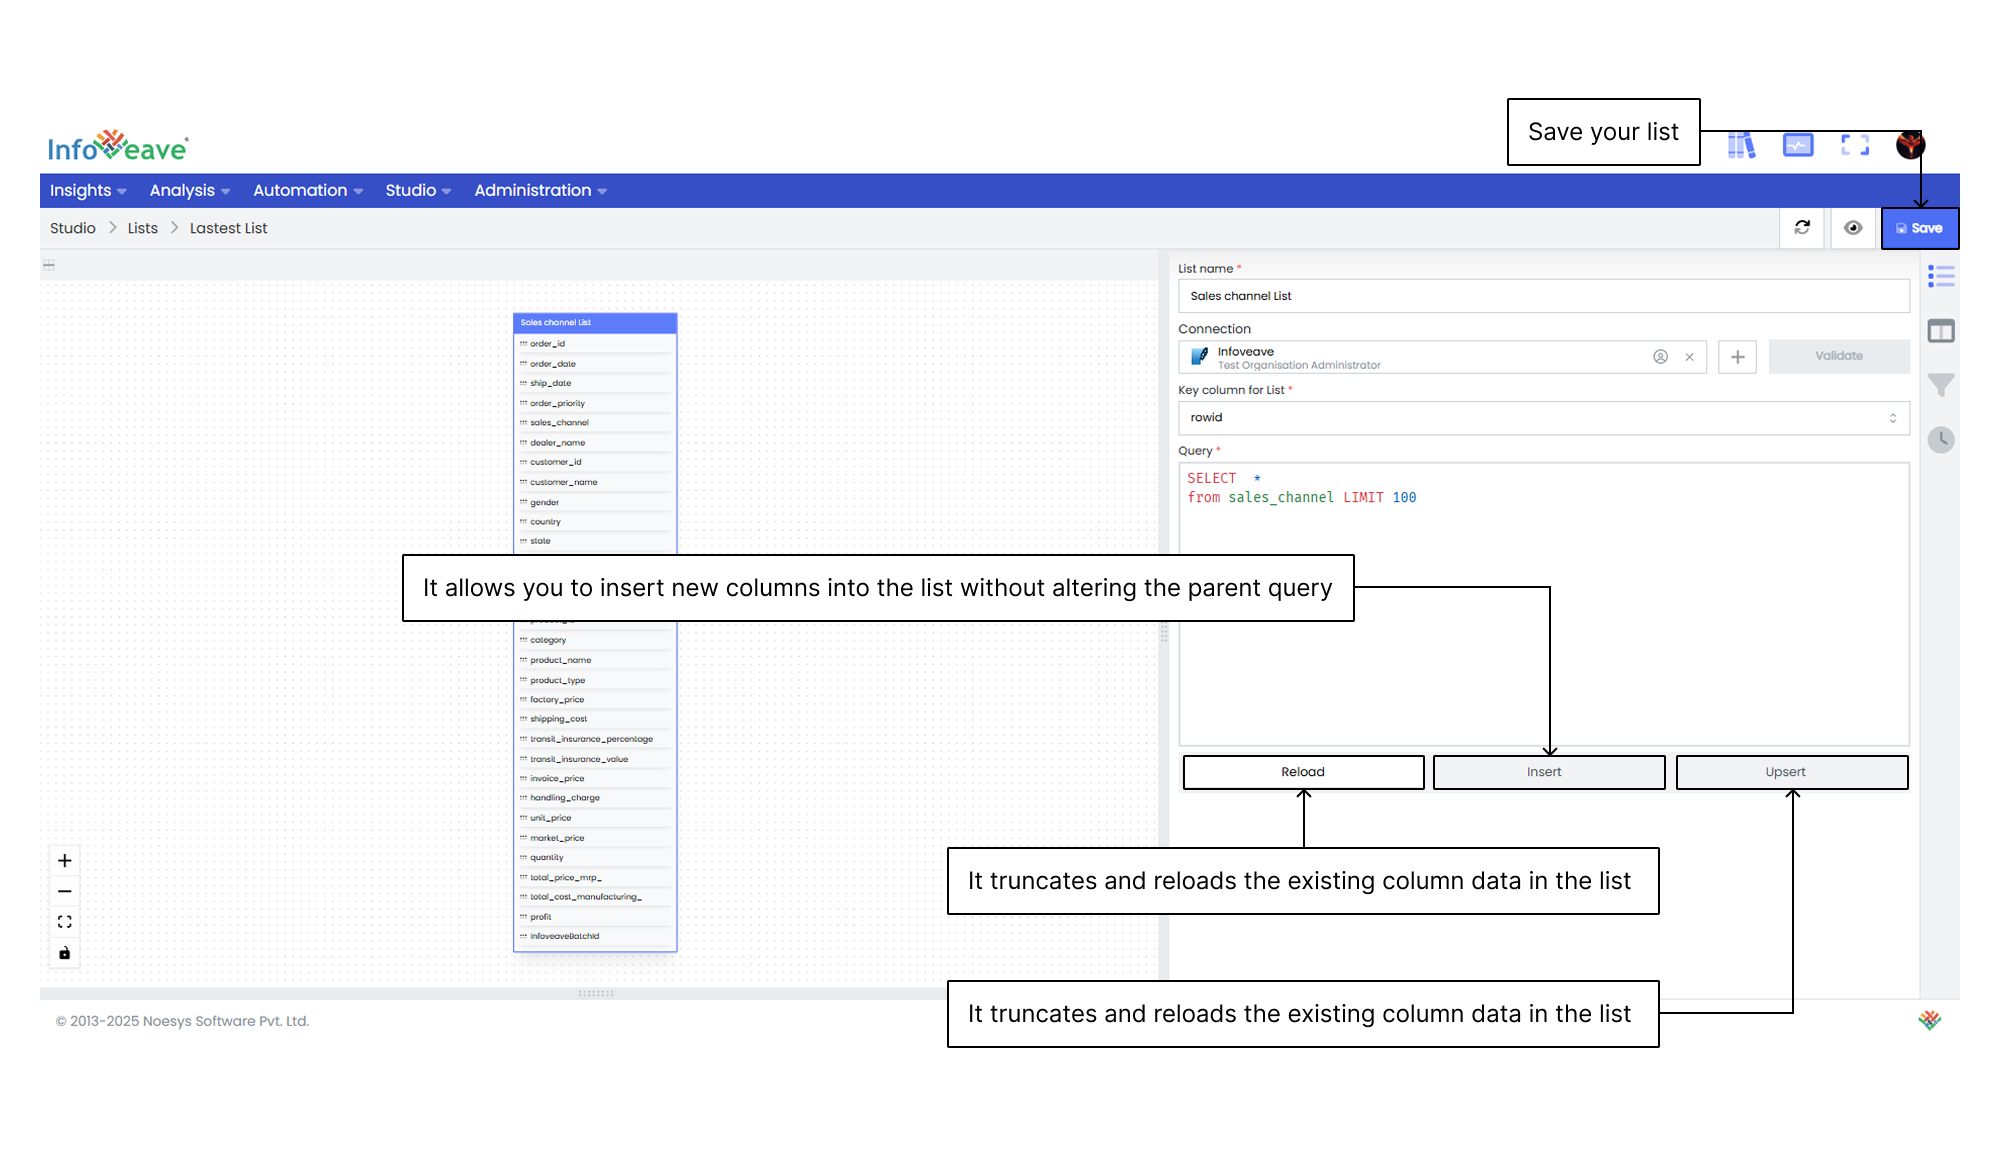
- Select the data ingestion type by clicking the appropriate button.
- Reload This allows the parent query to reload. It truncates and reloads the existing column data in the list.
- Insert This option lets you select and insert a sub-query for a parent query using the Insert query field. It allows you to insert new columns into the list without altering the parent query.
- Upsert This option lets you add a sub-query for a parent query using the Upsert query field. You also have to select a key column to insert and update the list without changing the parent query, using the Select key columns field.
- To save the list you created, click Save.
- To view the list, click on the View icon. To know more about viewing list, visit Viewing a list
- The newly created list is now visible under Studio Lists.
Scenarios for Data Ingestion Types
You are managing a dataset that stores customer information and purchase records for an e-commerce platform. This dataset contains data on customers, their orders, and their purchase history. You need to create a list to analyze this data more effectively. You have the following options for data ingestion.
-
Reload
Suppose you have a parent query that retrieves customer data, including contact information and order history. You want to keep this list updated as new orders and customer details are added. By selecting the Reload option, you can refresh the list.
When you choose Reload, Infoveave truncates the existing data in your list and replaces it with the most recent data from the parent query. This ensures that your list always reflects the latest customer and order information. This option is especially useful when your Datasource is frequently updated and you want to maintain a real-time or near real-time view of your data. -
Insert
Suppose you want to enhance your list by adding new columns, such as a Total Purchase Amount column that calculates the sum of purchases for each customer. By choosing the Insert option, you can do this without modifying the original parent query.
With the Insert option, you create a sub-query that calculates the Total Purchase Amount and inserts it into the list as a new column. This sub-query works independently, allowing you to enrich your list with additional data while keeping the core customer data query unchanged. It gives you the flexibility to customize your list with calculated fields or data from related sources. -
Upsert
Consider a situation where you need to update specific information in your list. For example, some customers have changed their addresses and you want your list to reflect these updates without reloading all the customer data. By selecting Upsert, you can do this efficiently.
With Upsert, you define a sub-query that includes the updated customer addresses. You also specify a key column to identify which customer records need to be updated. Infoveave handles the insertion and update of the data in your list, updating only the records that have changed while preserving the rest. This approach helps you maintain data accuracy without changing the parent query structure.
Managing Lists
To learn more about managing lists, visit Managing Lists.
Downloading Lists from Insights
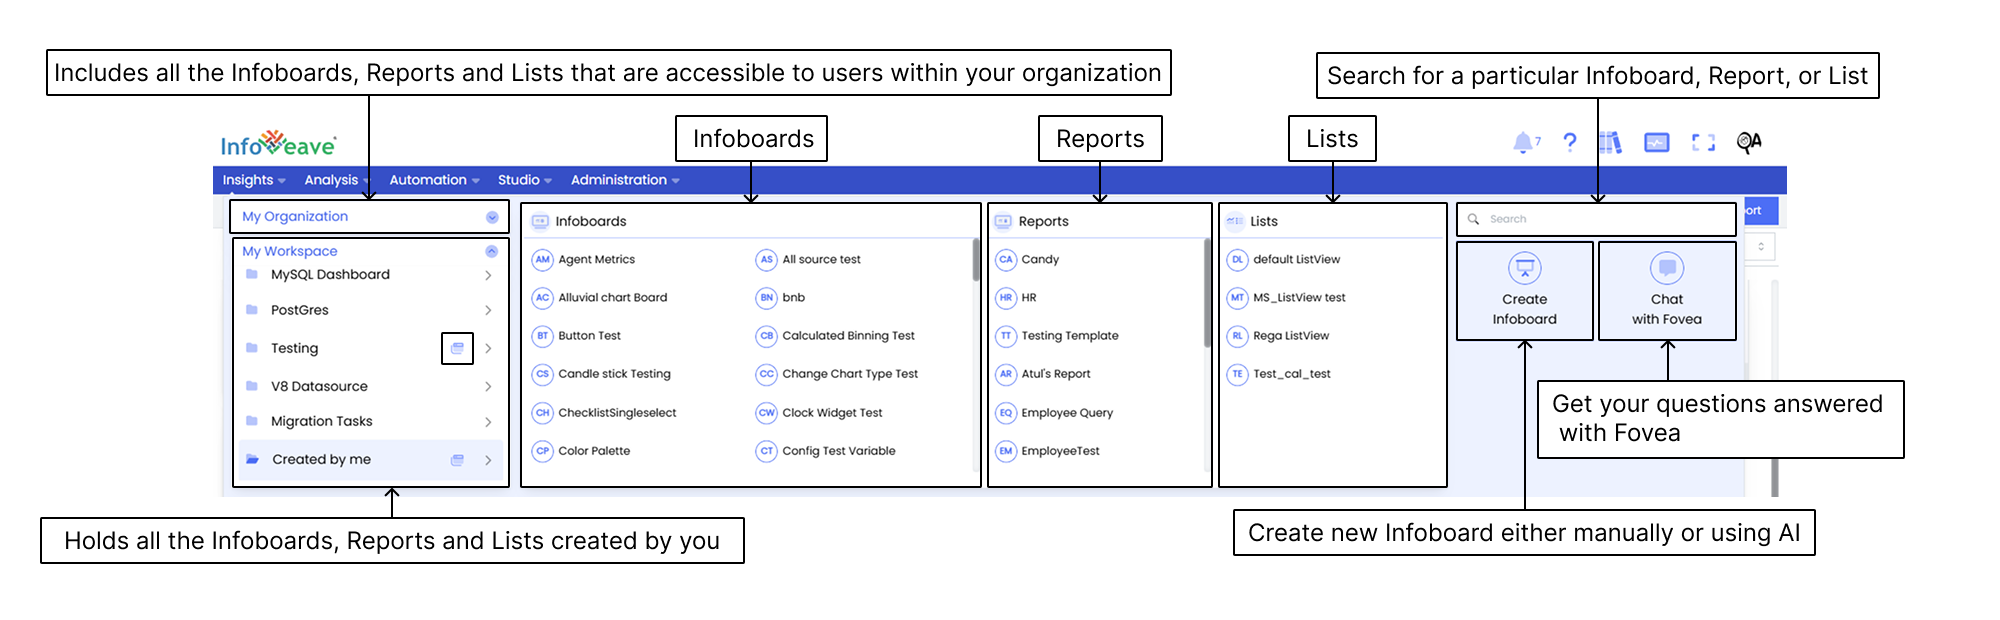
Insights Lists in Infoveave gives you easy access to downloadable data lists. You can quickly find and preview the list you want and download it in formats like CSV or Excel. This helps you simplify data retrieval and use the downloaded data for analysis or sharing.
- Click on the Insights section in the Infoveave menu.
- In the Insights layout, find the Lists option.
- Browse through the lists or use the search bar for quick access.
- After you find the list you want, click on it to open the list details. You are redirected to the List View.
- In the List View, you can preview the contents of the list including the data and columns.

- To download the list, click on the Download button.